We replaced the old ice melt / heat trace cable on the back of the house this week – and extended it out over the three story drop:
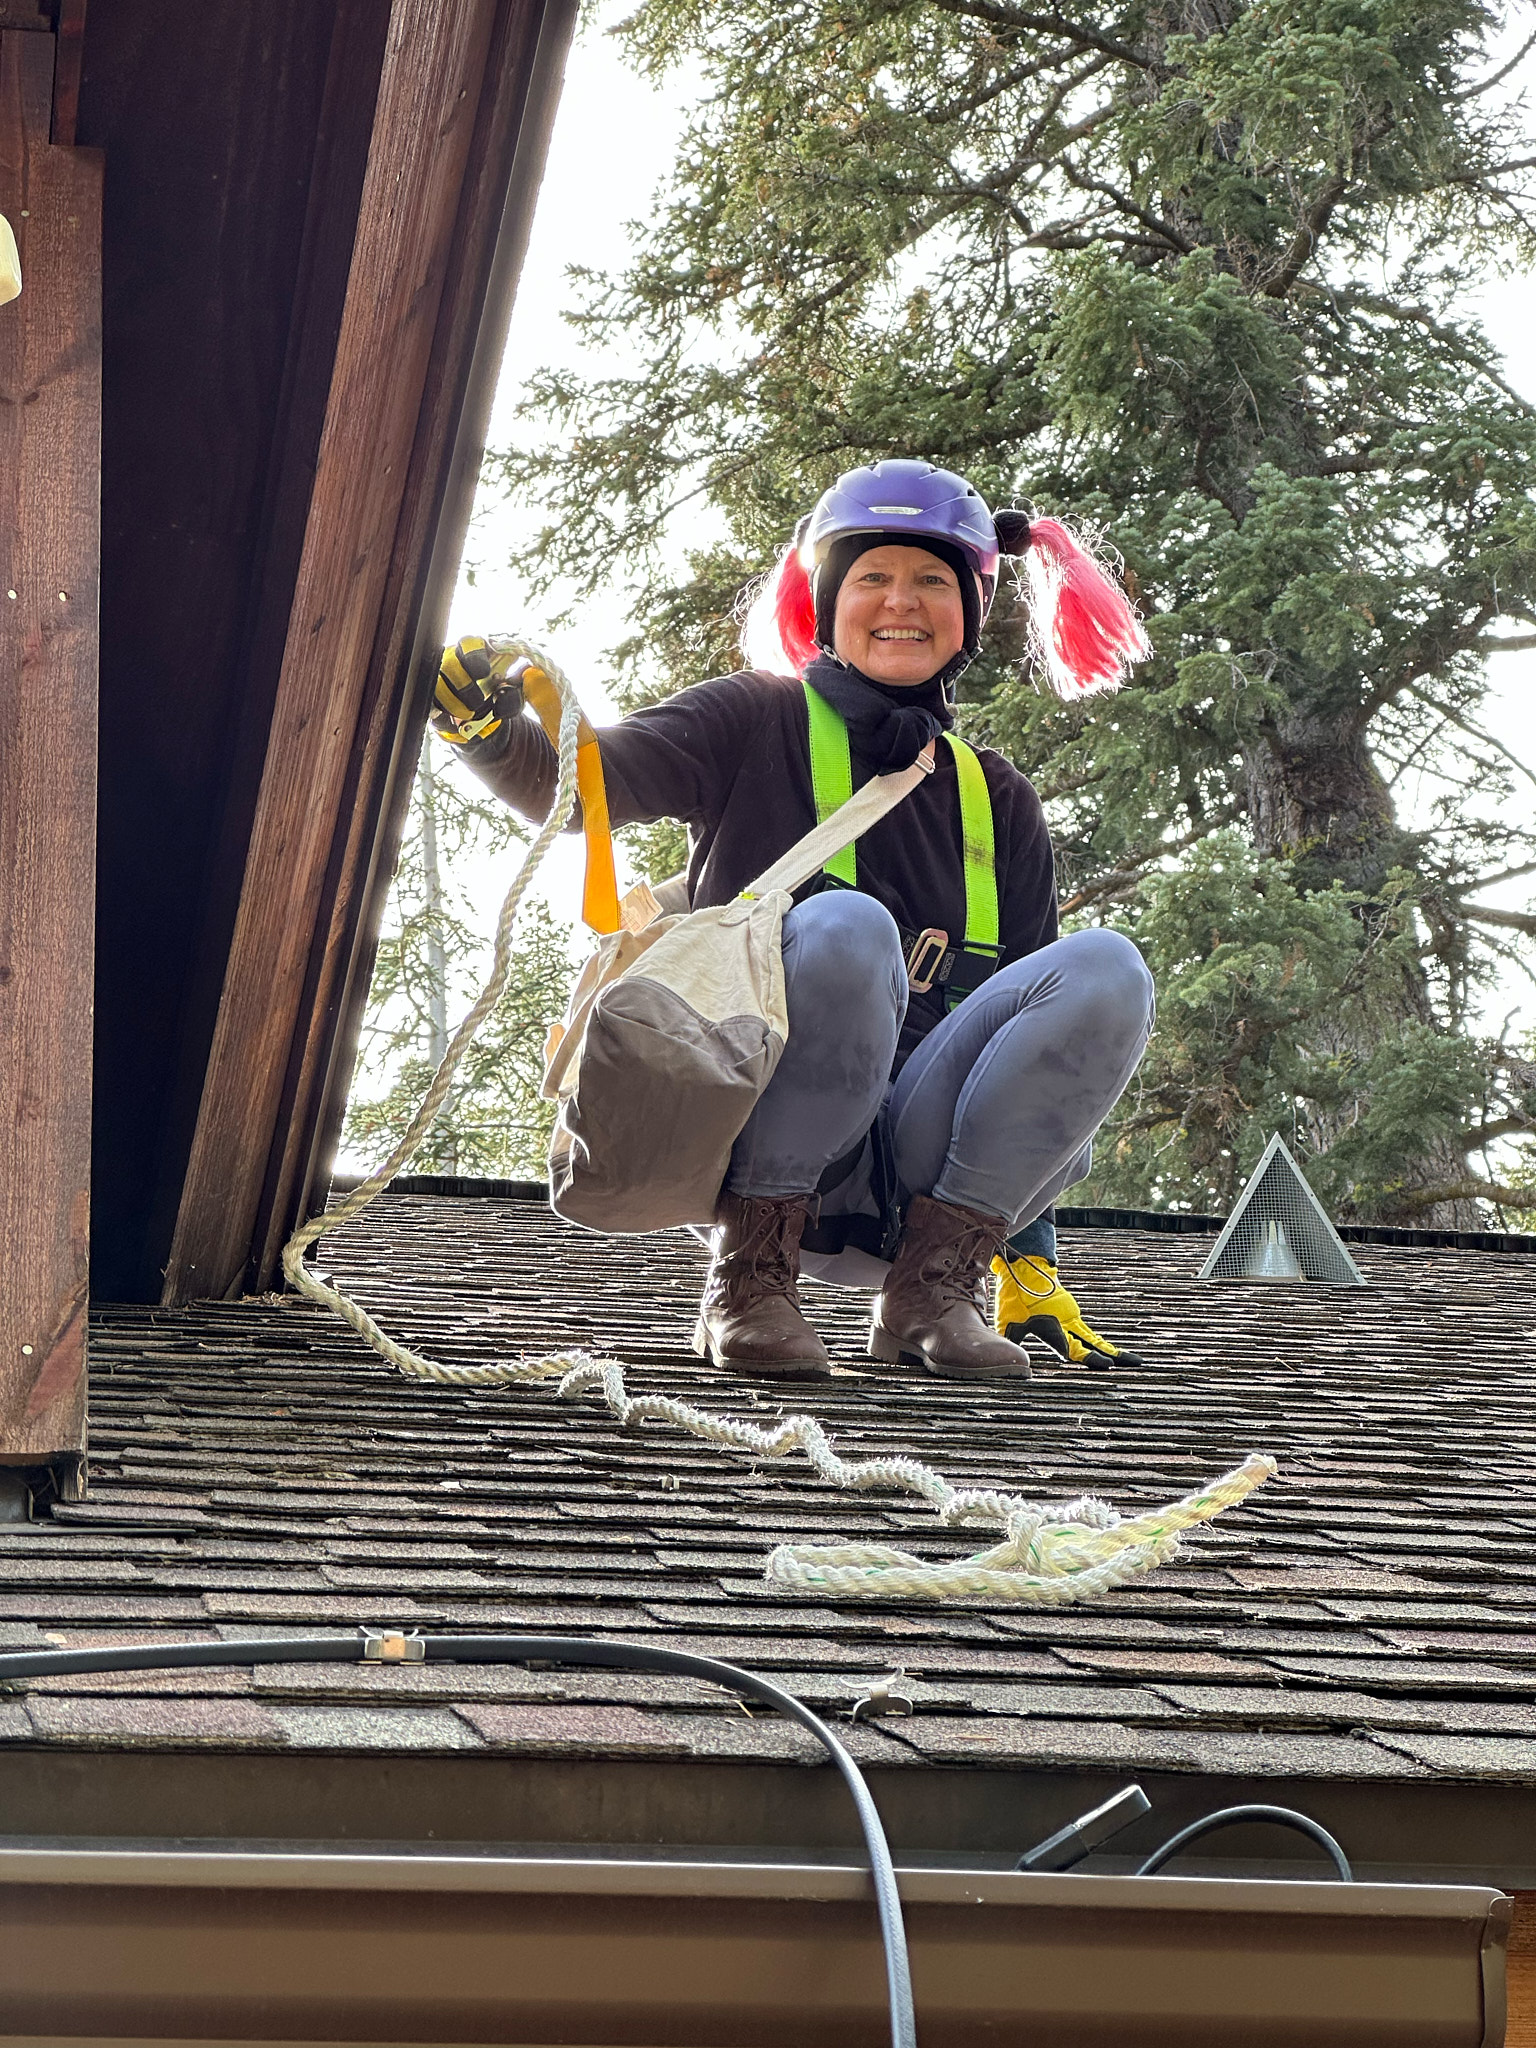
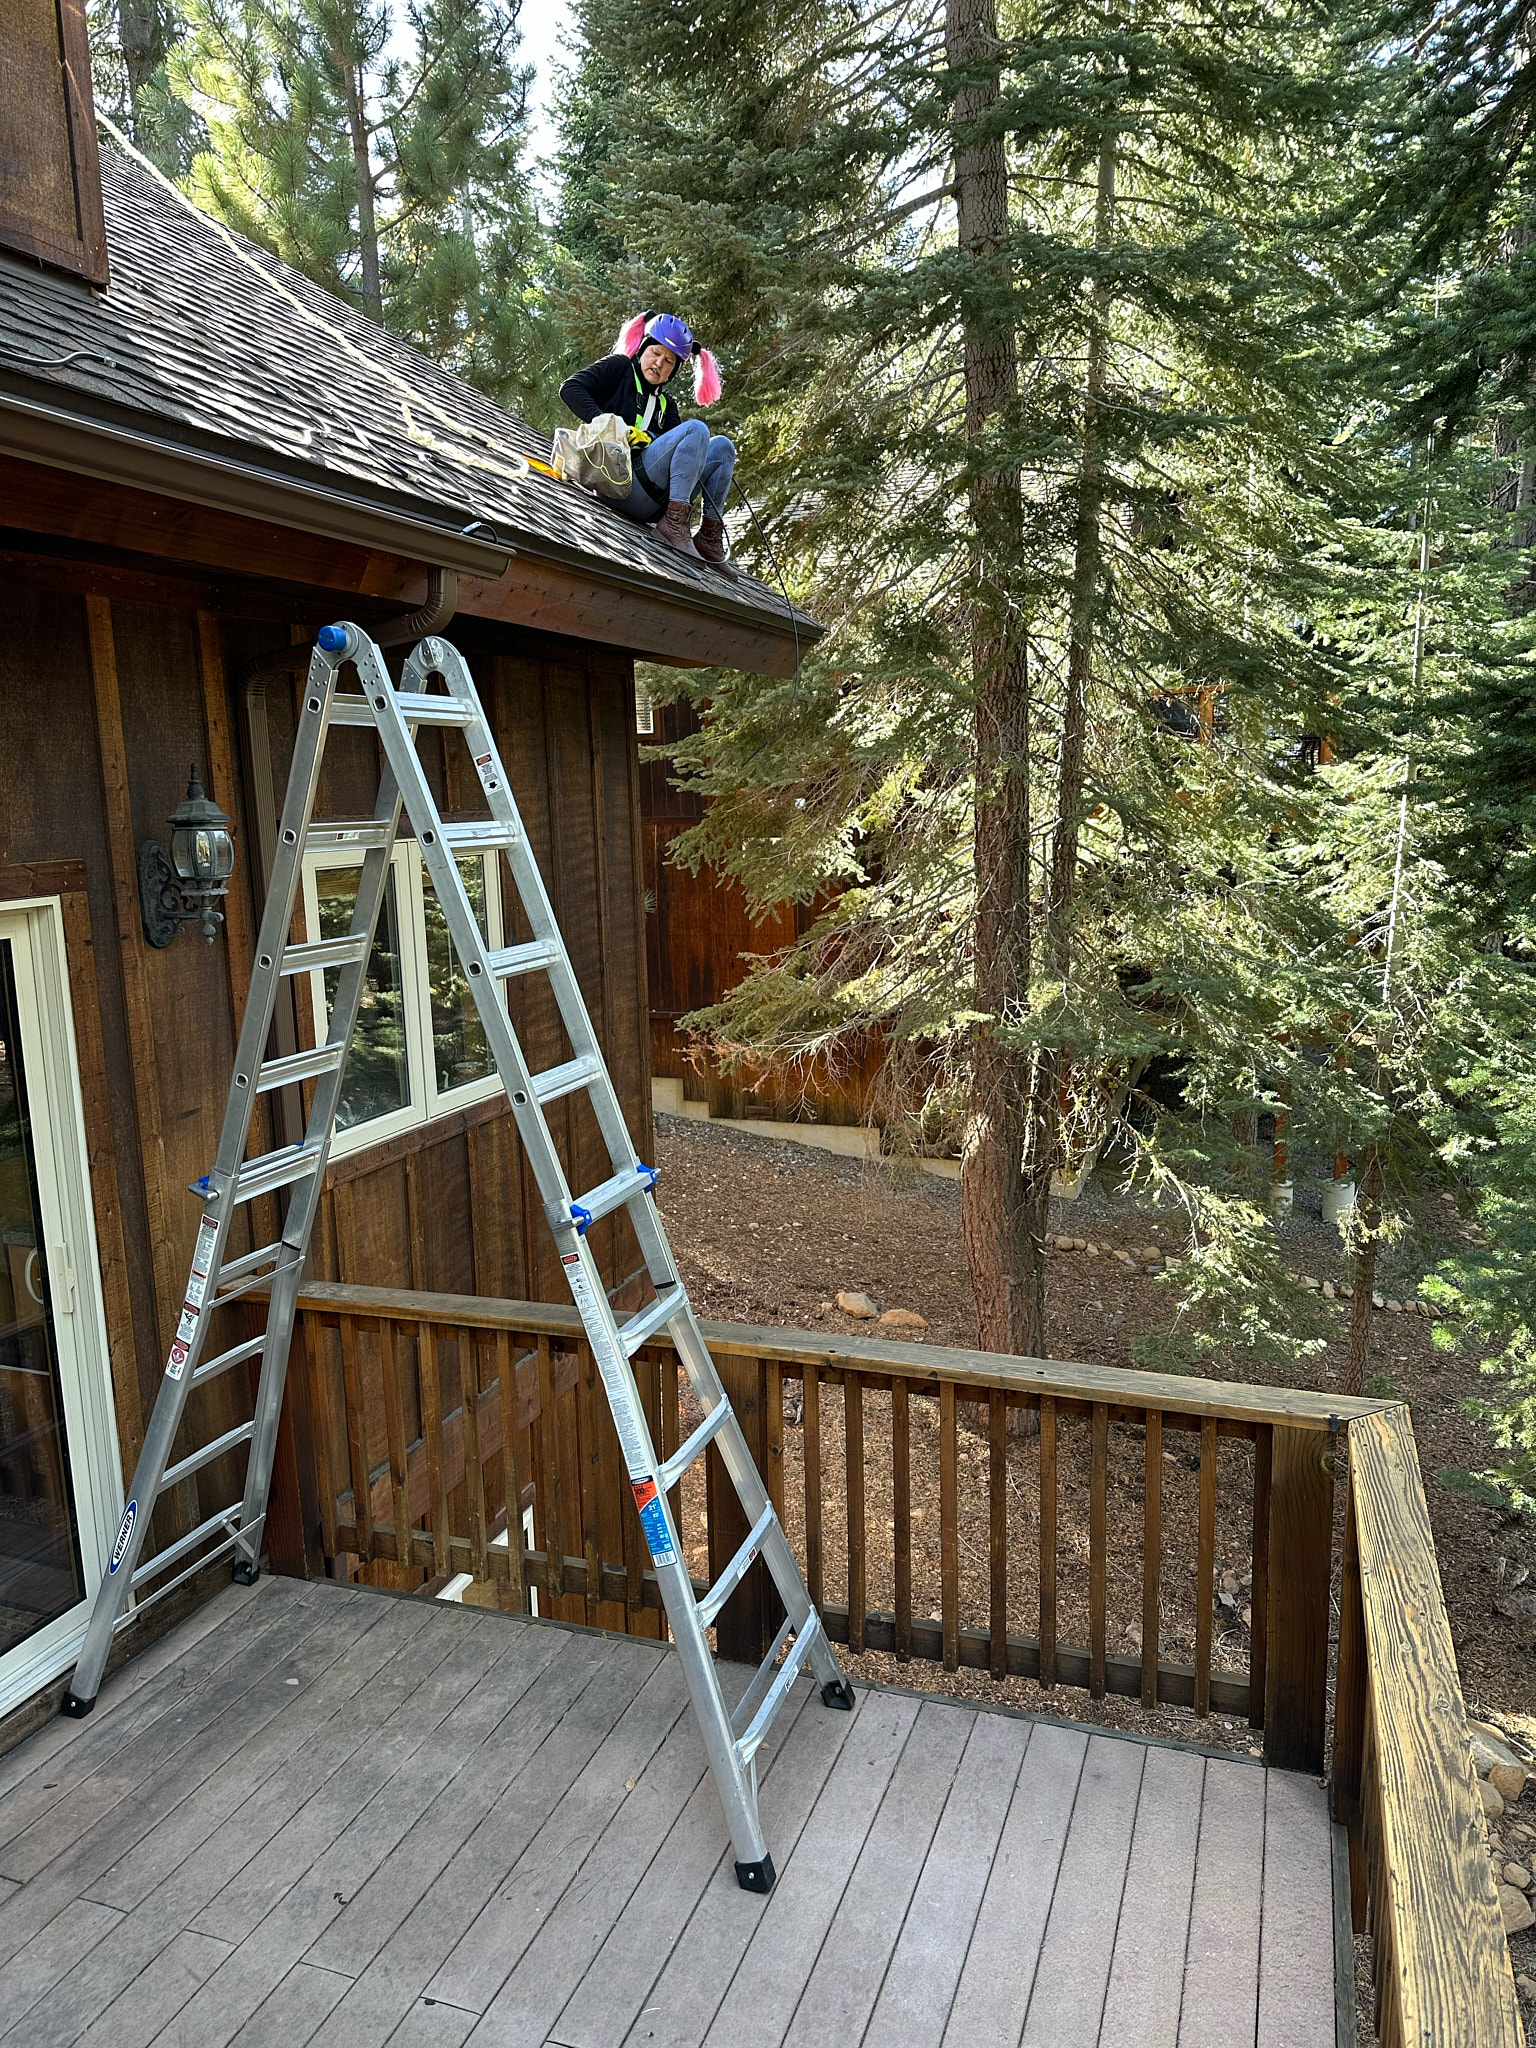

We replaced the old ice melt / heat trace cable on the back of the house this week – and extended it out over the three story drop:
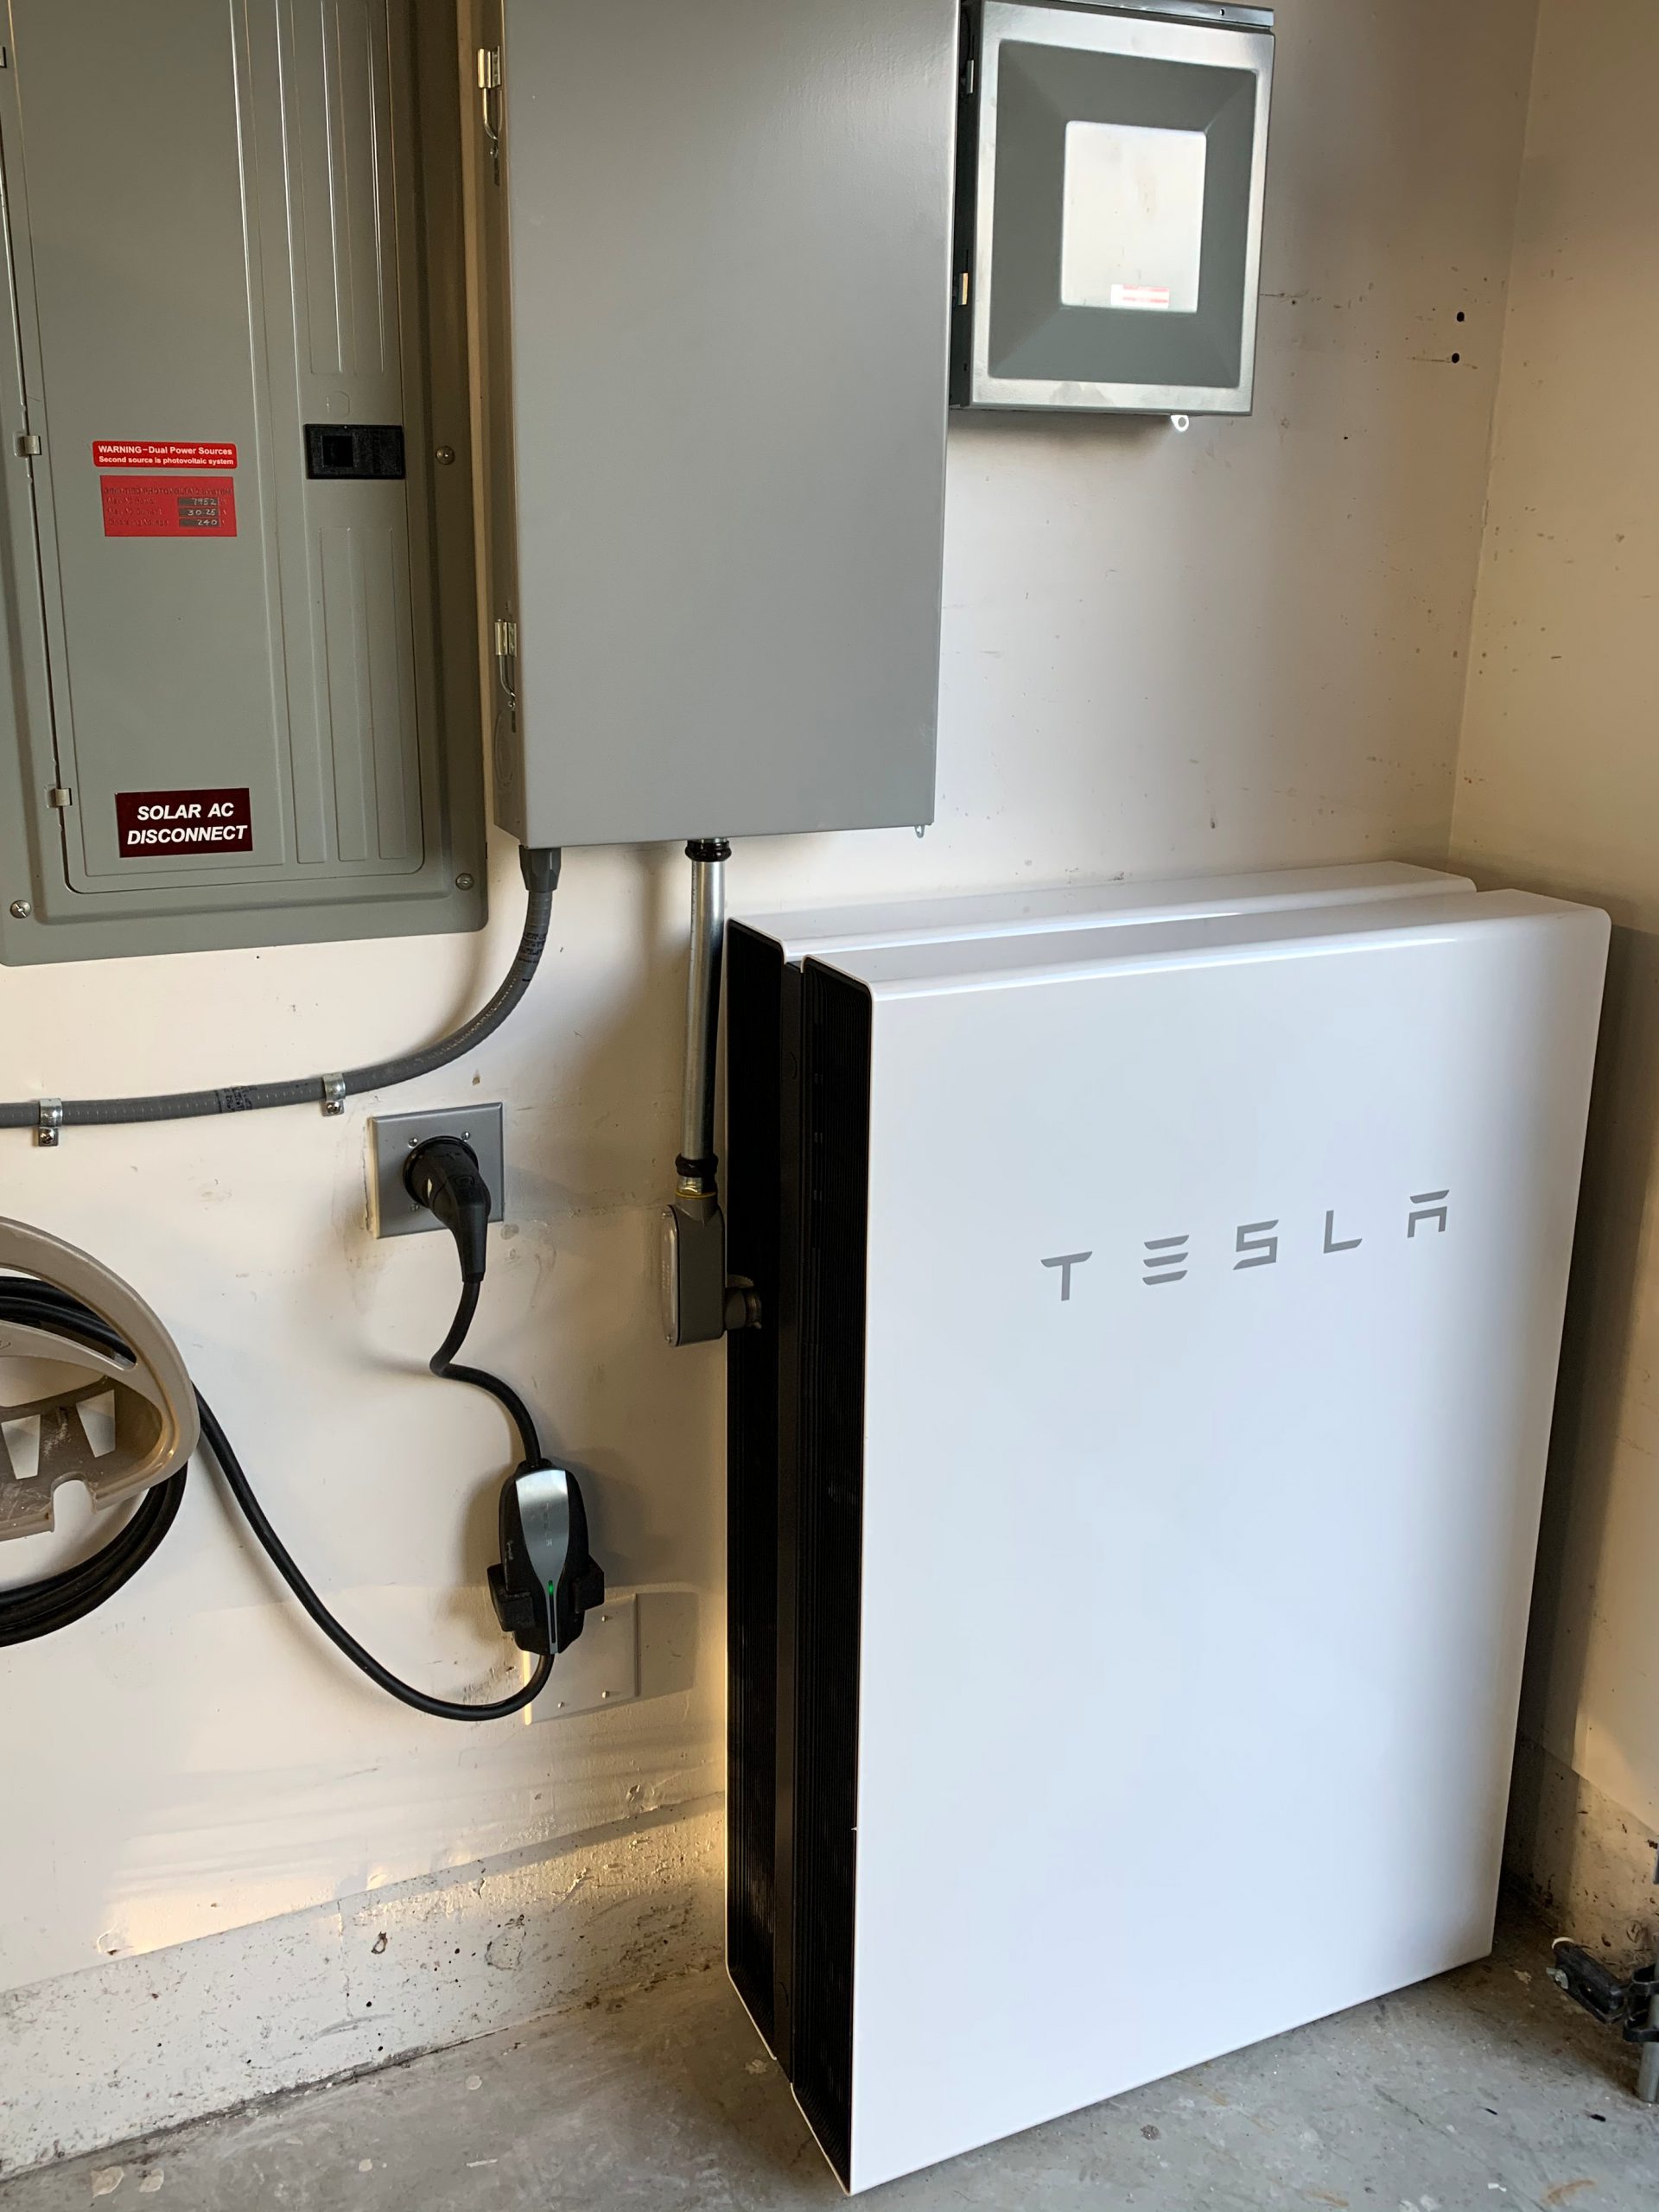 My two Tesla Powerwall 2‘s were installed last week and now I’m running on my own solar-generated power after dark!
You see, Powerwalls not only keep the lights on when the power goes out but they also let you automatically time shift energy daily to avoid using power from the grid at peak demand times – not something you get from a traditional backup generator. Plus they don’t need any maintenance or fuel.
And yes, this does mean that now I will still have power for the whole house and, most importantly, running water the next time PG&E needs to shut down the power grid for fire safety. Yay!
It used to be that daily peak energy demand occurred through the mid to late afternoons but with the widespread adoption and installation of solar photovoltaic panels, that afternoon demand has evaporated and the peak demand now comes in the evenings. As a result, power companies have been adjusting their rate schedules to reflect that, with the highest cost of energy running well after dark to 8 and 9 pm.
With battery storage, you not only get backup power for the whole house in the case of outages, but you can also automatically store energy generated during low demand periods of the day (including from your own solar panels) and automatically use that stored energy during the later peak hours, even after the sun goes down. This means that your existing solar PV system ends up being even more effective and cost-efficient.
Time-shifting energy usage with battery storage works so well that Tesla and other companies have been actively deploying massive, utility level battery storage systems around the world, in place of traditional, expensive peaker plants. (Peaker plants are power plants whose primary purpose is to cover periods of high demand.)
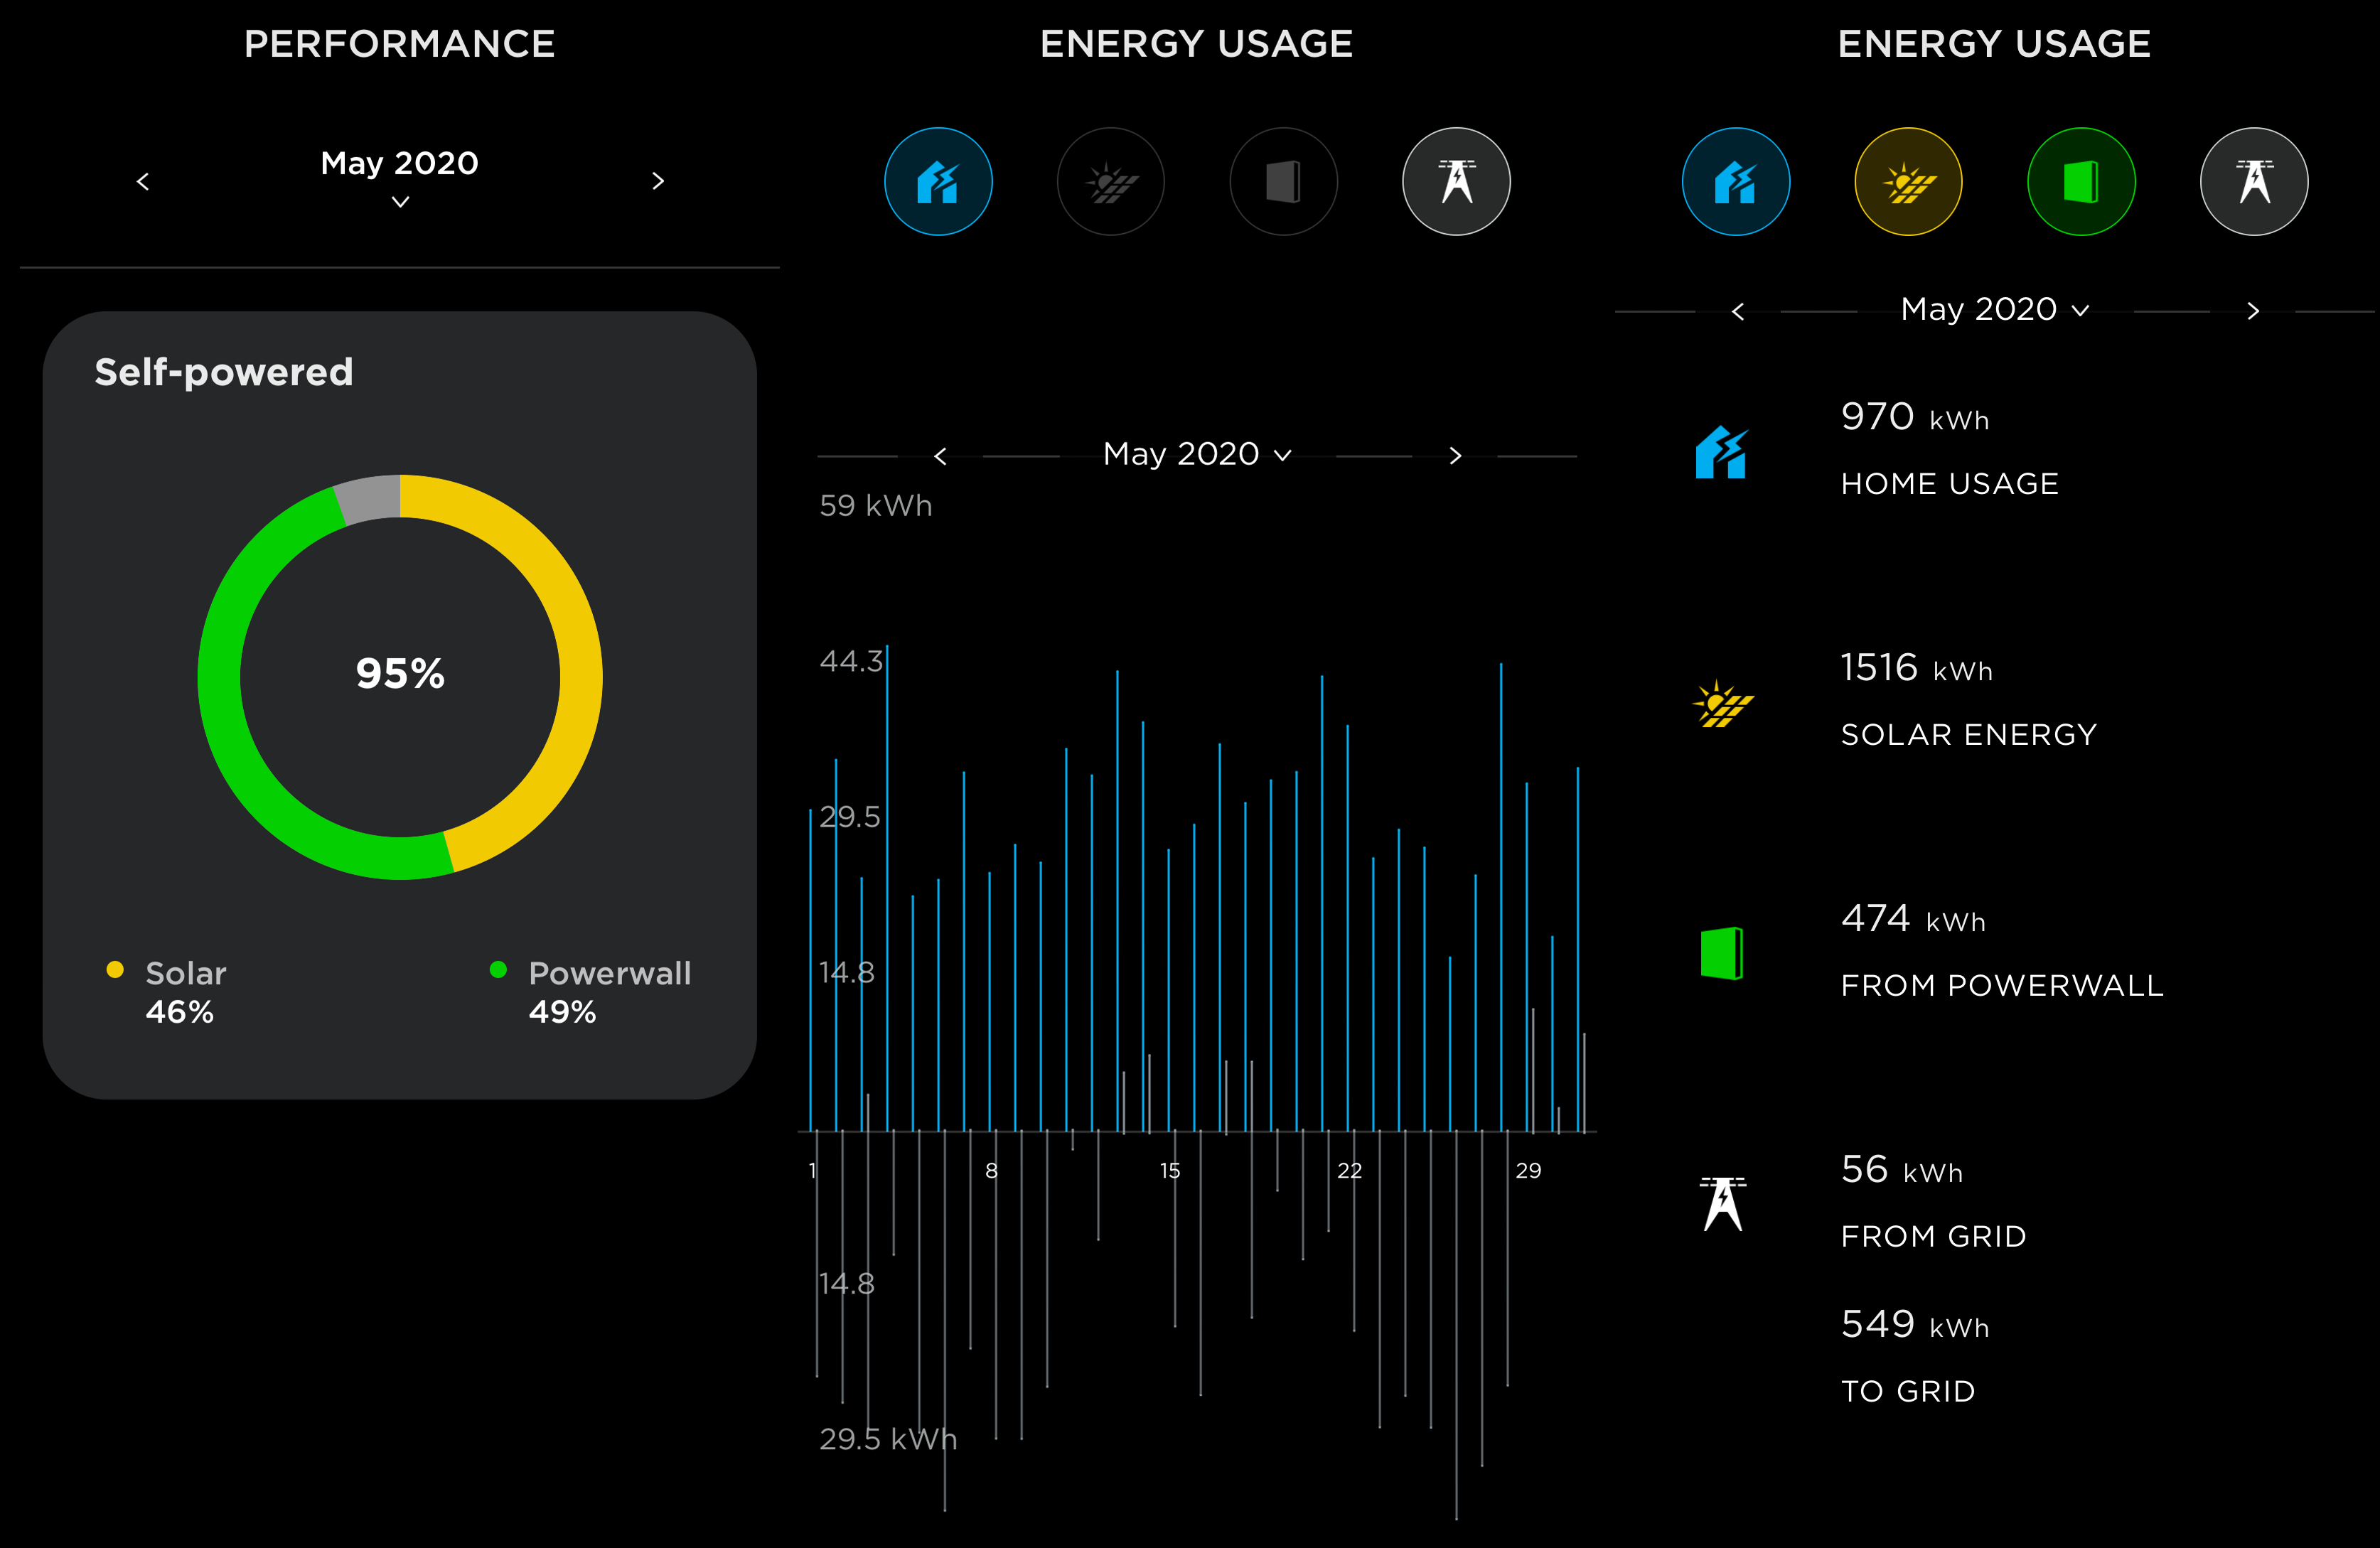
I really like the Tesla app for configuring and monitoring your Powerwall and, if present, your solar PV system. It continually displays the flow of power between your home, Powerwalls, solar panels and the power grid – in real time.
You can specify to keep the system in a “backup only” mode (keeping the batteries fully charged at all times), in a “self-powered” mode (where it stores any excess solar generated and uses it to power the home as much as possible each day), or in one of two time-based control modes where it forecasts your future energy usage and time-shifts your energy use and solar production to fit the peak, off-peak and shoulder periods of your particular electricity rate schedule. And all of these modes operate under a “storm watch” feature that will automatically override the normal behavior of the Powerwall to prepare for forecasted storms or other events that may result in an outage. All very cool!

I tried running in the “balanced” time-based mode for most of March but then switched to “self-powered” mode because, during the non-summer months (October – April), there is no peak rate and the difference between partial-peak and non-peak is only a couple of cents. In “balanced” mode, the system would make a point of exporting any excess solar generation during the partial-peak period for credit rather than continuing to charge the Powerwalls. This would mean it would be more likely to need grid power overnight. Now in “self-powered” mode, the Powerwalls are charged more and usually able to handle the entire house load overnight – depending on the weather (solar production and house heating need).
Update (June 2020): Well, it’s not even summer yet and the Powerwalls are already letting the house run completely self-powered most days. And by “house” I mean everything (central heating, water heater, cooktop/oven, washer/dryer, well & pressure pumps, septic system pumps) plus the cars (we’re both driving electric). There were a couple of days that were a bit stormy and cold enough to want to heat the house and a couple days of heavier charging of one of the cars, but every other day required no power from the grid (day or night) – and yet the system still exported plenty of excess solar generation by the end of the day. Having a couple of Powerwalls really does sort of double how much you get out of your existing solar panels. (I’ve got a 9 kW solar system.)
During the summer months, when there’s a daily period of much higher peak pricing, I expected to make use of the time-based “balanced” mode to optimize how much credit I get for excess solar generation. As it turns out, in the “balanced” mode the Powerwalls will switch to exporting solar power during the peak period even if the batteries aren’t yet full. So I switched back to “self-powered” mode to let the batteries fully charge each day to be sure to have plenty for overnight usage. They tend to fill up by early afternoon on sunny days and plenty of excess solar power gets exported at the peak rates anyway. This excess solar generation during the spring to autumn months will still make up for the power I need from the grid over the winter when the house uses much more energy for heating. (My panels were installed to optimize for summer peak rates – 75% of them are oriented to the west for summer afternoons. Now that I have the Powerwalls, I almost wish I had optimized them more for the winter sun.)
If you’re interested in buying a Powerwall, using someone’s referral link will gain you (and the person who referred you) a small rebate. Here’s my Tesla referral link.
My installation by Tesla wasn’t without issues. Read more “Tesla Powerwalls Installed”

As I detailed earlier (Those Ice Dam Blues), the Tahoe house developed thick ice dams all around to the point where I was getting water intrusion where the dormers meet the roof above the deck. Turning the poorly-installed heat tape/cables back on, and leaving them on 24/7, let the melt water drain off (and re-freeze into a thick layer on the deck). I called around and found Millers Roofing would be able to come out and clear the snow and ice from the roof about a week later. (Boy would that suck if the heat tape hadn’t been able to get the water to drain.)
Well… it would seem that I had some entirely unfounded expectations over what to expect. I was thinking that a service to clear the snow and ice from the roof would leave the roof relatively clear of both (at least until the next snow storm). Though I had no idea how they would safely remove the foot-plus thick ice, I was surprised to discover that they apparently don’t actually remove all of the snow or apparently any of the ice. Six hours of work for three guys (and $2250) and what they do is remove about three-quarters of the snow off the top. Troy sent me a photo of the front of the house two days after the roof snow removal crew finished (and after another storm dropped some more snow). Here’s the before/after shots:
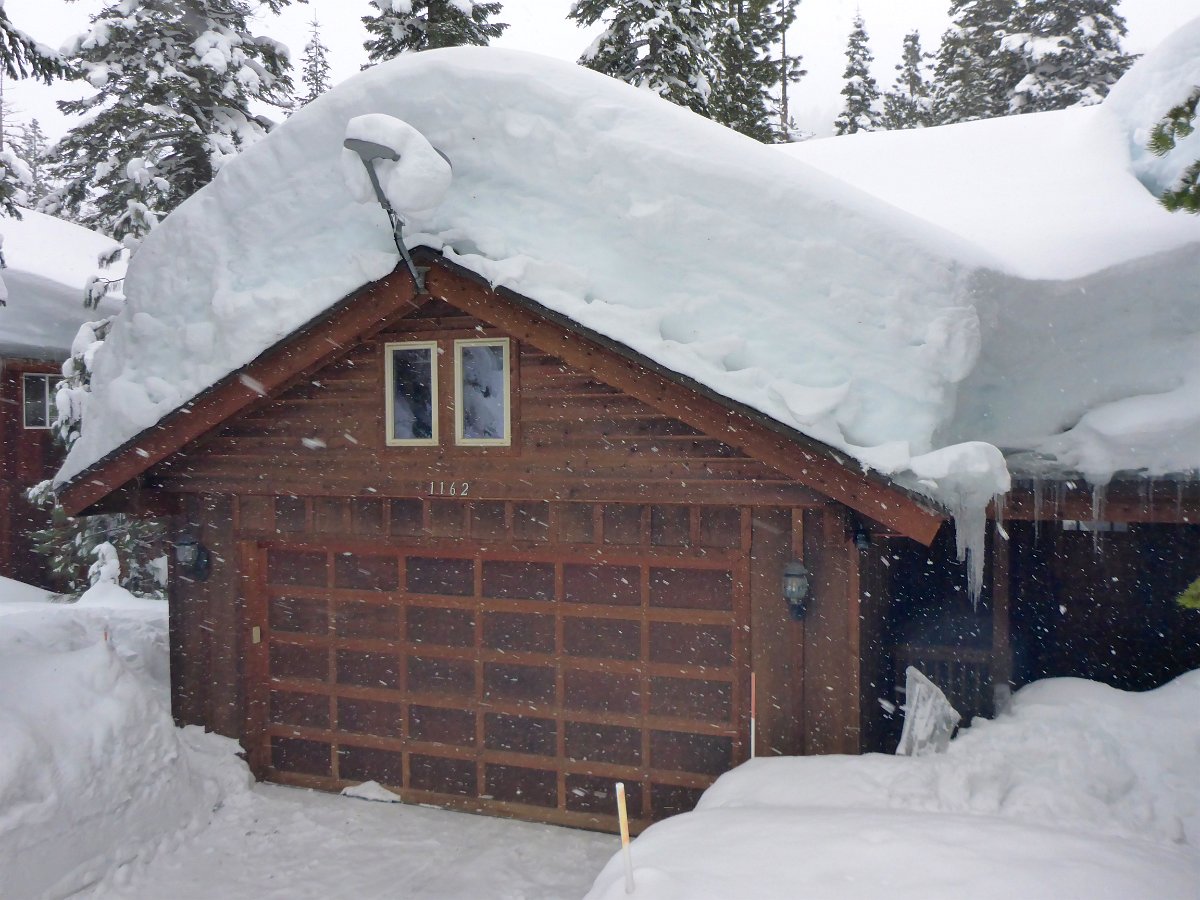
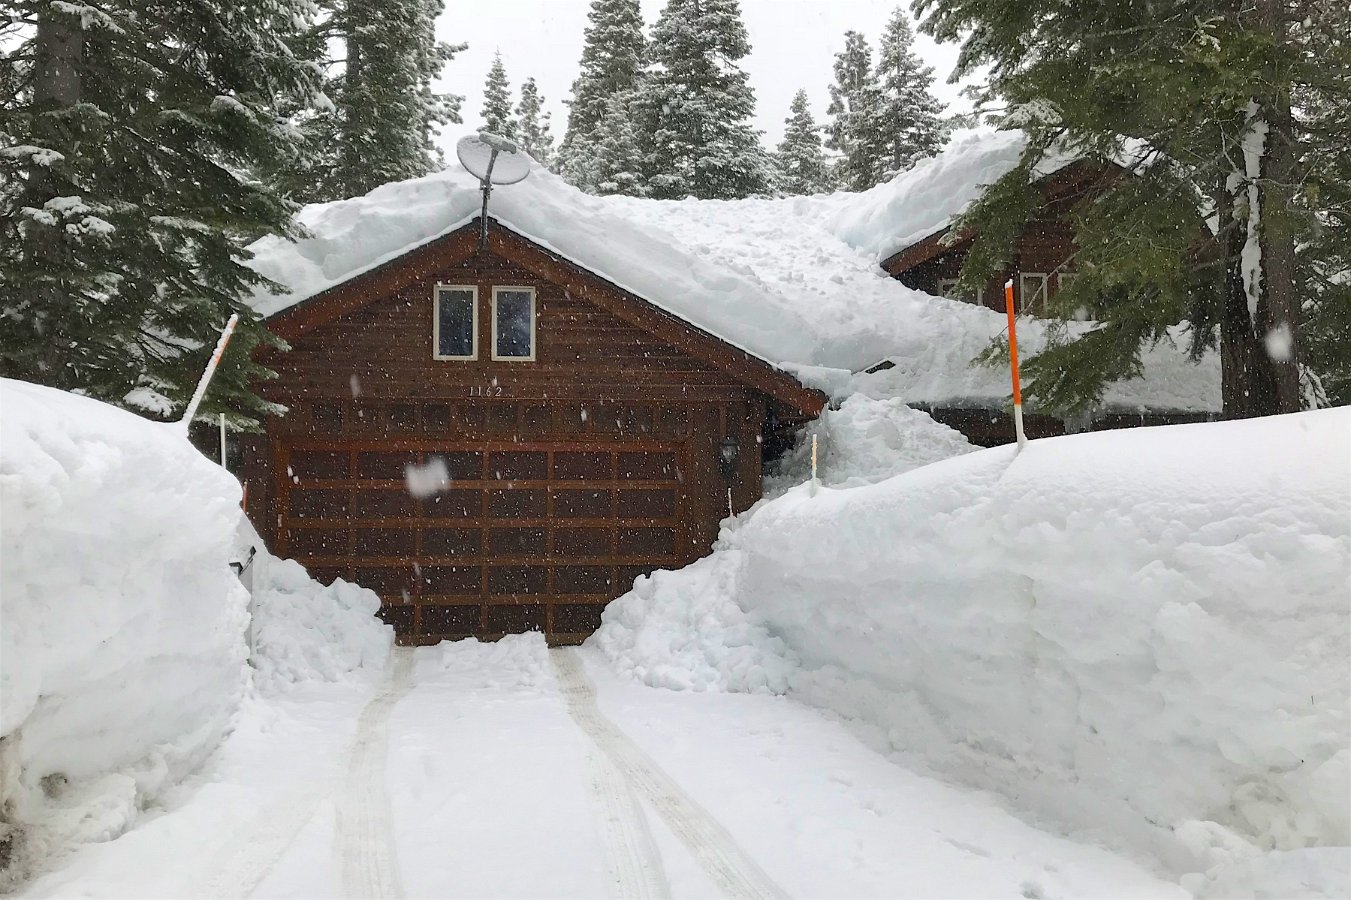
One week before and two days after the clearing work
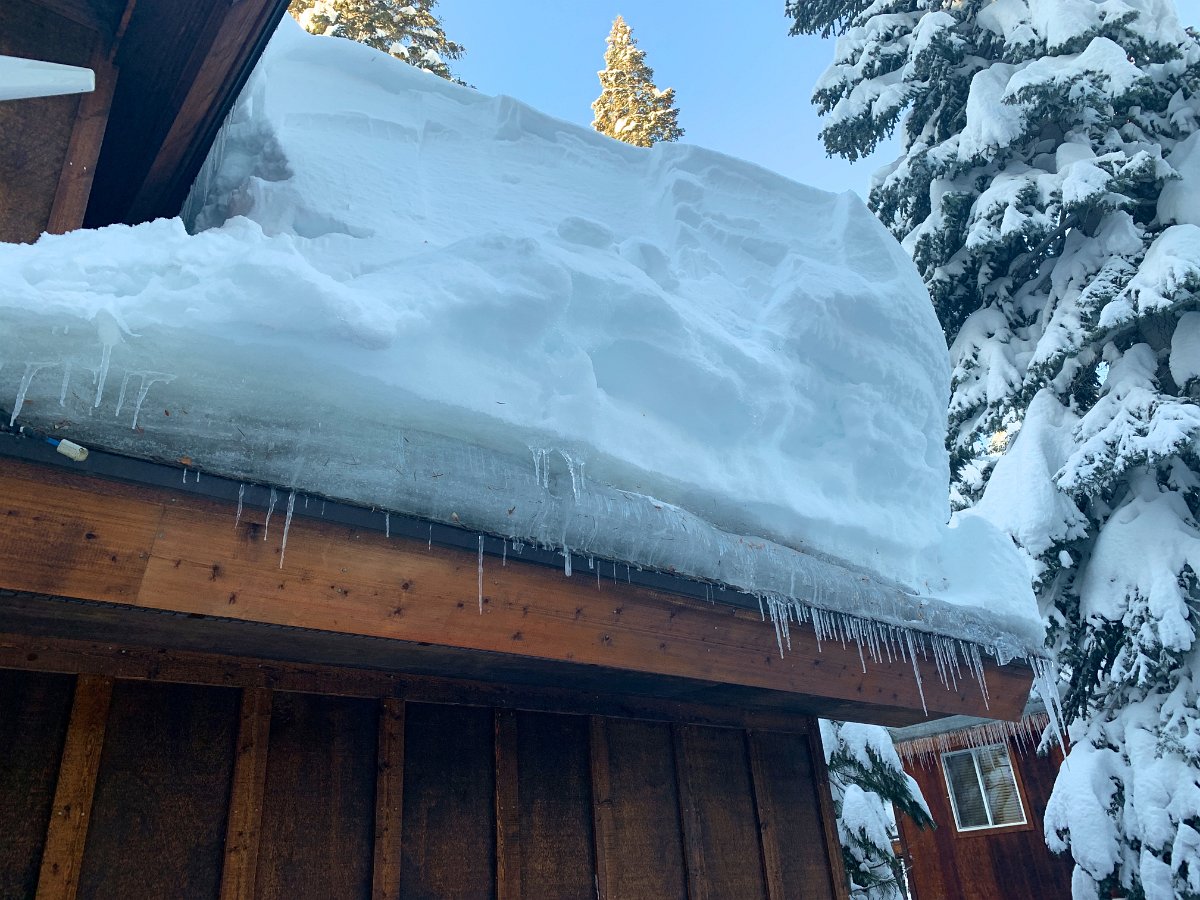
When I did get to the house about ten days later, I was dismayed to see that while a lot of snow was dumped off the roof, the ice dams remain everywhere around the house except for where the heat tape/cables run beneath the dormers:


And there’s quite the load of snow and ice from the roof on the deck now:


The concern here is how the melt water from the roof continues to fall and refreeze into a slab of ice on the deck – getting up to the door thresholds. We are starting to get a little bit warmer weather so we’ll see how this goes in the coming months but this clearly needs some work to avoid this mess in the future – both the ice dam formation and the ice slab on the deck.
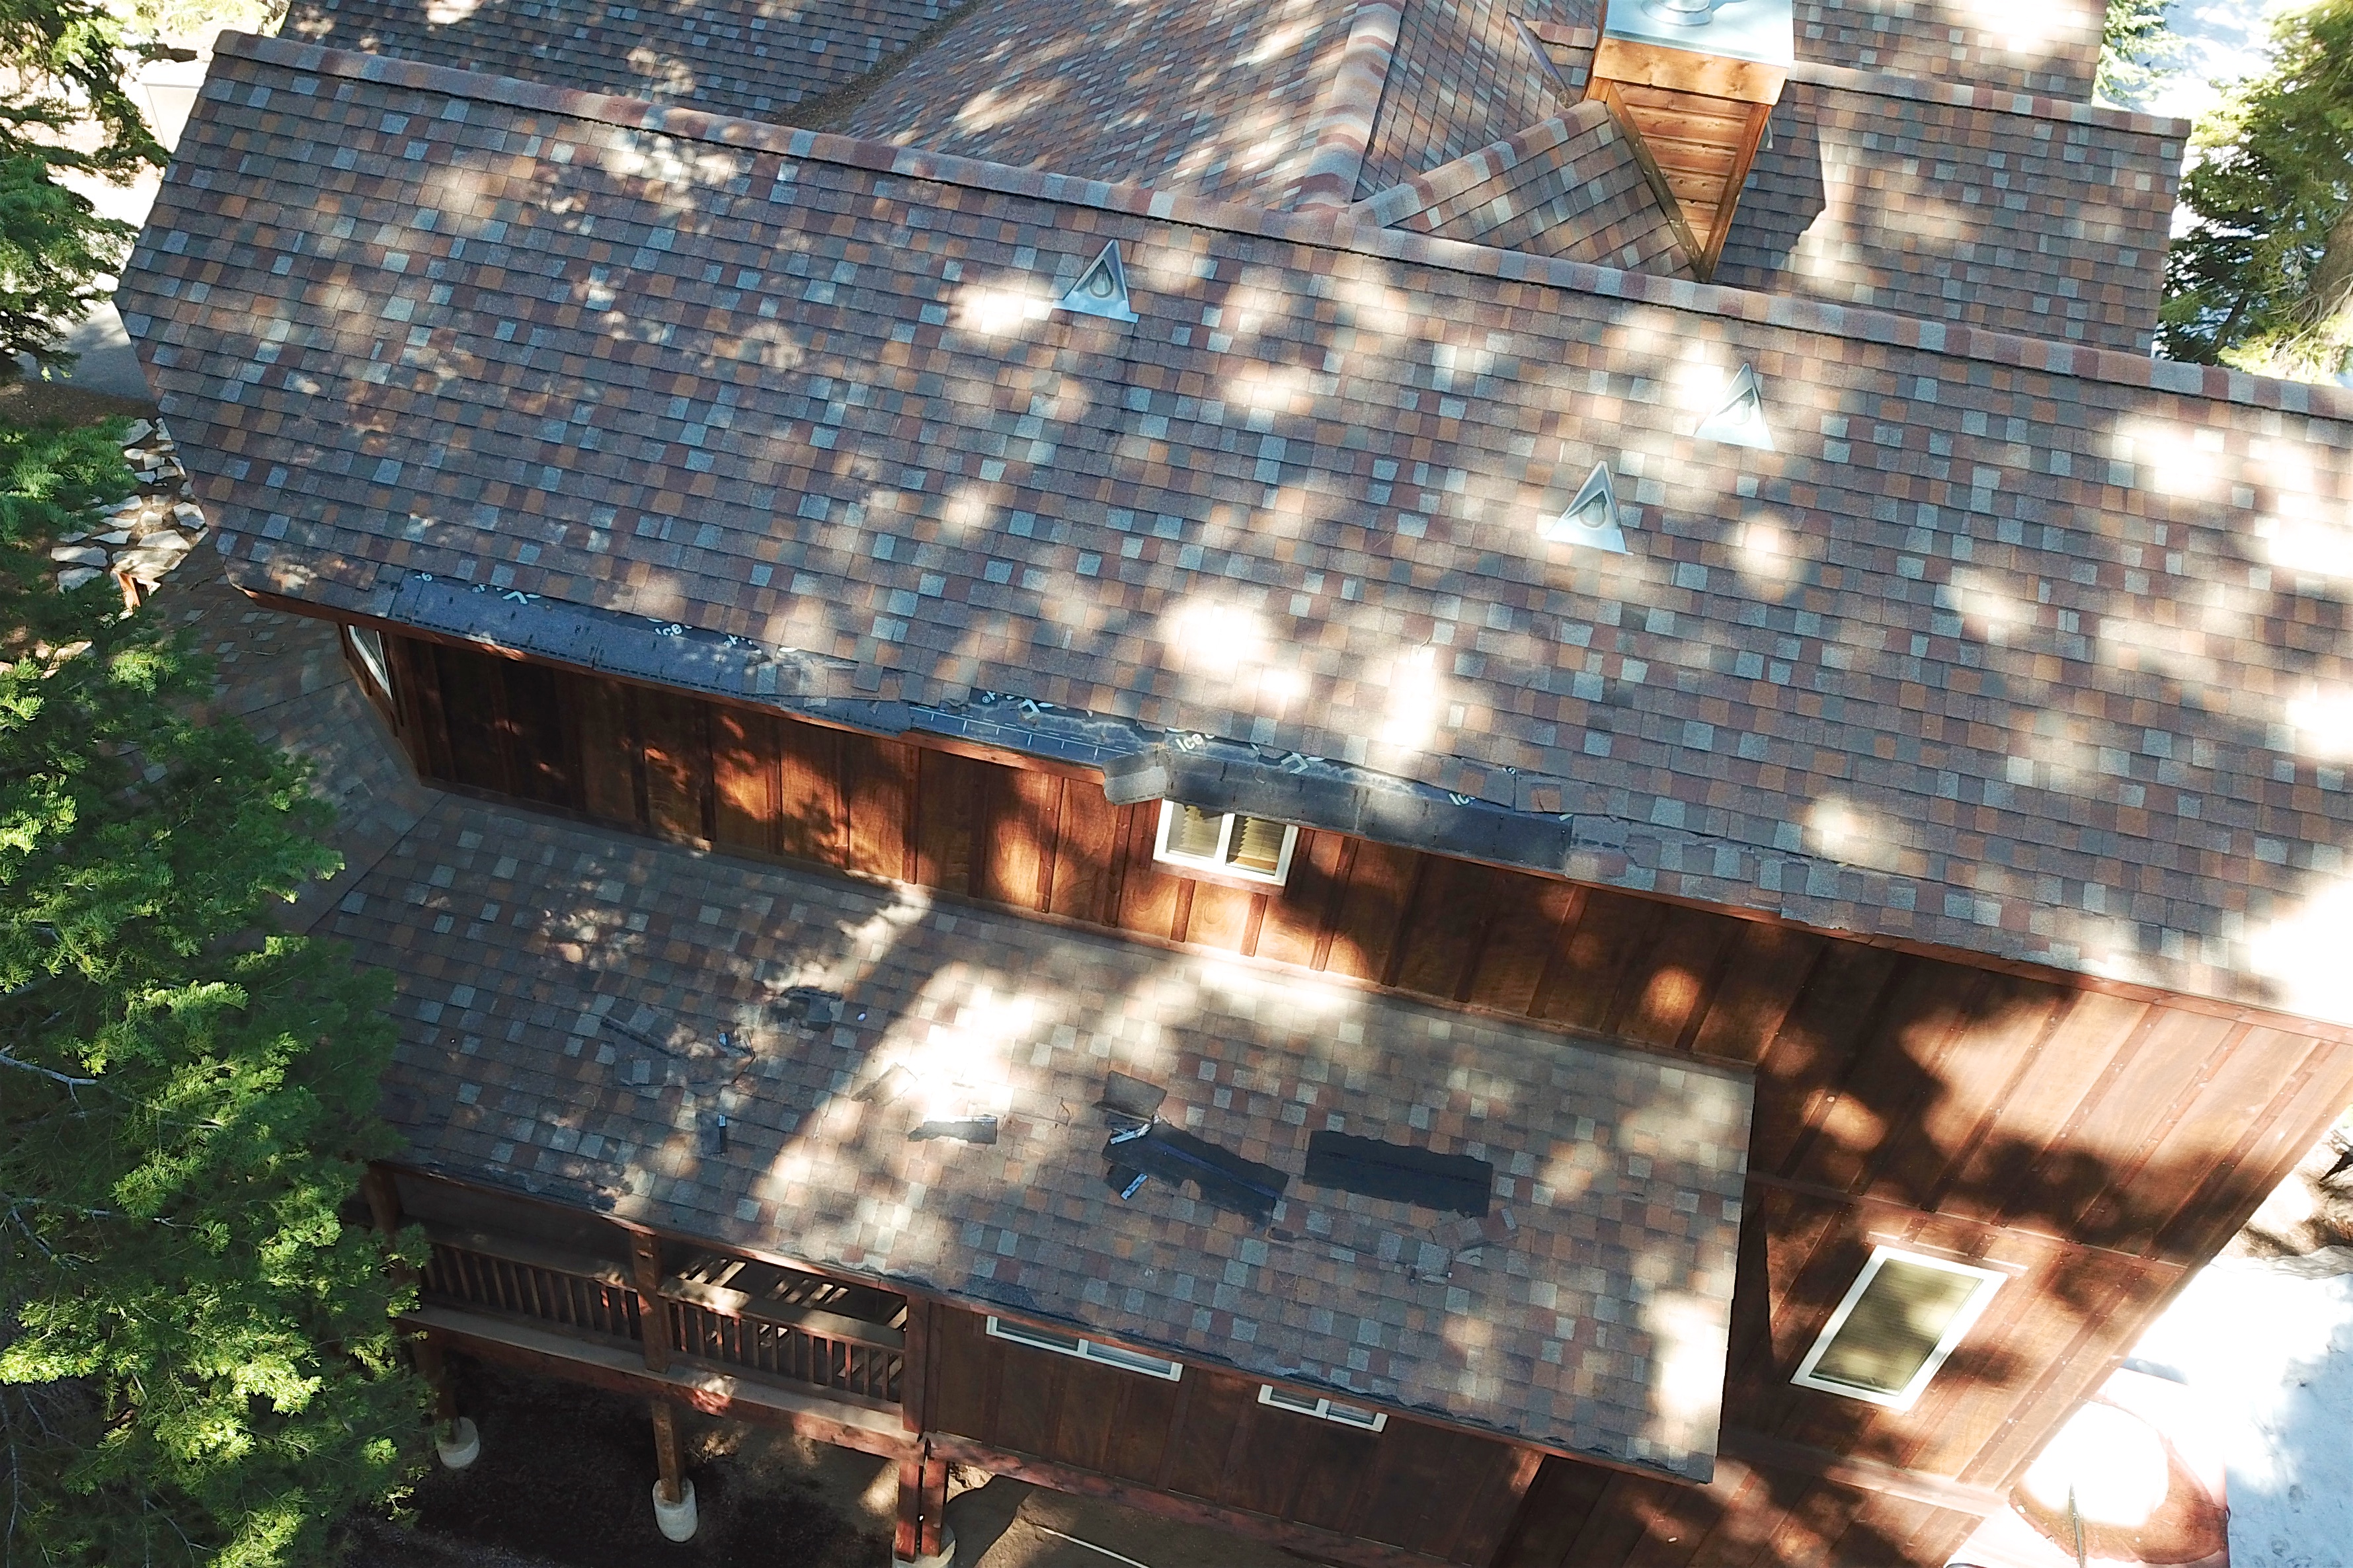
All of this makes me wonder if it was worth hiring that crew to do that partial snow load removal. I can see some more shingles are peeling off the roof eaves but maybe it would be worse. On the other hand, the ice dams remain until they eventually melt away and there’s plenty of snow remaining (and to come) to feed them. Hopefully there won’t be any water intrusion elsewhere on the roof where there are no heat cables installed.

Record loads of snowfall (and occasional bouts of rain) mean lots of snow and ice on the Tahoe house – enough to build up ice dams all the way around the house and to eventually find water streaming down the walls in the dining room.
It looks like the problem spot is where one of the dormers meets the roof. Melting snow collects above the ice dam below the dormers, getting under the shingles until it gets high enough to stream down where the dormer wall joins the roof. There is some heat tape installed under these dormers to create drainage through the ice dams but it’s not installed quite correctly and I had mistakenly understood that it’s not necessary to run it at night when the temperatures get down to the teens outside. Apparently there’s enough heat getting through the roof to melt the snow even when it’s that cold outside. So I ended up with water streaming down the inside walls (past electrical outlets, to boot):


Not good. I’ve got a crew coming from Mills Roofing later this week to remove the snow and ice buildup. There will be more snow and then more melt and more ice dams though. The heat tape that is there now is only on a portion of the rear of the house and it wasn’t installed properly. It doesn’t hang over the edge of the eaves as it should (to let the water drain off the roof) and a good 8-10 feet of it is wasted strung up on the wall coming from the junction box. I was able to rearrange some of it but the roof here is too steep for me to deal with most of it.
I’ve been in contact with Brian from Summit Ice Melt Systems and will be looking into potentially installing their product to prevent these ice dams from forming at all. However, that still leaves the issue of all this melt water collecting and refreezing on the deck below – and potentially leading to further water intrusion into the house:


There’s also still the outstanding damage to the roof from prior seasons. There are several sections of shingles missing from the roof but I wasn’t able to find anyone that wasn’t already booked up to repair the damage over this past year. I did eventually sign up with Jeff’s Roofing Truckee but he also wasn’t able to get to it before the first snows arrived. He did manage to locate a supply of the Tamko shingles in South Lake Tahoe though. Hopefully, he’ll get to my roof later this year once the snow and cold weather is gone:

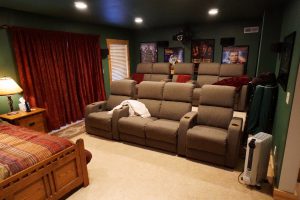
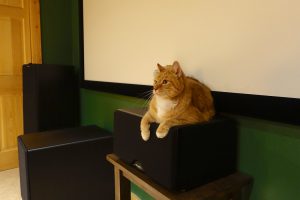
The Tahoe house has a large basement bedroom that was just crying out for a home theater conversion using my recently retired JVC DLA-RS55 projector and my old Sony amp/receiver. This involved getting a full set of speakers for 7.1 audio, running wiring through the walls for speakers and the HDMI video, moving the badly placed heater vents and intake, painting the walls and ceiling a dark green, mounting the projector and adding power, building another seating riser and getting it carpeted, ordering and hanging a projection screen, ordering and setting up two rows of reclining seats and of course hanging movie posters! The guest bed up front is a little weird and perhaps might make for some weird dreams of imagining an audience watching you sleep, but it doesn’t interfere with enjoying the big screen image or sound.
Click through for the full gallery:


I recently researched the available cordless power gardening tools (string trimmers, blowers, mowers, etc) to see what might be worth buying. Many companies are now offering 40V and 56V lithium battery systems and Greenworks now has even an 80V system (though higher voltage doesn’t necessarily mean more power is provided in the tool). There were a few reviews here and there and a few video demos but nothing that showed how well these newer, more powerful tools could handle more challenging tasks in the yard, like cutting down yards of tall, thick thistles.
I eventually decided to try both the string trimmer and blower from Ego Power+, based on their 56V battery system. And so I’ve put together a little video demonstration of a more serious test of their capabilities that might be useful to anyone else considering upgrading or switching over to cordless:
So I read a lot of reviews and settled on trying the Ego Power+ 56V system. From someone’s takeapart video, they seem to have designed their battery layout well, and they have a very good rapid charger that keeps the batteries cool while charging. I was going to try the Greenworks 40V system but I came across a number of complaints about build and design issues. For what it’s worth, I’m definitely happy with the Ego Power+ system so far and I recommend checking it out!
For years I’ve dismissed those little semi-autonomous, robotic sucking machines. It sounded like they weren’t really worth the trouble since they couldn’t really run for very long, pick up much debris in their tiny compartments, deal with furniture without missing spots or getting stuck or trapped. With all the need to supervise, it sounded easier and quicker to do it yourself. But then recently I stumbled on a review of a new model and was intrigued by the improvements and the possibility of a little machine to help keep up on all that cat hair my two furry friends are always producing.
A fun video showing my new little helper in action (1.5 minutes, 24 MB)
It’s the BotVac 80/85 from Neato. Unlike its more well-known competitor (iRobot Roomba), this robotic vacuum cleaner does not just follow a random walk around the room, bumping haphazardly from one obstacle to the next. The BotVac uses laser sensors to map out the shape of each room and build up a floor plan as it goes about its business. When it encounters obstacles like tables and chairs, it will actually work to navigate around each leg, vacuuming under and around as much as it can. It’s pretty amazing (and mesmerizing) to watch it navigate around the house, room after room, following its little internal rule sets to deal with various obstacles as they come up.
It’s not quite a replacement for a full-size vacuum cleaner but it certainly does an amazing job considering that you can just start it up and let it go while you go about doing other things. (You also do need a normal vacuum cleaner to clear out its filter.) It’s pretty cool though to come back and find everything freshly vacuumed! And it’s not really that loud (certainly much less than a full size vacuum) and it’s not too annoying to have it going about it’s business while you do other things.
One limitation with the BotVac is that at about four inches tall, it can’t fit under some furniture, particularly couches. (The Roomba design has a lower profile and can fit under more furniture.) Also, the BotVac can get itself stuck at times and need help. This happens sometimes with furniture that offers just enough clearance for it to partially slip under but not quite enough for it to fit entirely under. Often this goes fine and it will just work its way around, but other times it’ll get itself wedged in and need to be pulled out. When it does get stuck or trapped, it will cut power to its vacuum and call for help by chiming. It’ll then sit and wait quietly for a while before chiming now and again.
Here’s a much more mixed review of the BotVac that comes out in favor of the Roomba. Some more reviews: BotVac 85 vs. Roomba 880 (favors the BotVac) and iRobot Roomba vs Neato Botvac (favors neither).
Note that the BotVac 85 is really just the same model as the 80 but it comes with two extra filters included. (This wasn’t obvious to me.) Both the 80 and 85 come with the two different brush types.
Now… what should I name him?
UPDATE (1/28/2015): The BotVac is still running but I have seen more of its deficiencies. One thing that happens is that it essentially becomes a little senile with a low battery charge: it often has become unable to find its way back to its charge station with its battery runs low. It will repeatedly and aimlessly search a small area (a couple of square feet) and after a long while finally give up and call for help – this without any obstacles in the way. My guess is that it lets the voltage level drop too far on the battery now and is unable to sufficiently power its electronics and sensors. At first it only happened occasionally, then it started happening almost every time. But then, more recently (April 2015), it’s been working properly again! Weird. Anyway, when it does “go senile”, I have to pick it up and manually dock it at its charge station. (If I let it continue its search for the dock right in front of it, it will just wander off again.)
The other issue (and this is more annoying) is that its methodical method of covering a room means that it will get into try over and over again (unsuccessfully) to reach some particularly difficult spot (due to furniture) and waste a lot of its battery charge or even eventually get itself wedged in or otherwise stuck. Bringing it back out again will often lead to it just finding its way right back into that spot. I’ve since got into the habit of leaving some strategically placed pillows or other items to prevent it from getting into those spots. This is where I imagine the Roomba might do better with its random walk pattern: it probably won’t get stuck obsessively trying to reach the same spot.
Lastly, as I mentioned earlier, the biggest problem with the BotVac is the little laser assembly sticks up in the center of the unit. This protrusion isn’t accounted for when the unit tries to go under some furniture so it can end up wasting energy trying over and over to get under some furniture or even getting wedged under such furniture.
However, the BotVac does still do a good vacuuming job and it’s great to be able to set it off running while you take care of other things.
 Water started coming through my kitchen ceiling on November 21st, after a rain storm. This is less than ideal. Apparently something has failed in the tiled deck upstairs that sits above the kitchen. At least I’m lucky in that the ceiling has various openings for fire sprinklers and can lights otherwise the water might have pooled and collected in the ceiling unnoticed for a long time before eventually failing more dramatically.
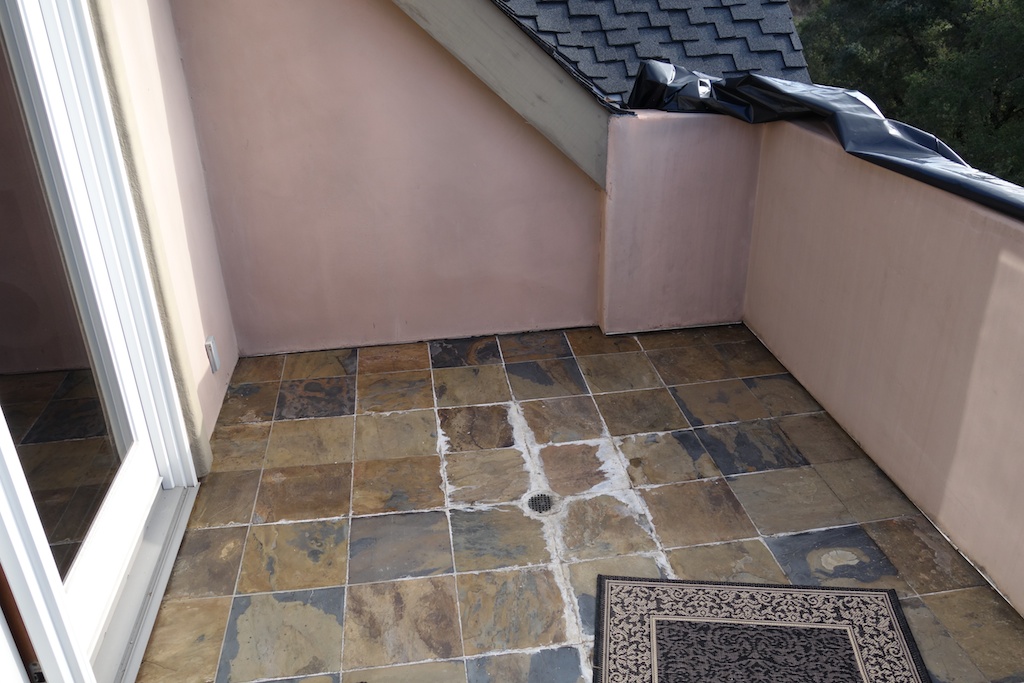
Bobby Hultzen is a tiling contractor who has been working with me to try to locate and fix the problem since late November. He initially identified a bunch of possible trouble spots: how the roof goes right into the wall around the deck (how do you keep *that* from drawing in water?!), the construction of the deck wall, the bedroom door frame, the deck’s overflow drain and of course the deck bed itself.
