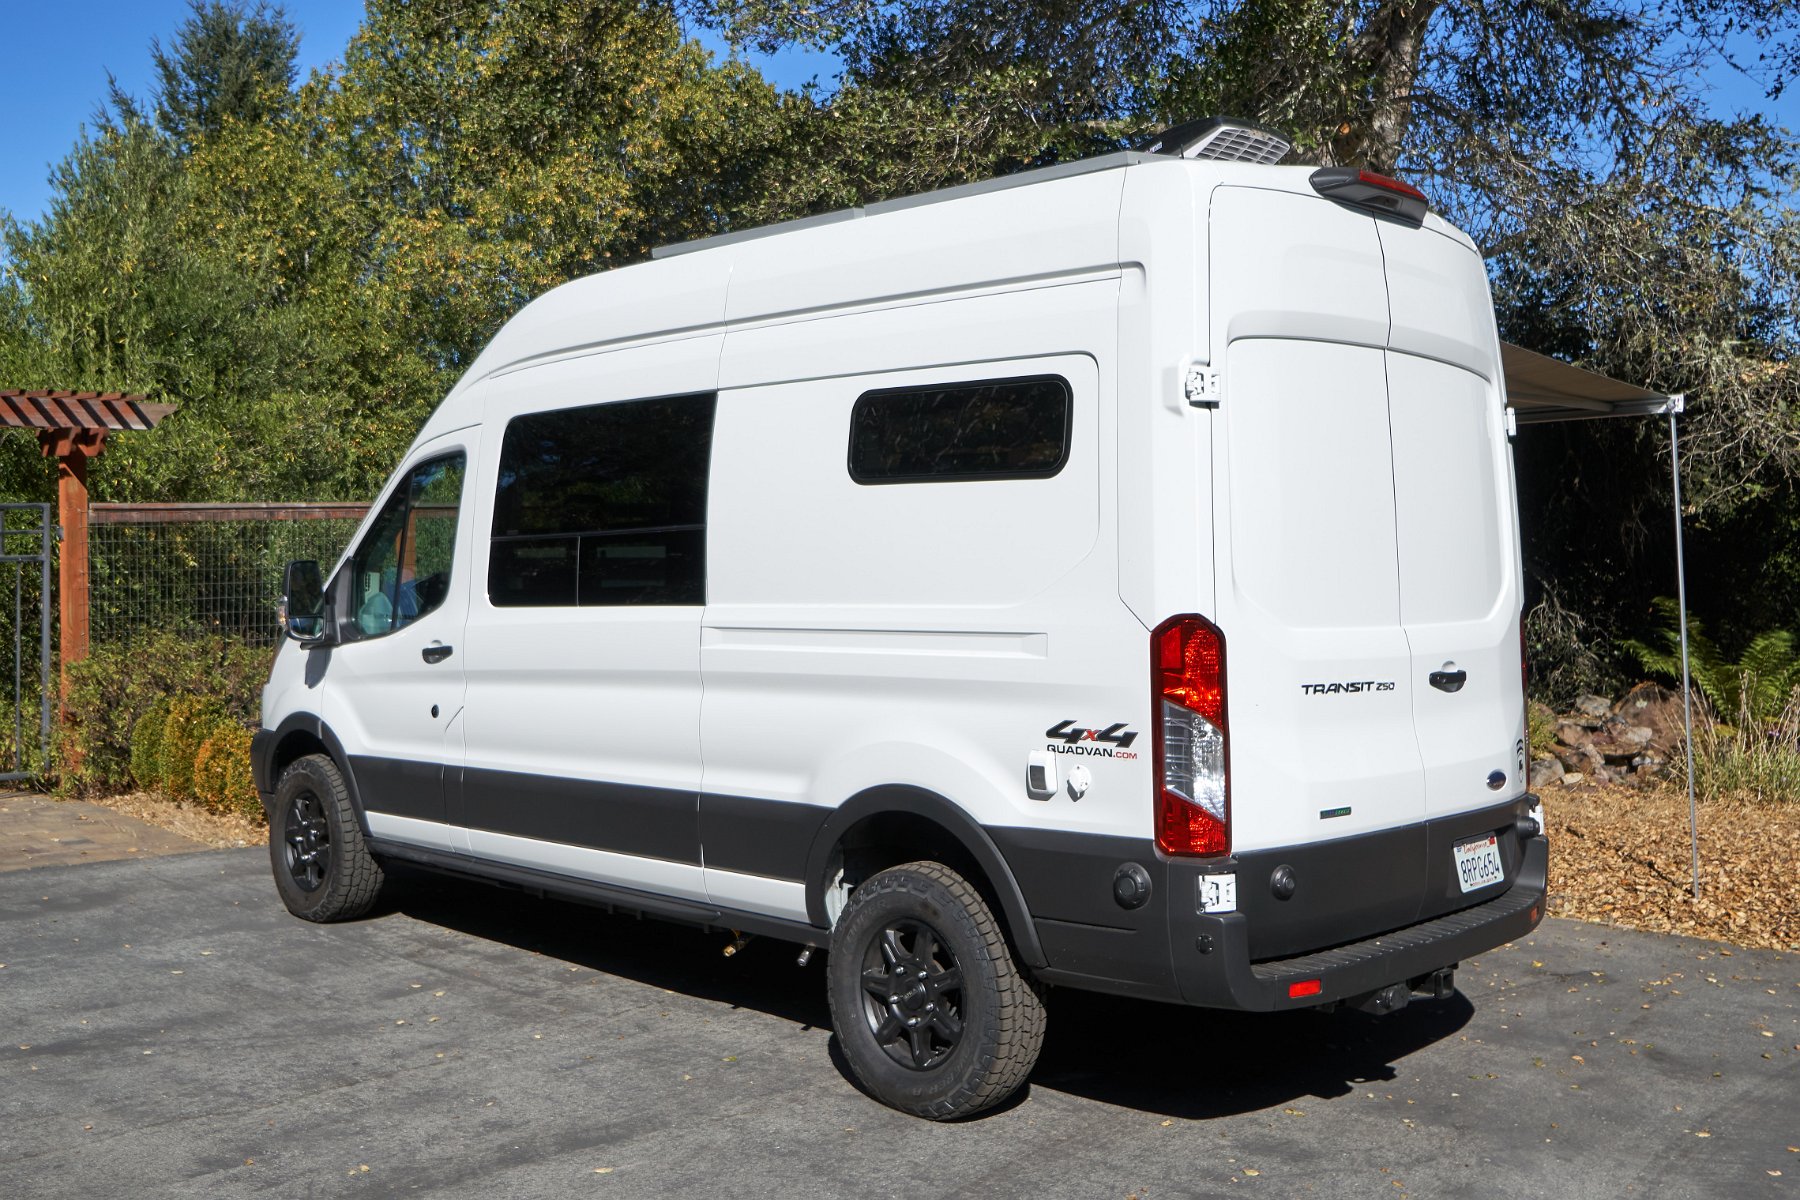
I’ve set up this page to share information on the conversion of a 2019 Ford Transit cargo van into a 4×4 adventure camper van (aka The Traveling Cat Adventure Vehicle II). We downsized from our 25 ft long, Sprinter-based RV, a Leisure Travel Vans Unity. Our two biggest wishes were to 1) have internal storage for our mountain bikes and 2) have a smaller, more off-road-capable camper van that would allow us to continue down some roads that we would previously have to give up on and that would also allow us to park a little more easily in busy metro areas.
(Click through for the full gallery)
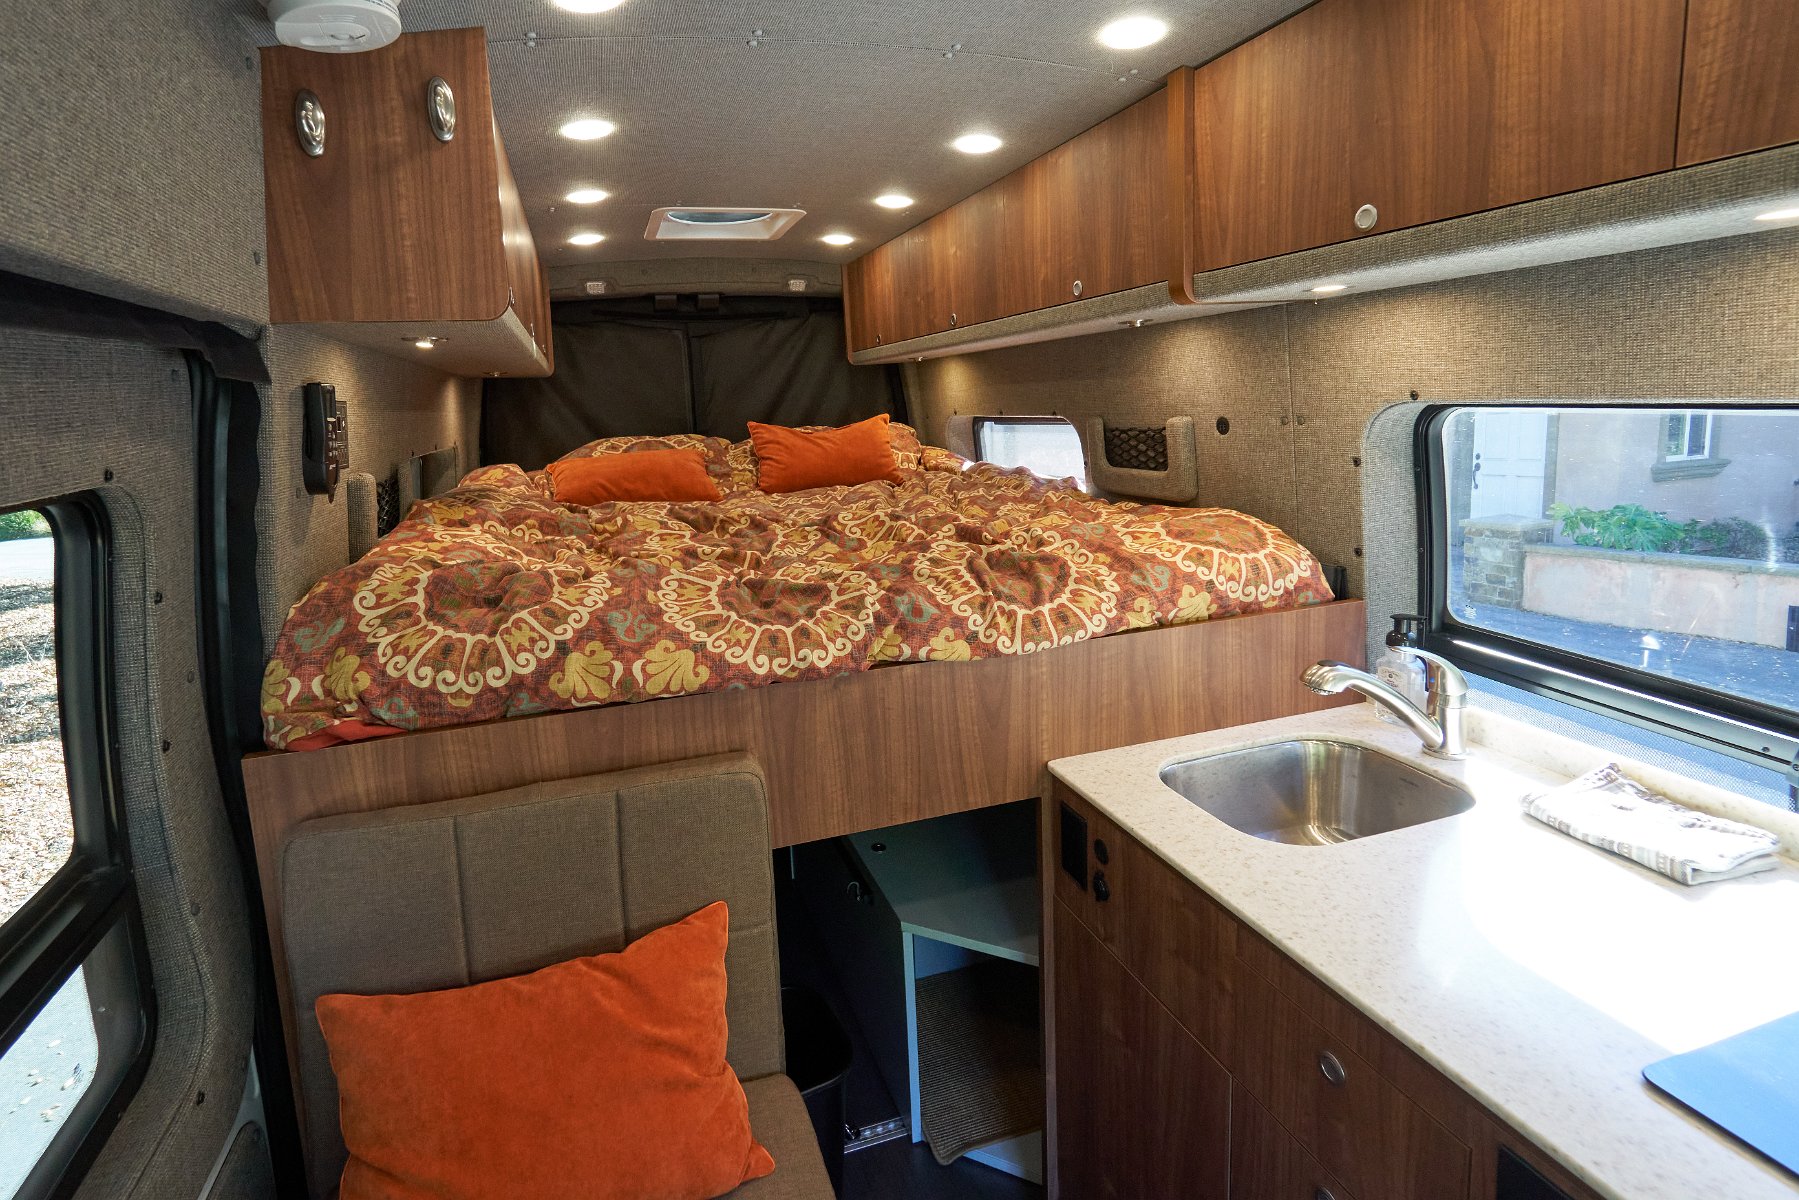
Van Haus Conversions did the bulk of the build out to a camper van. The design features a queen-sized raised-platform bed that runs length-wise and creates a large “garage” space for bikes and gear underneath, leaving a living space with a galley (sink, refrigerator, cooktop) and a seating area surrounding the fold-out swiveling table between the two front swiveling seats and a small bench seat that hides a dry composting toilet.
I was originally attracted to Van Haus when I saw their “Watson” layout that incorporated a dinette seating area, a garage/bike storage area and a galley and hidden toilet into the smaller, non-extended Transit van. However, I eventually decided that we just carry too much bulky stuff (mountain bikes and gear, inflatable kayak and gear, telescope and gear, camp folding chairs, grill, plus space for the cats’ litter box) to be able to get by with that layout. Hence the switch to the platform bed arrangement with the large storage space underneath.
Van Haus was great to work with as they’re very open to accommodating any custom requests, unlike some more well known outfitters – and their craftsmanship looks to be very good. (Here’s some pictures of the work as it progressed.)
(Please note: As an Amazon Associate, I earn from qualifying purchases made via my links to Amazon.)
Vehicle Upgrades
Cab Upgrades
House Build-Out
Plumbing
|
Appliances
Electrical
Accessories
Maintenance / Tips
Wish List / Future Possibilities |
Selecting a van and options
Over the course of a year or so, I must have checked out easily more than a hundred van builds from both DIY-ers and professional outfitters. Eventually I settled on going with the gas-powered Ford Transit over the Sprinter or the Promaster. The Promaster was out because of its low ground clearance and I steered away from the Sprinter despite its popularity because I was tired of dealing with diesel emissions issues on our Sprinter-based Unity (not to forget to mention the dirtier emissions from diesel)– and it can sometimes be a hassle just to find diesel.
What I really want is a fully battery electric drivetrain in a van with 400+ miles range and all the benefits that implies: no more emissions, almost no maintenance (just tires really), more torque and power, better handling with more weight down low, recovering spent energy when slowing down or going downhill, complete control of your speed on downhill stretches without any braking, fully charged whenever you leave home and lots of electric power available for everything else in the van.
As of 2020, a long range electric van isn’t yet available from anyone but when it is, I’ll be quick to make the conversion! (Been driving electric cars since 2011, and there’s no way I’d go back!)
I wanted the non-extended long body (19.5 feet long, 148″ wheelbase) because I didn’t want to lose off-road maneuverability with that extended length overhang or the ability to park easily in metro areas. I chose the high roof model to allow me to stand upright without hitting the ceiling (I’m 6’4″) and to provide more space above a raised platform bed.
 I looked around for an available Transit in this configuration (either used or on a dealer’s lot) but all of the vans I could find were either very basic work vans with no options or they were maxed out with every option including dark paint colors and glass rear cargo doors. I wanted to avoid any dark exterior color to help reflect heat in the hot sun and, for the same reason, I didn’t want glass windows in the rear cargo doors. We found in the Unity that it was very helpful to park with the windowless rear of the Unity towards the sun to keep the interior relatively cool. (It was also extremely helpful to partition off the cab area from the house area with a heavy blanket to keep out the heat.) I also didn’t want to pay for the full featured 2019 radio/navigation unit as I was planning to swap it out with a better aftermarket system. It sounds like the 2020 audio/nav system may be more worthwhile though.
Anyway, I ended up having to configure a custom order from the factory and wait. The ordering process with Ford was complicated by an incredibly long list of often conflicting and poorly documented options and packages. I ended up with just the following packages and additions on top of the standard features:
|
|
4×4 conversion and suspension upgrades

 I ended up ordering a Transit in June of 2019 with delivery expected in November – still a little before the 2020 version with all wheel drive would become available. Rather than wait even longer for that somewhat unknown product, I made plans to have the van converted to four wheel drive by QuadVan in Portland, Oregon.
QuadVan also raised the low-hanging rear shock mounts, upgraded the suspension components, gave the body a 2″ lift, added both front and rear locking differentials, added protective skid plates, installed larger all terrain tires (see below) and switched out the gear ratio to 3.73 to better match the larger circumference tires. (Here’s a gear ratio calculator.) As a result, the van is certainly a more serious 4×4 vehicle, although many of these changes could also be applied to the factory all wheel drive build.
- 4×4 QuadVan conversion w/manual shift high/low
- Front axle: Eaton Detroit Truetrac Locker
- Rear axle: Eaton Detroit Truetrac, ratio change to 3.73
- Van Compass leaf springs
- Raise rear shock mounts
- Bilstein front struts and rear shocks
- 2″ body lift
- Skid plates under front and middle sections and under gas tank
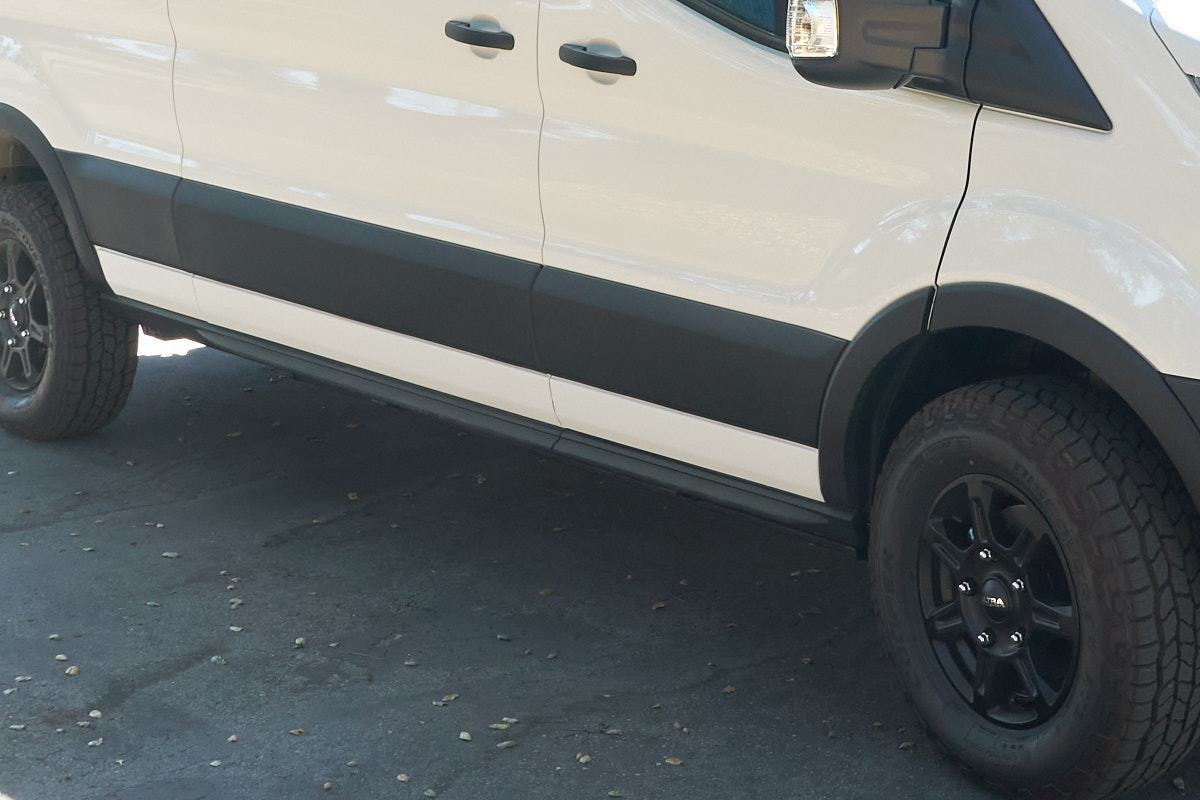
Adding larger all terrain tires
 As part of the goal of making this a 4×4 adventure camper van, I researched larger all terrain tire options. From the factory, the van came with relatively small, highway-oriented Continental VanContact A/S 235/65R16 all season tires and simple steel wheels.
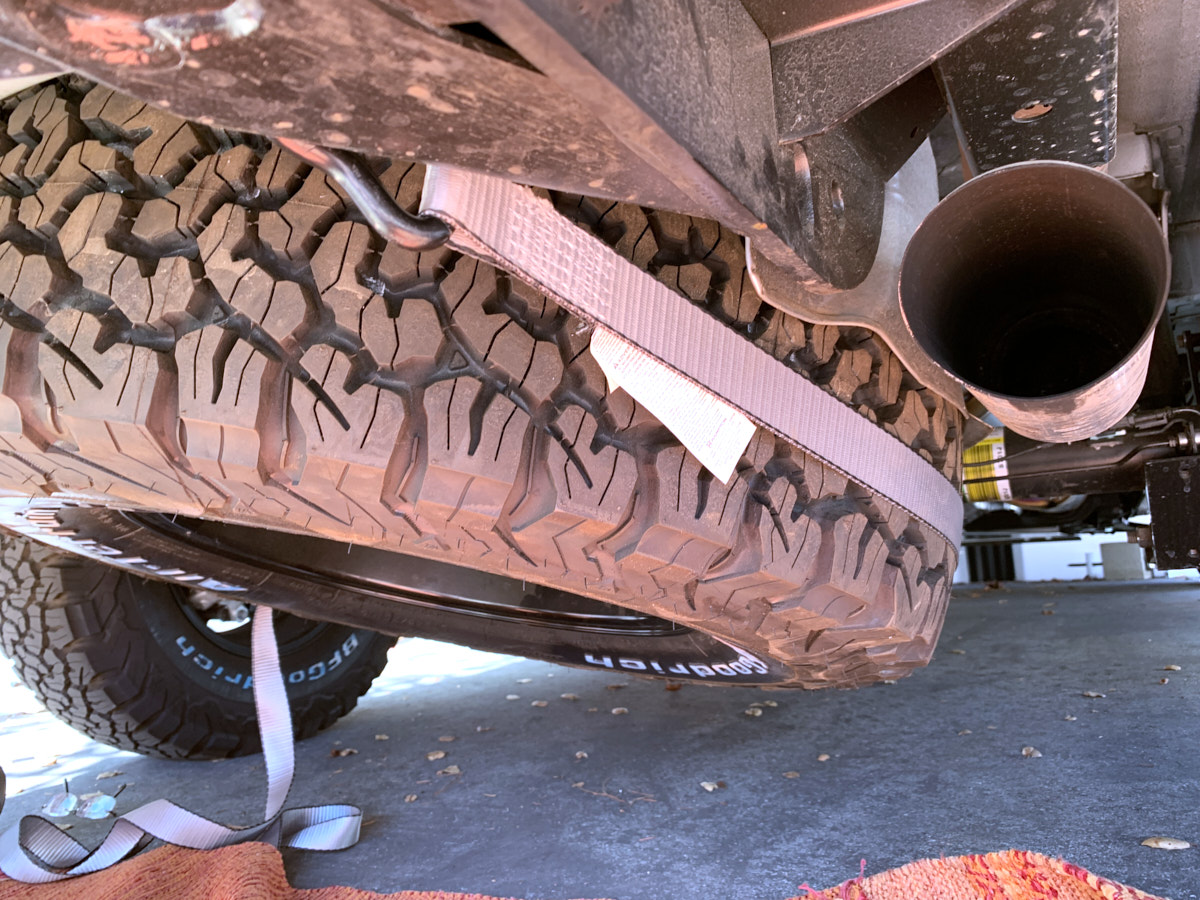
Looking over the Transit forum, I found lots of discussion of various larger, all terrain tire options but some of these sizes or models can require modifications to the van. I settled on BF Goodrich All Terrain KO2’s at 245/75R16 which did require a little trimming to a corner of the front wheel well (which QuadVan took care of) and also which appeared to be the largest size that could still be made to fit the spare in the space under the van, albeit with the help of a ratchet strap.
I also got some really nice-looking, black-painted, 16-inch Ultra Toil aftermarket wheels from TireRack to replace the plain factory steel wheels.
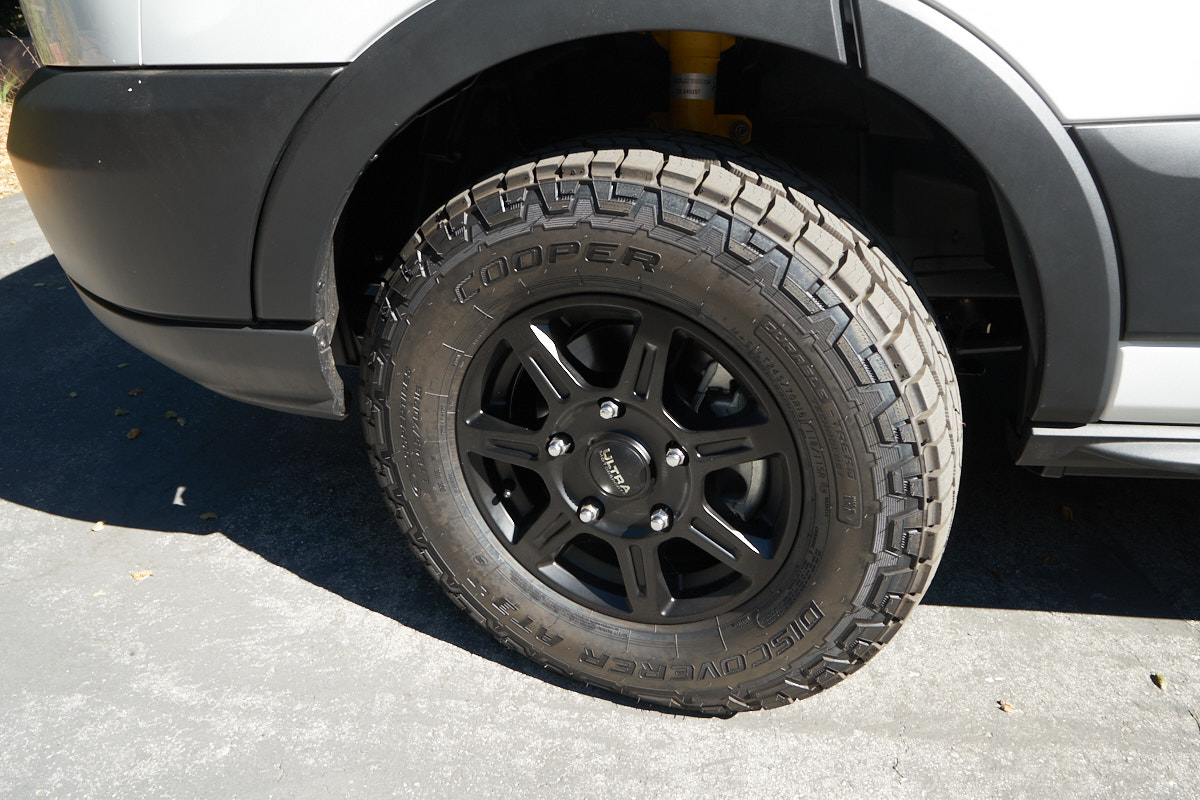 However, it turned out that getting one of those KO2’s at that size in the spare tire carrier under the non-extended length van wasn’t so easy after all. After trying various suggested tricks, I ended up selling the barely used KO2’s and getting the slightly smaller Cooper Discoverer AT3’s in LT 245/70R16 which fit fine in the spare tire carrier – no tricks with deflating them or compressing them with a ratchet strap.
Update (September 2023):
Following the rear-ending accident that crush the rear doors and damaged the frame rails, I discovered that the spare tire had actually been rubbing against the rear differential. So as part of the full van rebuild after the body shop finished its repairs, I requested that an Aluminess tire carrier be installed on the rear cargo door. I had originally considered doing this but didn’t like the idea of the rarely-used spare hanging on the back door all the time and preventing the door from being opened all the way to the side of the van. However, since the larger tire wasn’t really fitting properly underneath, I gave in. It’s been fine.
Update (March 2025):
While on a road trip in Utah, it became clear that the front tires were wearing down badly (and not evenly) so we took time out to get new tires. Since we now have the tire carrier on the rear door, I went with larger tires again to get a little more ground clearance. I chose Falken Wildpeak A/T4W at LT245/75R16 based on various recommendations and they’ve been running well.
Adding a Rear Sway Bar
I did not end up driving the van again until after the 4×4 conversion and the camper van build was complete, but when I did I immediately noticed that the handling had changed and it had become very uncomfortable. Even after it was fully loaded with our gear, we found that at highway speeds (60+ mph), any little curve or steering input (even staying within our lane) made the rear of the van feel like it wanted to swing out. The van felt fine with normal maneuvering at slow speeds but at highway speeds it was seriously unnerving both behind the wheel and riding as a passenger. It felt like you had to slow down below highway speeds even for very mild highway curves and, until you quickly learned to make very minute steering inputs, you’d easily fall into a series of over-corrections as the van wanted to swing one way and then the other. It was seriously uncomfortable to drive on the highway.
Apparently this is body roll brought on by the higher center of gravity from the camper van build and perhaps the suspension changes. For what it’s worth, we never experienced this with our larger Sprinter-based, LTV Unity RV – but then it also had dually wheels and a rear anti-sway bar. After talking to John at QuadVan and someone at my local 4×4 shop here in Scotts Valley, I’ve ordered a Hellwig rear sway bar to address this:
Looking on the Transit forum, I do see other folks have experienced excessive body roll and have installed either the Ford anti-sway bar or the Hellwig but also plenty of folk saying they’ve never had an issue and think it’s unnecessary. (I’ve gone with the Hellwig version as it’s both adjustable and larger/stronger.) There are reports of failures with the older design of the Hellwig on the Transit, but this has been supposedly addressed with an updated design that uses a pass-through bolt through the van frame now.
Update (February 2021):
After several months of waiting for Hellwig to ship the order, I searched around and found an online shop that had them in stock for the Transit. (Apparently Hellwig shut down their manufacturing due to Covid-19.) My local 4×4 shop installed it and we got to try it out over a week of mixed interstate, highway, and dirt roads. It definitely handles much better than it did. It still doesn’t feel as secure as our larger Sprinter-based 25-foot RV but it’s definitely better. There’s still some body sway in the rear pulling uncomfortably on highway curves, but it’s not so pronounced.
I still don’t like the steering on the Transit though – it always feels a bit loose and disconnected as you negotiate curves at highway speeds. I don’t know if that’s an issue with all Ford Transits or not.
Update (April 2021):
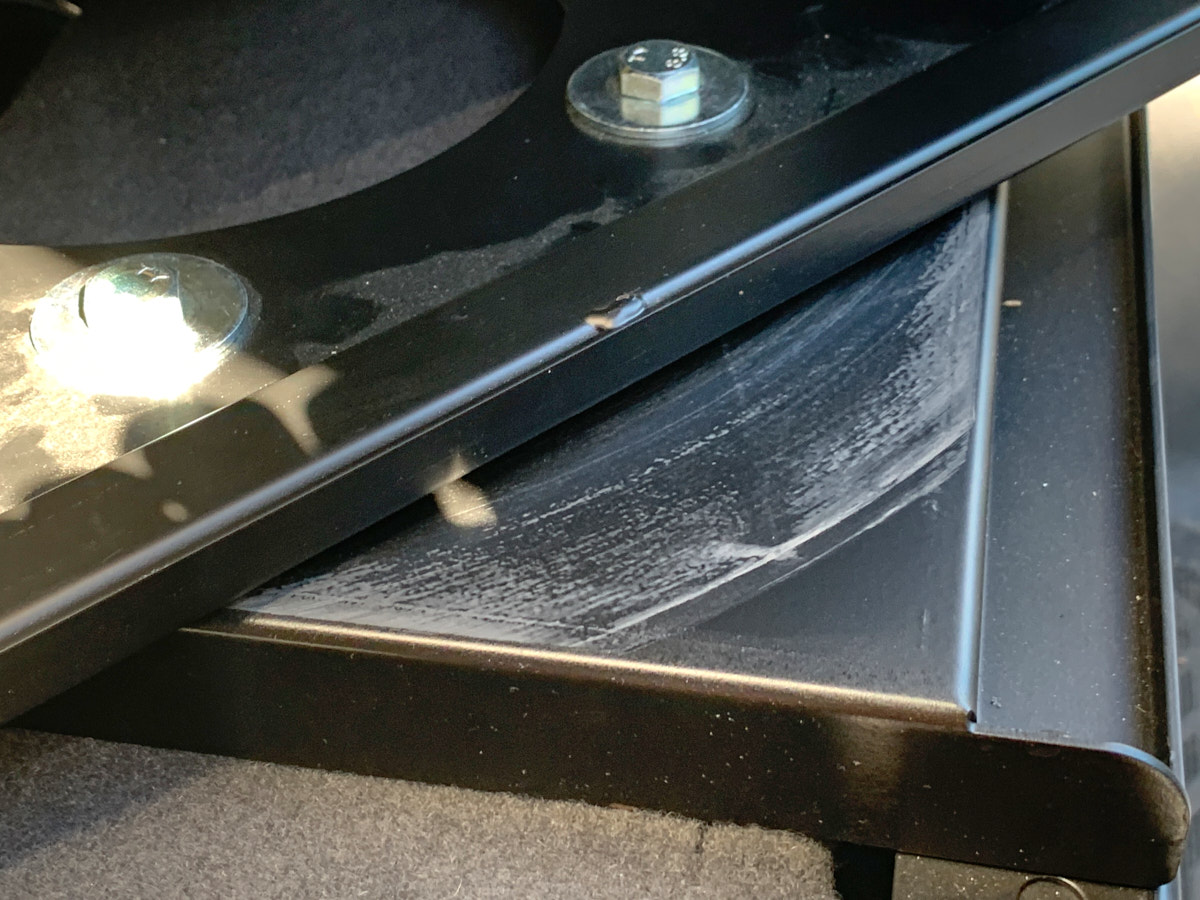
We experienced a failure with the sway bar installation after driving a rough road that caused the van to swing hard side-to-side. Started hearing a frequent loud popping/clunking noise from the rear end and after lots of investigation, I found what appeared to be a bent attachment point for the end links on the sway bar. I sent a picture to Hellwig and they responded in a couple of hours (yay!) and explained how the installation was done wrong on several points.
A couple of days later, I got some replacement parts and proceeded to redo the installation myself and discovered that my local 4×4 shop (“4x4andmore” in Scotts Valley) had pretty much ignored Hellwig’s instructions:
Installing the replacement end links and not repeating the shop’s installation errors eliminated the popping/thunking sound. It seems to be working fine again and it feels like it’s performing better in reducing sway. |
What happens when your sway bar is not installed properly: Now properly installed: |


Powered steps (driver and passenger)
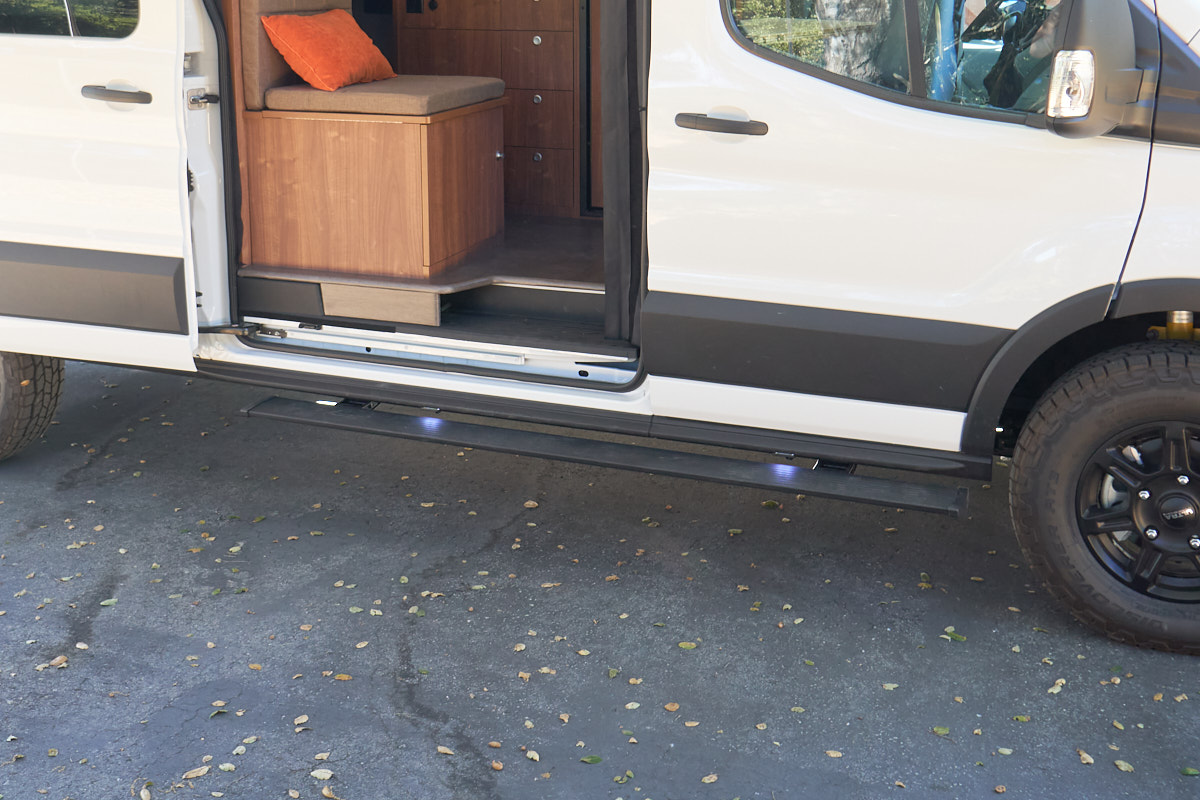 I opted for Amp Research’s really great powered/retracting steps or running boards. These tuck up and out-of-the-way to give you better ground clearance. This is apparently not a particularly easy install but Van Haus Conversions installed mine.
One thing to note is that they take over the OBD (on-board diagnostics) port under the dash for power and control signals. This became an issue when I went to install my stereo/nav unit upgrade which also makes use of the OBD II / OBD 2 port for the iDatalink features. However, you can install a splitter to allow both to access the OBD signals. Amp Research sells an expensive one but I found a $10 version that seems to work just fine.
- Amp Research Powersteps for both driver and passenger sides (affiliate link) or see Amp Research’s web page
- OBD2 Splitter (affiliate link)
If at some point you find the steps are no longer operating after your starter battery is reconnected or replaced, know that there’s a simple trick to reset them. Find the Amp Research control box under your hood and look for the wire running to the positive terminal under the hood. Disconnect that wire at the AMP Research box, reconnect it and voila! They’ll be working again!
Upgrade headlight bulbs
We noticed right away on the initial drive back from Oregon that the stock headlight lamps are pretty pathetic – at least if you’re used to modern headlights. I looked into getting some high powered LED lamps off Amazon but it seemed like there were mixed reviews on all of them with issues like fan noise, compatibility issues, early failures, etc. so I just ended up grabbing a pack of Sylvania SilverStar Ultra (affiliate link) replacement bulbs which are supposed to be among the brightest halogen bulbs available. They do seem to be an improvement, though not as nice as some of the white, high intensity headlamps I’ve experienced on other vehicles.
Installation is straight-forward – just try to avoid dropping and losing a socket down into the engine compartment as I did – never did find it again.
Replacement antenna
The 2019 Transit came with a traditional, tall, flexible antenna in front of the windshield. Unfortunately, the thing is a big source of wind noise at highway speeds. I decided to swap it out with this short solid antenna (affiliate link) just to eliminate the wind noise. It’s a super simple upgrade: just unscrew the old one and screw in the new one. Looking on the Ford Transit forums, I see that other folks have done the same, and some have just sawed off the bulk of the original antenna.
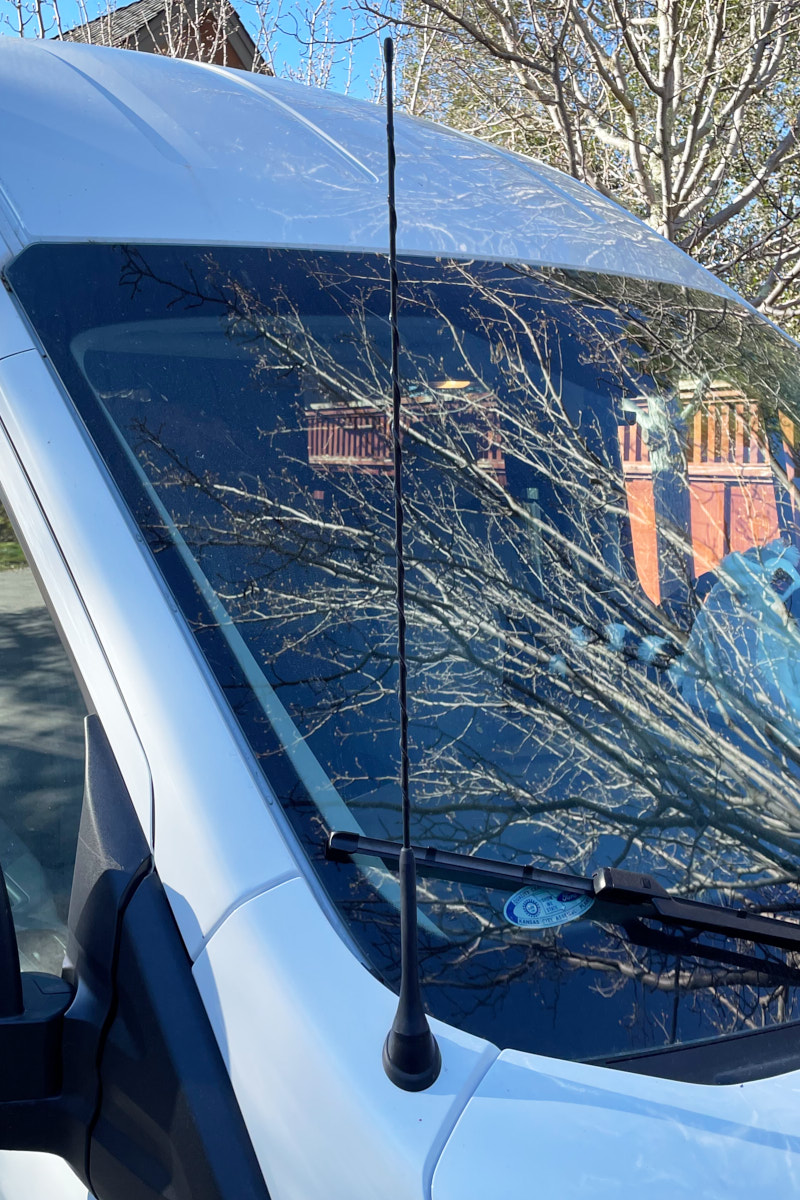

Shortening the antenna will probably affect reception of distant long wavelength radio (AM stations), but that’s no great loss to me as I typically stream music from my phone or radio/podcasts from the internet.
Swivel platforms for driver and passenger seats
 As part of our Van Haus build, swivel platforms were added to both the driver and passenger seats to make it possible to sit around the table. Van Haus chose the swivel platforms from SwivelsRUs. I had ordered the collapsible parking brake from the Transit factory so that a driver’s swivel seat wouldn’t be an issue. (Apparently it is possible to lower the standard parking brake – see FarOutRide’s instructions.)
When we first picked up the van from Van Haus, we noticed that the seats were a little difficult to swivel compared to our previous Sprinter-based RV but didn’t worry about it at the time. However, in the coming weeks, the seats became almost impossible to rotate while sitting on them – it would take all the effort I could put into them and they were nearly as difficult to rotate when not seated in them. It also became apparent that the plastic disc that was sandwiched between the two plates was getting rubbed raw and marred. I pointed out this issue to Erik at Van Haus, but he merely seemed to think that we were turning them the wrong way or binding up the wires – neither was true.
 Against Erik’s warnings, I ended up loosening the bolts that sandwiched the plastic rotation plate and spraying some silicon lubricant in between and this immediately freed up the swivel action. It was now possible to rotate the seat freely while sitting on it or not. However, this may have introduced a bit of play in the seat – even after tightening the bolts back down. I can’t remember whether it was always liek this or not, but the swivel platform shifts ever so slightly (with an audible clank). And it rattles like crazy on a washboard road if there’s nobody sitting in the seat.
The driver’s seat play isn’t so obvious because I’ve got it pressed back against the galley cabinet to maximize my leg room but I haven’t been able to tighten up the passenger side, no matter what I try – including using a large torque wrench on the bolts. It’s weird though as it doesn’t seem like the two outer plates actually move relative to each other. It’s like the whole swivel platform is shifting but I can’t see how. Here’s a video demonstration of what the shifting is like.
 Looking on the web, I found that the folks at FarOutRide.com have done a comparison of the four swivel platform options, including the ones we have from SwivelsRUs. They found that all four had some degree of free play or wobble. They actually used the SwivelsRUs model for over two years before switching it out for the Scopema model mostly because of how it’s 1-1/4″ lower and “went from a kind-of-awkward-but-that’s-OK driving position back to a normal driving position” and feel that it’s much better for driving comfort. That sounds tempting and I may try it eventually. I am certainly experiencing discomfort in my driving position but I think it’s because of how I can’t put the seat back far enough to extend my legs comfortably. (More on that later.)
I should note here that Van Haus decided to move the jack that was originally stored under the passenger seat to a cabinet in the garage portion but after investigating it, I found that it was no trouble to insert or remove the jack from under the seat by merely adjusting the seat fully forward. So, to save space elsewhere, I moved the jack back and added a couple of other related items under the seat, like my air compressor and tire repair kit. There’s lots of space there and it’s easy enough to get into – shame to use precious cabinet space elsewhere.
Replace radio/receiver/navigation unit
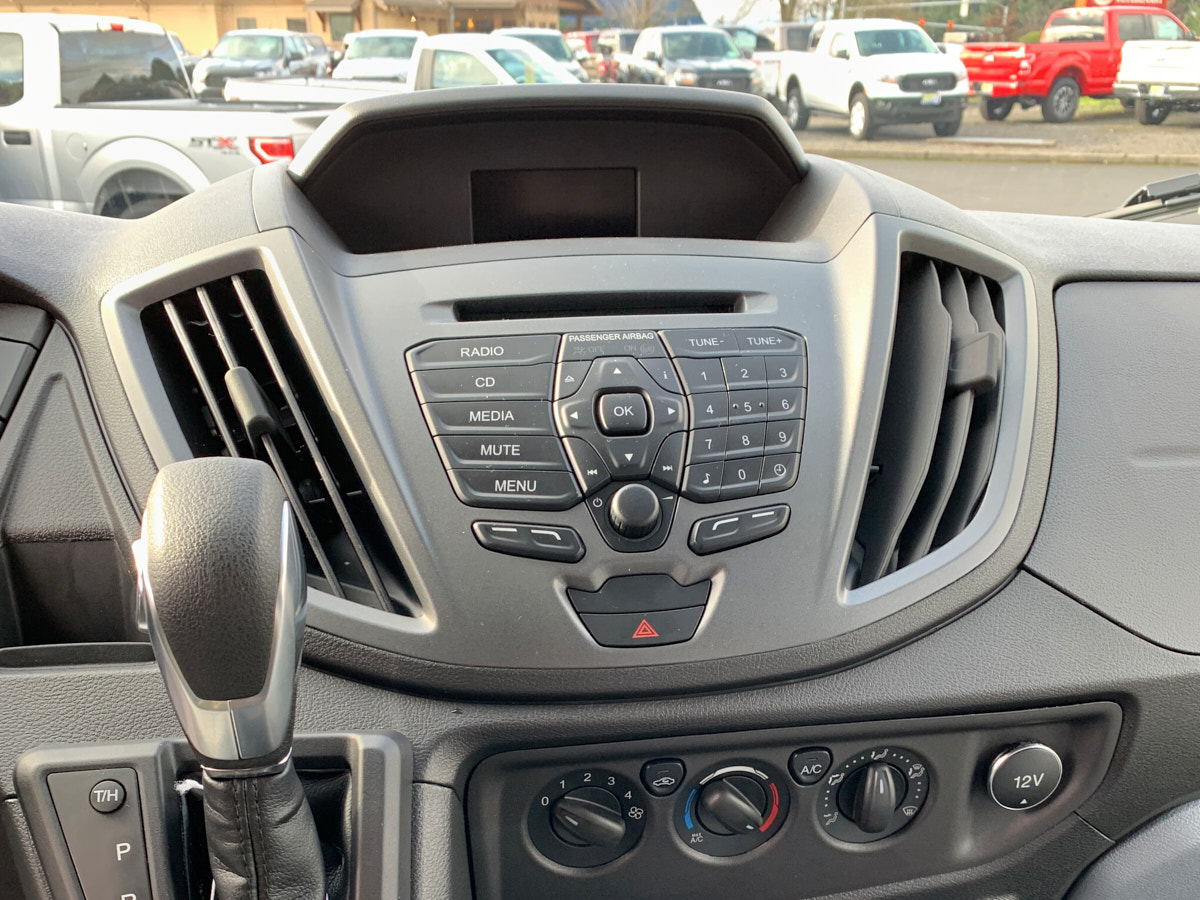
| In 2019, the available factory options for the radio/stereo/navigation unit weren’t great and the display screen was rather small. (The screen size is particularly important for easily viewing the rear view while backing up.) It sounds like the 2020+ models have a better option now, but for the 2019 build I chose the just-above-base AM/FM/CD w/screen model which was supposedly easier to swap out for an aftermarket system than the absolute base unit. Unfortunately, this base build didn’t include steering wheel controls.
By the time the van conversion was finished, several aftermarket car stereo systems were just coming out that provided large, oversized, “floating” displays that could be mounted from a normal single or double DIN opening. Sweet! I decided to go with a Kenwood model that offered a 10″ screen, wireless CarPlay as well as built-in navigation support (in addition to that provided through Apple CarPlay or Android Auto) and integration with Kenwood’s separate forward dash camera unit. It also supports iDatalink Maestro which provides access to vehicle information (engine temps, tire pressures, etc).
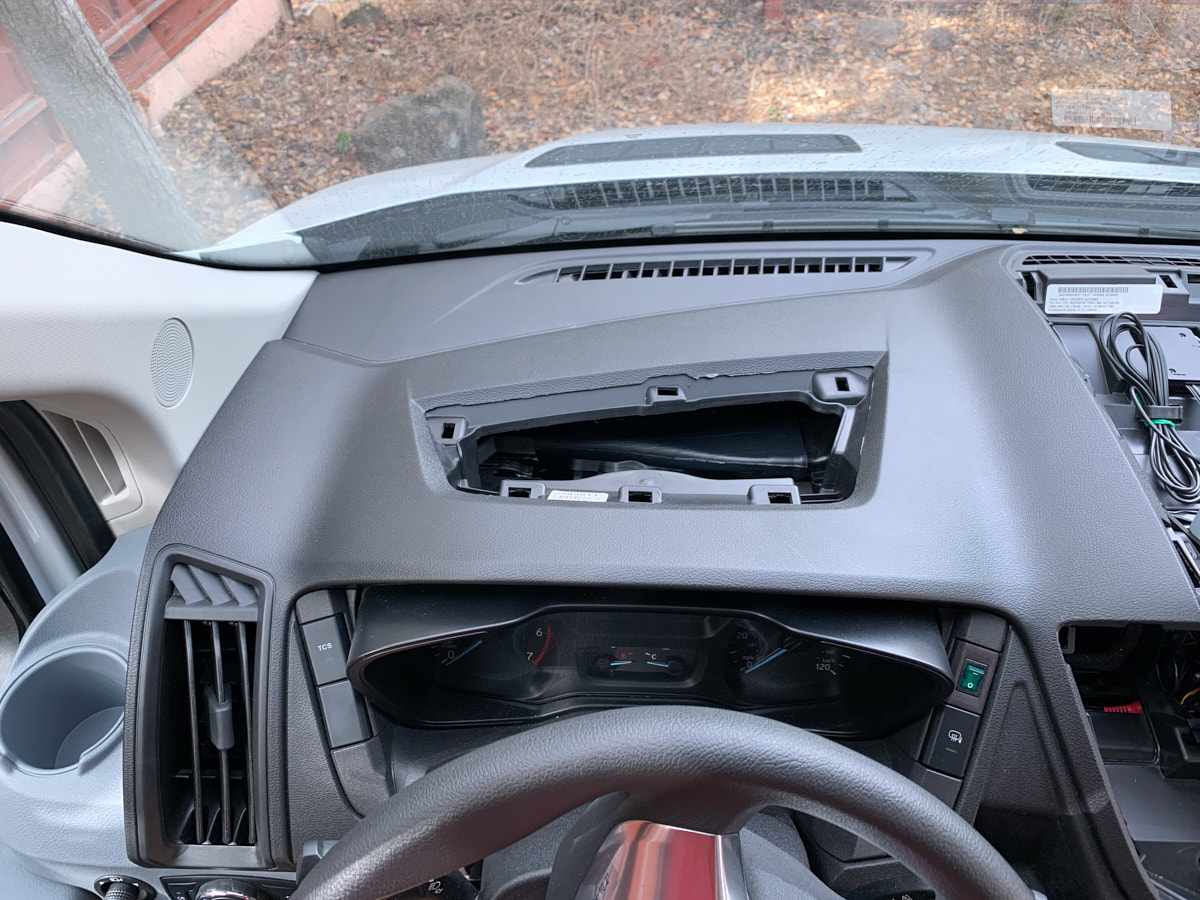
Crutchfield is really nice for ordering car stereo upgrades since they’ll also identify and package up all the necessary fascia and wiring kits for your particular vehicle. Most of the provided kit worked well except that the replacement fascia (Metra 99-5835G Dash Kit) has a terrible clip system for securing the piece to the dash. Many of the clips were very difficult to secure and fit poorly, many of them even popped out and were lost to the innards of the dash in the process of test fitting things together and one clip point broke entirely. I ended up adapting some of the clips from the original dashboard pieces and jury-rigging others to get things to secure in place. It was quite the unnecessary pain. You’ll find that initially the screen won’t fit the Transit’s dashboard in its factory configuration but the unit comes with an additional, extended mounting bracket (and instructions) to allow the screen to be installed with room to spare.
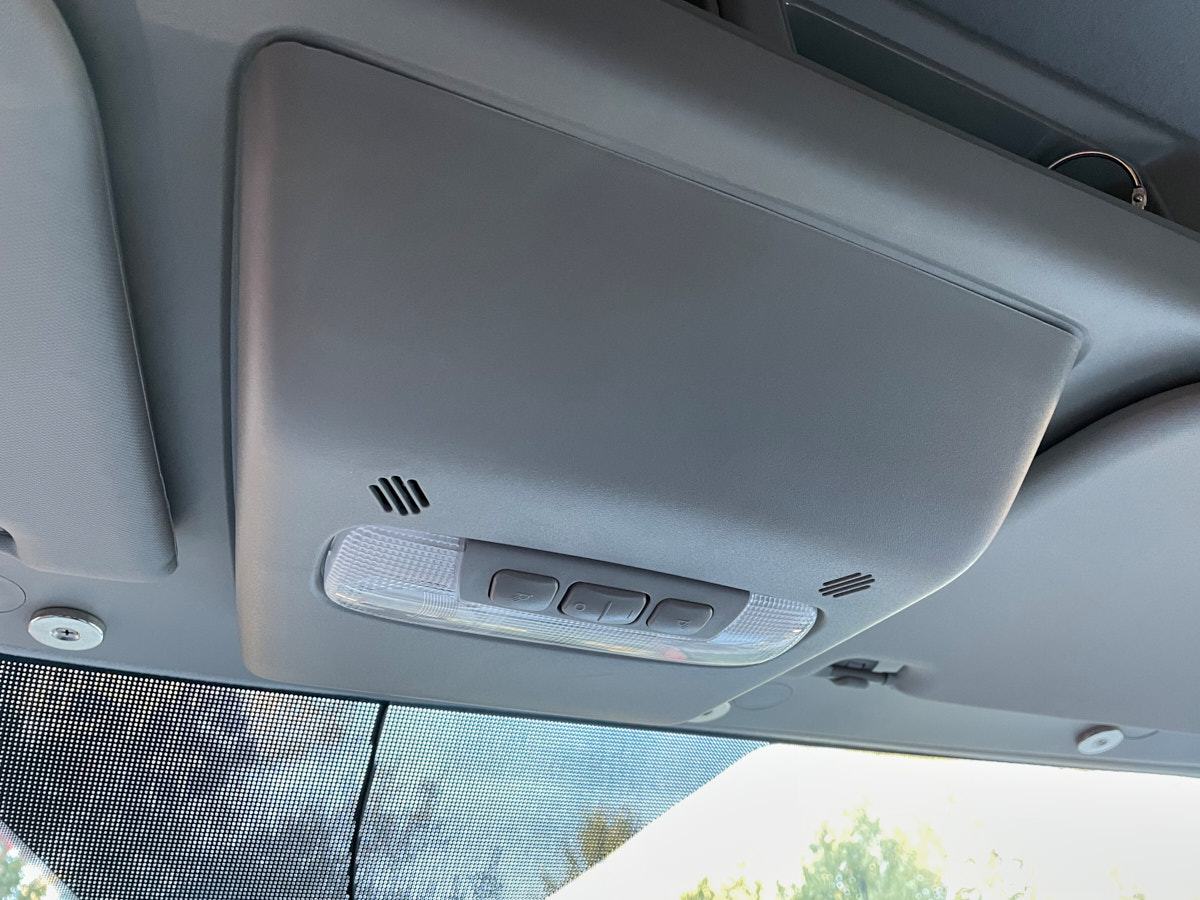
I secured the GPS antenna underneath the replacement top dashboard piece that fits behind the display screen to give it a clear view of open sky through the windshield. For the provided microphone, I routed it up to the overhead console. There’s a slot for a factory microphone inside the overhead console and I secured the microphone in there pointing towards the air holes in the slot and sealed it off behind the microphone. Testing the microphone in this location proved that it worked well for phone calls – I was easily heard even while driving. I routed the microphone wire (along with the dash camera cable) along the ceiling fascia, down the A pillar behind the air bags and just under the top of the dashboard to the mounting location for the receiver. There’s an easy to open access panel on the top of the dashboard behind the steering wheel for doing this. Removing the A pillar covers takes mostly a lot of force but even so, the driver side was extremely difficult to fully release because two of the clips are unlike all the others and seem to be designed to not be able to be removed once clipped. I don’t have any advice here even after looking for help online – others have had similar difficulty. I had to mess with it for a long time trying to get fingers and other tools in there to get those two odd clips free. I wish you luck! Unlike the A pillar covers, the overhead console should not just be pulled off forcefully. The side closest to the windshield is hinged. You have to open it from the front side, towards the seats. The two clips in front that hold it in place can easily break – I broke one and had to repair it. (I used crazy glue and a bit of metal as a splint to give it strength again.)
One surprise during the installation was finding that the Amp Research powered step installation had taken over the OBDII port completely. This port is also needed for the iDataLink Maestro. I was able to get around this with an inexpensive splitter cable for the OBD connection and it’s working fine. |
|


Dash cam installation
 While installing the Kenwood receiver/navigation system, I also chose to put in a forward-looking Kenwood dash camera. The Kenwood DRV-N250 provides 3 Megapixel recording with high dynamic range and includes a number of additional features like collision warning, parking recording/monitoring, GPS integration and auto-save on sudden motion. Most helpful though is that the unit integrates into the radio/navigation system display.
I mounted it about where the rear view mirror would be and ran its cable (along with the receiver’s microphone, see description above) along the top of the windshield behind the overhead cover, down the A-pillar behind the air bag and under the top of the dash to the radio/nav system location. One tip on doing this: remove the cover on the top of the dashboard in front of the steering wheel for easy access to threading these cables. It’s an easier and shorter path then going down under the steering column and back up again.
Speaker upgrade
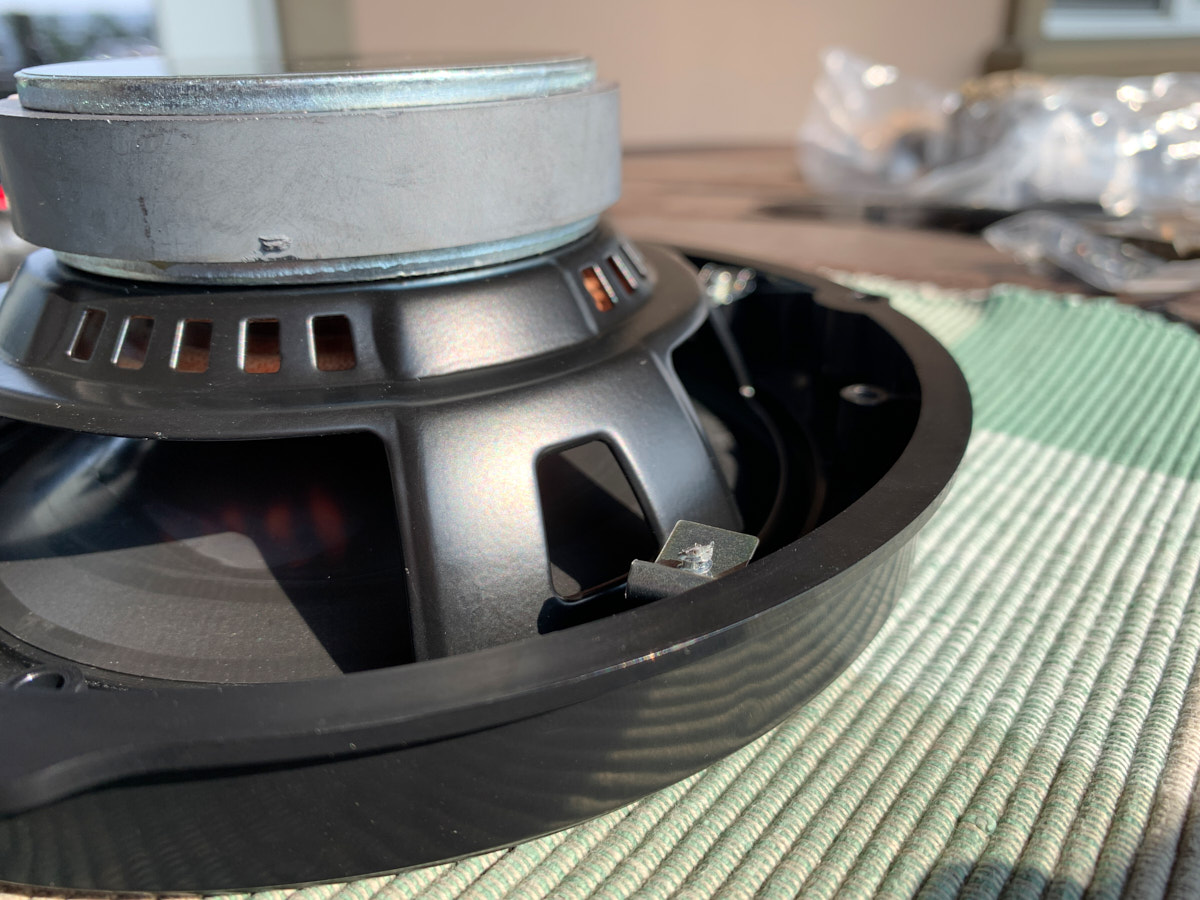
| Not surprisingly, the factory speakers that come with these base radio/receiver units are very basic and sound correspondingly terrible. A speaker upgrade was definitely needed.
Crutchfield has a slick new system for previewing the sound of car speakers using one of a number of known headphone sets. I don’t know how accurate it performs but it definitely let me hear differences and helped me to choose one set of component speakers among many possible options – and I’m happy with the end result. I went with these Focal 6.5″ component speakers which had the added promise of being able to fit into the factory speaker locations without too much trouble. However, the speaker installation and wiring ended up being the biggest hassle of all.
The factory configuration puts a tweeter in each of the two A pillars and a woofer down low in the door panels. These are wired together at points deep inside the dashboard that are pretty darn inconvenient. To install a decent pair of component speakers (with separate tweeters and woofers) you’ll need to change the wiring somewhat. One option is to use the existing wire run to the woofer in the door panel, connect the crossover here and mount it on the door panel and then run the wires to the tweeter back through the wire channel and pin connectors through the door jamb and up to the A-pillar. (This is what the folks at FarOutRide did.) I wasn’t keen on messing with that door jamb connector and drilling it open, and besides (darn it), there are already wires running to the tweeters! I couldn’t find anybody on the web who had located where the tweeter wires were spliced into the wires leading back to the receiver, but I was determined to do so. It took a little bit more removal of dashboard pieces on the passenger side, but sure enough I was able to locate the splice point buried in a friction tape-wrapped bundle of wires just to the right and behind the glove box. There’s plenty of room to mount the crossover in there. There wasn’t really enough room in there for my hands to do normal wire crimping, but these fantastic Posi-Twist or Posi-Lock wire connectors worked well in that tight space. (Amazon affiliate links) The driver side splice point proved even more difficult to locate and eventually impossible to actually reach. I found it, way up behind the dashboard against the firewall but there’s no way of getting to it without completely disassembling the dashboard – which I wasn’t going to do. Instead, I decided to install the driver side crossover behind the receiver itself, connecting the factory wire run to the driver side woofer as is and running a new set of wires for the driver side tweeter under the top of the dashboard (following the same path as the microphone and dash cam wires described above). This is what I would recommend as easiest to do: mount the crossovers behind the receiver in the center of the dash using the existing wiring for the woofers and then run two new sets of wires to the tweeters from the crossovers, routing them just under and through the dash. After wiring, the Focal RSE-165 tweeters can simply be slipped into the factory openings in the A pillar cover and secured with some friction tape. As I described during the radio receiver upgrade, removing the A pillar covers takes mostly a lot of force but the driver side was extremely difficult to fully release because two of the clips are unlike all the others and seem to be designed to not be able to be removed once clipped. I don’t have any advice here even after looking for help online – others have had similar difficulty. I had to mess with it for a long time trying to get fingers and other tools in there to get those two odd clips free. I wish you luck! You’ll need to remove the door panels to access the woofers. There are a few guides on YouTube for removing the door panels as well as a nice written guide from FarOutRide.
The next bit of trouble came from fitting the woofers into the door panels. The Crutchfield-supplied speaker adapters are just a lot of trouble. They don’t fit as is and I had to shave off a bunch of plastic bits and then find some different screws and then cut the tips off those screws to get them just the right length so as not to dig into the door frame. I eventually got them installed but screw all that. Use these speaker adapters from Hein instead (impactproducts on eBay) which are specifically fashioned for our Transit vans. I’m sure they’ll work great, just as their other adapters did for my old Sprinter-based RV. |
|


Add sound deadening and insulation to cab doors
Van Haus Conversions had already applied sound deadening material around the van, including to the cab doors. However, we had some leftover Thinsulate insulation from my speaker installation years ago on the Sprinter-based RV, so we decided we might as well use up the rest of it here on the inside of the door panels. The idea is just to reduce road noise and resonance through the cab doors and it probably helps a bit with insulating from heat and cold.
For the insulation, it’s just a matter of cutting it to fit the removable door panel and spraying adhesive before pressing it in place:

For instructions on how to apply the sound deadening material, refer to my write-up on our Sprinter-based RV.
- 3M Thinsulate SM400L automotive insulation
- Noico heavy barrel roller (affiliate link) (one form of sound deadening material)
- 3M Hi-Strength 90 spray adhesive (affiliate link) (for the insulation), this stuff is great!
- 3M foil tape (affiliate link) (for covering cracks, edges and seams of the deadener material)
- an automotive panel removal tool (plastic/nylon tool with a thin leading edge to pry off panels)
- work gloves (the aluminum edges of the deadener material are sharp)
All-weather front floor mat
This one-piece all weather floor mat from WeatherTech works well and fits well in the cab area:


Drop leaf swivel table system on Lagun mount
We ordered a lovely, custom-sized drop leaf bamboo table from WeekenderOutdoors on Etsy – large enough for board gaming and still fits securely behind the driver’s seat:

Awning-style front windows and rear bunk windows
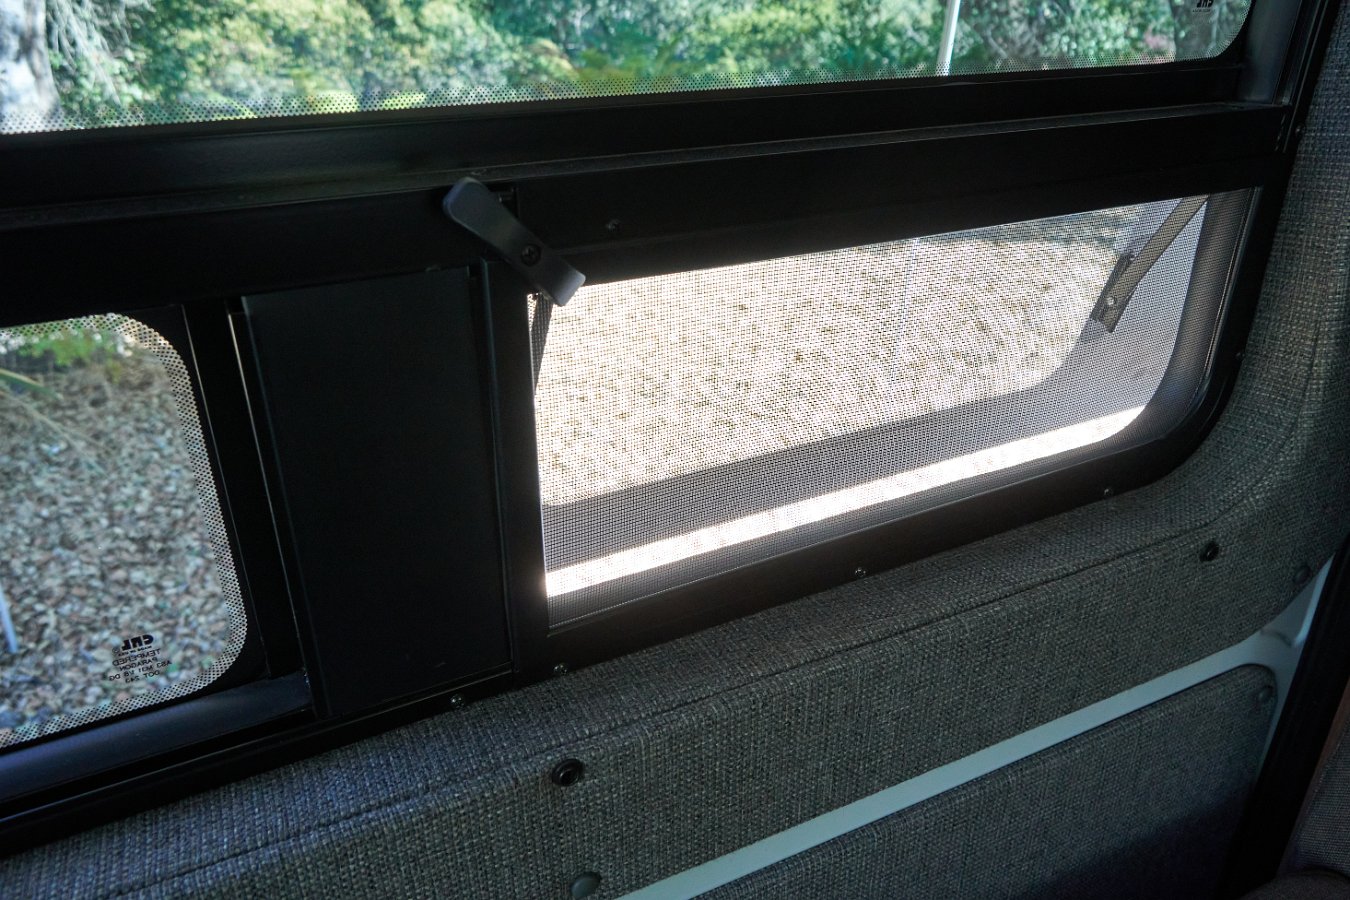 While I opted for no windows in the rear cargo doors to provide better insulation from the sun and the cold, we did have large windows added to both sides up front around the gallery area and much smaller bunk windows in the rear along the bed.
Both the front and rear windows are awning style windows from CR Laurence. While they don’t open very far and probably don’t provide as much ventilation as slider windows, they can be left open in the rain and they’re more secure from forced entry. The amount of ventilation isn’t really a problem though since the MaxxAir fan in the roof can push or pull enormous amounts of air through even just a single partially opened window – and of course we can open the sliding door and cargo doors if we want things to be very open to the air.
- CR Laurence Transit Driver Side Forward Window
- CR Laurence Transit Passenger Side Forward Window
- CR Laurence Universal Non-Contoured Awning Window
 One issue with the front split pane awning windows that I wasn’t aware of when we decided to go with them is that the passenger side only has one of the two panels that can be opened. This was apparently done because the Transit has an old-style door pull lock immediately below the window and they were concerned about someone being able to force themselves past the bug screen and pull the door lock open. However, with the window installed, the sliding door lock is now almost impossible to grip and pull on to unlock anyway. Might as well remove it. And even if the lock pull were left in place, I’d still like the option to be able to open this window for increased ventilation, particularly since I tend to park with the back, heavily insulated end of the van facing the sun which places the sliding door side in the shade.
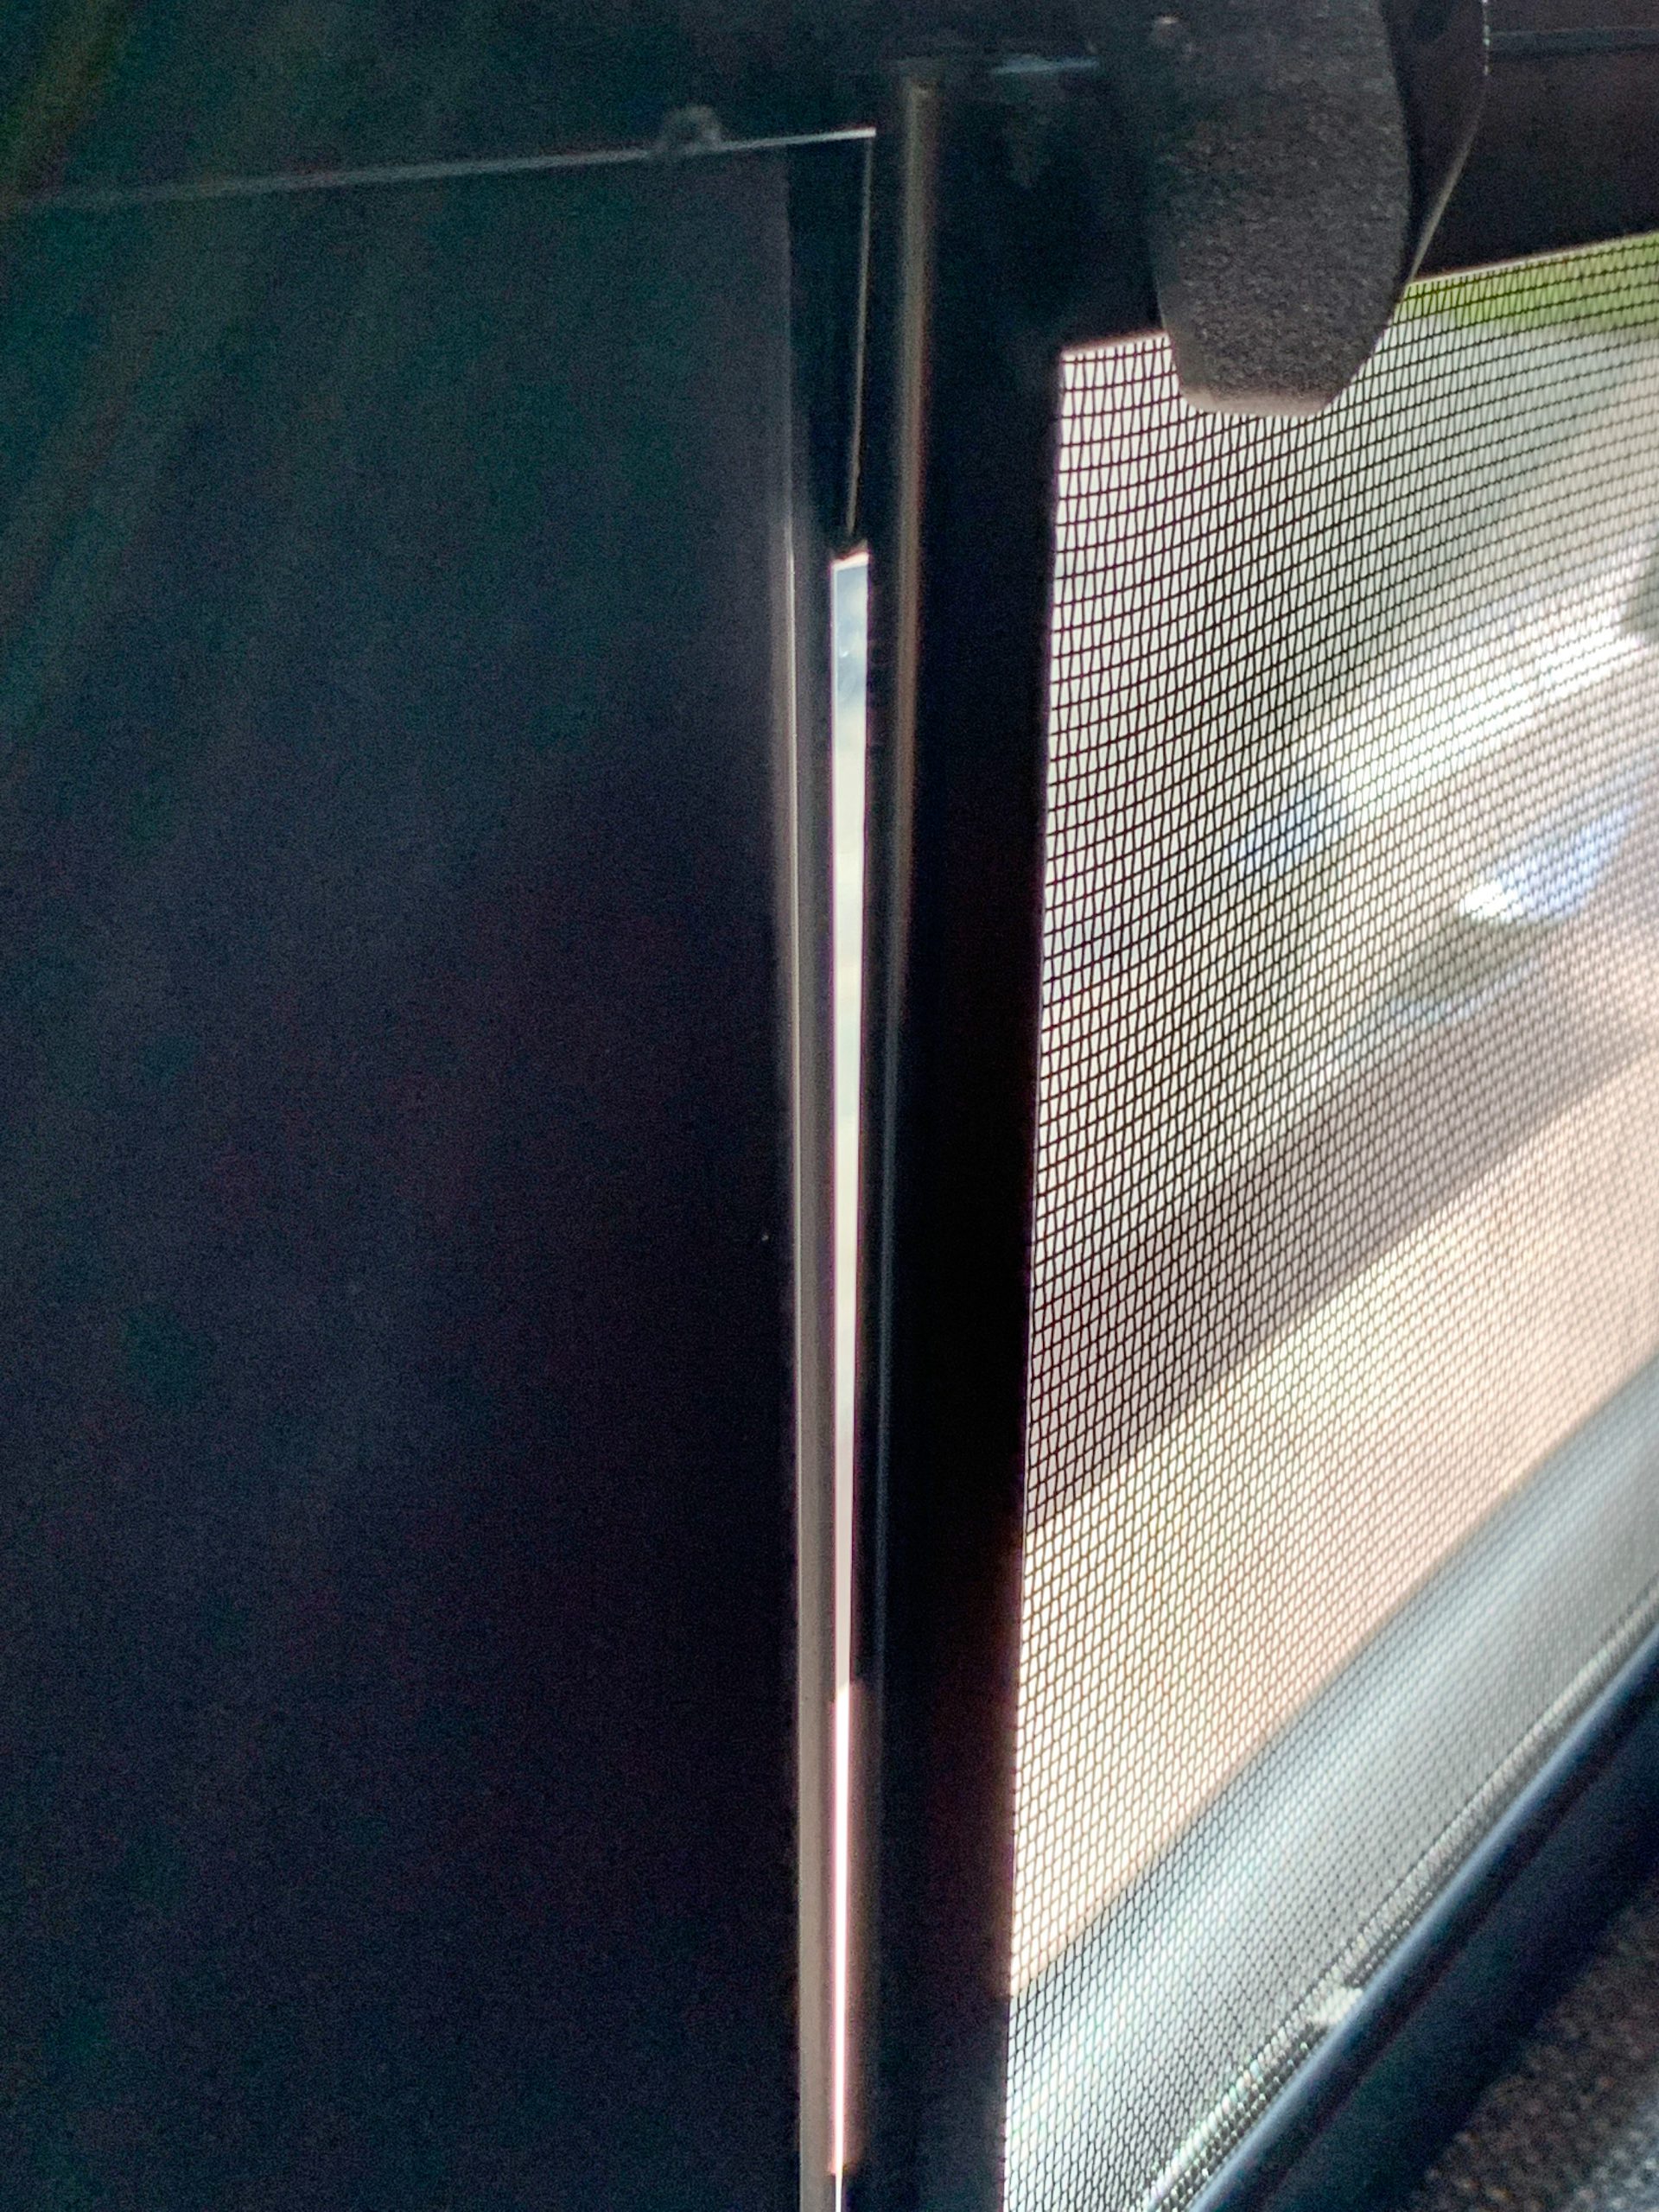
Another issue we noticed right away with these CR Laurence windows is that the front windows have very poorly sized bug screens. All three of the panes that can open have screens that leave a large gap on either one side or the other of the frame. This would be quite the nuisance when parked somewhere warm that’s filled with no-see-ums, gnats or mosquitoes – as we’ve encountered in previous travels. I was able to fix this with some black window insulation but I think it’s ridiculous that CR Laurence doesn’t make their bug screens fit properly to their windows.
Electric awning and exterior LED strip lighting

As part of the build out from Van Haus, they installed a 10.5 foot long Fiamma Awning F45s with electric motor. We very much enjoyed the awning from the old Sprinter-based RV and knew we’d want it on the van for making our own shade in hot weather. I also asked for it mounted on the van side wall – which apparently requires some reinforcing to the interior of the van wall — but I think it works better and provides more shade mounted closer to the door and ground, and aesthetically looks nicer compared to being mounted up on the roof.
Van Haus also wired up some LED strip lighting but unfortunately they ran it on the inside of the awning cover, so the lighting is not useable unless the awning is actually open. Also, the bare LED strip lighting produces a strong glare of light that’s unpleasant to sit under or look at. So I ordered some new strip lighting from Amazon and an aluminum diffuser channel to mount along the underside of the awning cover. I was able to reuse the existing wiring after drilling a small hole at one end of the cover to route the connecting wires.


This works much better: you can use the lights with the awning open or closed and the light is nicely diffused and not aggravating at all. Might be nice to add a dimmer switch too.
We’ve also picked up some USB-powered string lights that plug into the external 12V port for a more festive lighting arrangement:

Insulated window coverings
Van Haus provided a set of folding insulated window covers for all of the windows and the cab area. Their design has the window covers snap into place over the wall openings and you can fold them up and snap them in a mostly open position or remove them entirely to store away when not in use.
For the front cab area, they use the same material cut into a single large piece that hangs in front of the windshield, dashboard and driver/passenger window – sort of like a solid curtain. It snaps into place with magnets over the windshield and snaps around the driver/passenger windows and a pair of hooks on the visor arms in between. It’s an interesting idea but we found it to be a minor hassle to hang up and take down and it doesn’t really work that well for keeping the heat in or out since it doesn’t sit flush up against the windows – it just hangs in mid-air like a partition. It also doesn’t make it easy to enter or exit via the front doors.
So I ended up getting a roll-up, reflective thick insulated windshield cover that we can slide into place day or night for keeping heat in or out. It rolls up small enough to slide in vertically between the driver’s seat and the “B-pillar” of the van.
I looked online and found various insulated window covers made especially for the Transit driver and passenger windows. The first set I got was from Nightfall Overland but these turned out to be less than ideal because the stitching on them left fairly large holes that were big enough to let out light (not great for “stealth” camping) and probably didn’t help with their insulating properties.

I found a different, more expensive set of window coverings from a local Santa Cruz company, Strawfoot Handmade and these are really great. The stitching is very fine and completely opaque, no light leak at all, they seem very insulating (using Low-E insulation) and they snap into place snug against the windows with magnets, allowing you to still open and close the doors. They’re reversible with light and dark colors for either keeping out the heat or for stealth camping – making the van appear to be completely dark and unoccupied. Best of all, they’re very quick to unfold and slip into place – which is great when sightseeing in hot weather and repeatedly sealing up the front of the van from the outside heat.


They actually make them for all the windows of standard Sprinter and Transit camper vans and it would be tempting to replace the other Van Haus window covers with them as it seems to me that having the insulation right up against the windows would work better in cold winter weather than the Van Haus designs which leave a large air gap between the window itself and the covering over the window box opening.
Bug screens for side door and rear cargo doors
We’ve now tried THREE different versions of bug screens!
Here’s the original set from VanUpgrades:
I opted for some magnetic closure bug screens for both the side door opening and the rear cargo area. There are a few different varieties available from VanUpgrades and we went with the 4.0 version of their magnetic sealing screens and the stronger, heavier “no-see-um” screen in case the cats try to climb on them. (Hasn’t happened yet though.)
The screens work well and, most importantly, it’s super easy to prop them open when there are no bugs to worry about – which is of course most of the time. However, in the evenings, it’s really nice to be able to leave the van’s side door open and make use of the bug screen to keep out moths and other bugs attracted to the lights. It’s also been nice to have the screen closed in cold weather so that we can leave the sliding door open at times but still keep out some of the cold and wind.
I definitely recommend including the bug screen for the sliding door entrance but I’m now thinking that the rear cargo area screens are not all that useful. If we’re ever in an area with lots of bugs, we simply wouldn’t leave the rear doors open anyway. So I’ve taken them down and stowed them away for now.


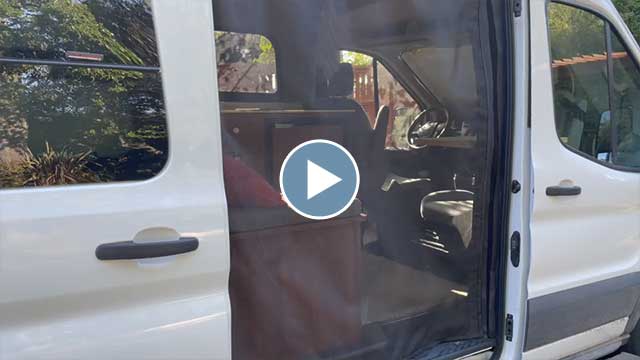
Here’s a little video demonstrating the use of these rear and side door screens:
Here’s the second set of screen doors we switched over to, the BugWall:
As part of the process of rebuilding the van after we were rear-ended in 2022, we opted to try a new design for screen doors – the BugWall for both the side door and rear cargo area – with a few modifications.
With the side door screen, the BugWall best feature is that it normally remains rolled up and out-of-the-way until you have need for it. Well, mostly out-of-the-way. Mod#1: I modified it by lifting the top straps and securing them to the door frame above the BugNet’s own frame. This way it’s now completely out of the way and not reducing the height of the door opening:

Not only does this screen door design keep it out-of-the-way when it’s not needed, it also improves air flow in hot weather because it’s not hanging in front of the door window. As with the previous bug screen design, we also make use of it in cold weather sometimes because it traps heat and mostly keeps out the wind while still giving a more open feeling than having the van’s sliding door closed.
When you want to deploy the screen, you release the straps keeping it rolled up and zip the sides closed. This leaves a magnetic closure down the middle of the screen for quickly entering and exiting. However, we’ve found that the bottom of the screen doesn’t really sit flush to the floor of the van. If you’re parked on a slight slope, the screen would hang away from the van leaving a large gap along the bottom for all the little flying buggers to invade. Mod #2: We fixed this by sewing in a few magnets along the bottom trim of the screen and now it clings to the metal bottom of the door frame.


The design of the BugWall rear cargo door screen also allows it to be kept out-of-the-way when not needed. The bottom portion of the screen is actually an opaque and somewhat insulating material. We keep the upper half portion covering rear of the bed all the time and keep the bottom half tucked under the bed to leave open access to the cargo area. We bring it all the way down only in cold weather. This is much more convenient than the VanUpgrades design where you had to pull open the bug screen from side-to-side every time you wanted access. (So much so that we actually stopped using and removed the old rear screen entirely, as I described above.)

The rear screen can also be fitted with a transparent plastic top half (pictured above) to allow an open view while keeping out the wind. We really like this feature.
Update (October 2025):
And finally the latest (third edition) of a bug screen for the sliding door entrance:
The rear BugWall screen continues to be fine but we had some issues with the BugWall version like the bottom of the zipper getting caught (and broken) by the closing of the side door if you’re not careful to make sure it’s tucked safely out of the way. Also it had a tendency to hang away from the bottom edge of the entry leaving an open gap for bugs to come in. We put up with it for a while but eventually I decided to try a different design.
This one is from VanEssential and there is no zipper to get caught along the closing edge because it’s a simpler design. It’s just a single piece with a magnetic seal along the right side. Like the earlier model, we leave it up and out of the way until it’s really needed. Unfortunately, since the screen is almost as wide as the door, it’s a bit of a hassle to roll up just because it’s so wide.
Also, we haven’t been somewhere with this net where we had to deal with clouds of gnats or no-see-ums, but so far we’re finding that it doesn’t make a very tight seal down either the vertical magnetic strip nor across the bottom. Perhaps we can improve on this by adjusting how tightly it hangs.


Bike Storage
A key criteria that directed the design of the van was the desire to have our two mountain bikes stored safely inside – both to reduce the risk of theft but also to avoid the massive amount of gunk that would collect on the bikes when we had them mounted behind the old RV on a bike rack while traveling on dirt roads. So yay, our bikes can now be stored inside the van!
Under the bed platform, the garage area has cabinets on either side housing the water tank, battery bank, inverter, heating system, etc as well as hiding covering the wheel wells and providing some organized storage. Between these two cabinets, I wanted to minimize the amount of space the bikes would occupy. I ended up miscalculating how closely I could position the bikes and still be able to roll them in and out. When I got the completed van build back from Van Haus, I had to spend a bunch of time figuring out how to make the bikes actually fit.

First off, I removed one of the lower panels from the cabinet (I don’t know why these panels were doubled up) and I cut open a hole large enough to allow a bike pedal to be slipped in so that one bike would be practically flush against the right side cabinet wall — with a felt pad to keep the rear wheel mount from rubbing against the cabinet. It then became apparent that I had to cut down the size of the cat apartment box that Van Haus had built for me to have any chance of getting the second bike to fit alongside the first.
Van Haus provided a set of L-tracks installed into the floors and cabinets but it was clear I would need to create mounting plates so I could offset the position of the handlebars of the two bikes from each other. I ordered some pre-cut, thick aluminum plates and drilled holes in them so that they could be secured to the L-track. Then I found I still needed to raise up the fork mount of the first bike so that the second bike could be rolled in under the handlebars of the first. I accomplished this with a wood block attached to one of the aluminum plate.
Lastly I bought a pair of RockyMounts Hotrod bike fork mounts which come with swappable through cylinders for the three common axle sizes – all three of which we can actually use (12x100mm, 15x100mm, and 15x110mm: road bikes, mtn bikes and mtn e-bikes).


Unfortunately we found out the hard way that, if left unsecured, the pedal cranks of the second bike would slowly migrate around until the pedal was rubbing up against the frame of the first bike – scratching off the paint. :-( Well, we found someone to repair the paint job and I’ve now learned to secure the crank arm to the rear of the frame with a velcro strap and we slip padded covers over the pedals between the bikes, just in case. I also strap down the rear wheels to another L-track so that the bikes can’t bounce around and potentially hit each other while driving on rough roads.
It took lots of fiddling and measuring and problem-solving but we finally have an arrangement that works. I add a cable lock to secure the bikes to the mounts as an added precaution.

Cat Apartment (and Litter Box)
 One of the wonderful things about the camper van is being able to take my two cats, Pan and Hera, along on our trips. They’re not too keen on the actual driving part but they do enjoy hanging out and exploring the places we go. And of course it means we can stay away from home in the van as long as we want since the cats are with us and not left behind or needing a caretaker.
To this end, I present the cat apartment box – provided by Van Haus. It mounts into the garage space under the bed platform and is split between an area towards the front where they can access their food and water and an area in the back where their litter box resides. There’s a door at the rear that allows me to remove the litter box every morning to clean it out, the top lid can be raised if needed for cleaning out everything and the whole apartment is removable – it’s secured in place to one of the L-tracks on the floor of the garage area.
Unfortunately, I totally misjudged how much space would be needed for mounting our two bikes and I ended up having to completely disassemble and then cut up the cat apartment and put it all back together again – after learning how to make these fancy pocket holes (and buying the specialized jig).

I added a scratch pad inside (which also helps prevent tracking of cat litter) and a little motion sensor light as it can be pretty pitch black back in the litter box area at night. I’ve got a five-gallon bucket in the back where I stow the bags of used cat litter until we can drop them in a garbage dumpster. I do have to unload a few things from the back of the van whenever I go to clean out the litter box, but it’s not too much of a hassle – particularly since it means having the kitties with us!

Storage Organization
Here’s the garage area before and after fully loading:
That’s two mountain bikes and all of our biking gear, an inflatable two-person kayak plus paddles, vests and assorted kayak gear, a not-small telescope (8″ Schmidt-Cassegrain type) with mount, tripod, eyepieces and other astronomy gear, my camera gear, lenses and tripod, folding chairs and table, shoes and boots, portable grill, portable solar panel, water supply hoses, leveling blocks, tool box and repair supplies, hatchet, hand saw, shovel, lopper, tow strap, jumper cables, extra cat litter plus a sealable bucket for used litter and of course the cat apartment itself: one room for the litter box and another for the feeding area.
As I mentioned with the swivel seat platforms, there’s actually plenty of space under the passenger seat to store things besides the jack that’s already there, like an air compressor and tire repair kit. The space is even more accessible when you just move the seat forward:

One thing I regret about the Van Haus design was that the storage space provided via the cabinets in the garage area uses large hinged doors that required us to move or unpack around to access. In particular, we’d have to pull both bikes out to get to the cabinet on the right. So what I ended up doing is removing the cabinet doors entirely to provide open access to this storage.
I cut and painted a piece of MDF to make a little protective barrier in front of the batteries and I relocated the light bar from the outside of the cabinet door to the top of this barrier. I then tried mounting an elastic cargo net over the open storage space but this seemed not secure enough to keep things from falling out and onto the bikes. So I opted to add a half-height wall (also cut from MDF) so that we can just tuck things into that space without worrying about it falling out. With the opposite cabinet, the cargo net idea is working okay since that space is already deeply recessed.


UPDATE (August 2024): We bought and installed these very nice rear door organizers from VanEssential: https://www.vanessential.com/product-page/ford-transit-lower-rear-door-storage-panel
(pictures needed here)
Seat back and wall mesh pockets
The Transit van seat backs don’t have any sort of pockets but I found these mesh pockets that work really well. (Various duplicate versions on Amazon.) They have velcro-like backs to them and they cling well to the seat backs and the wall surfaces:


UPDATE (September 2025): We’ve since changed out these mesh pockets. For the passenger seat back, we’re using this very nice organizer from VanEssential: https://www.vanessential.com/product-page/seatback-organizer
(pictures needed here)
Cooktop: Double Burner Induction
I really strongly recommend going with an induction cooktop – both in a camper van or RV and at home. It’s so much faster and nicer than cooking with gas stoves (or of course traditional electric).
Unlike gas stoves, you’re not sending the bulk of your energy into the open air or heating up a burner – all the energy goes directly to the pot. How this works is that an induction cooktop uses a collection of electromagnets to excite the molecules of your cookware, thus heating up the pot directly. This means that bringing even a large pot of water to boil is incredibly fast – we’re talking like a minute or two instead of ten or more. It’s fantastic! (But oh so frustrating when you find yourself forced to use a gas stove again.)
Induction cooktops also instantly respond to temperature adjustments, even faster than a gas stove and give you really fine control over temperature. Cleanup is really quick and easy too since it’s just a smooth surface to wipe down. And you’re not dealing with open flames or a cooking surface that gets super-hot – the only heat on the stovetop is the residual heat from the pot itself. Another bonus is that you’ll no longer be buying and burning fossil fuels (natural gas or propane) just to cook up your meals.
Now induction cooktops do require you to use pots and pans that respond to a magnet (that is, ferrous materials), but that’s not a big deal as stainless steel works great. (Cast iron works too.) You’ll even find some aluminum or copper pots that are marketed as “induction-ready” because they have some steel in their base plates, but you’ll find that these don’t work nearly as well (or as quickly) as a solid stainless steel pot.


Induction cooktops are particularly well suited to camper vans and RV’s since it means you don’t need to carry propane on board and you don’t even end up using a lot of electricity because they’re so efficient. Now for most camper vans and RV’s, you’ll need to use a much lower powered cooktop, not the 40-50amps at 240V you have with an induction cooktop in a home environment. That does mean less heat and fewer burners but the 110-120V units still work great, particularly when compared to the similarly lower-powered propane stoves made for camper vans.
Now usually you’ll see single burner models in vans, but we definitely wanted two burners and so I went with the True Induction Mini Duo (affiliate link) double burner induction cooktop which can be installed inset into the countertop.
The True Induction Mini Duo (affiliate link) can supposedly pull up to 1800W. Given that max draw rating, your inverter will need to be larger than that. However, keep in mind that it’s rare that you’ll be using full power and not for very long anyway – pretty much only to bring a big pot of water to a boil quickly, like in a minute or two. Most of the time, whether you’re frying meats, simmering a sauce or steaming vegetables, it’ll be pulling much less, more like only several hundred watts. I was happy to find that with our 2000W inverter, we could easily be steaming something on one burner of the induction cooktop while simultaneously grilling something on our portable electric grill outside (which can potentially pull 1200 watts, but again, not when maintaining a temperature setting). So yes, we’ve found it easy to use both appliances on our 2000W inverter since neither neesd to pull their full wattage to maintain medium cooking temperatures.
Unlike a home kitchen induction stove, these inexpensive little versions do not have very fine control over the amount of heat generated at the low end of the 1-10 digital scale. And in fact it actually has to cycle on and off in order to simulate low power, again unlike a full size home induction cooktop. This is unfortunate but still worthwhile to avoid the hassle (and fumes) from using propane. One hidden trick to deal with the lack of fine control with the default 1-10 scale on this True Induction model is to tap the “Menu-On” button (has a thermometer symbol) to switch to a temperature scale. This temperature scale provides a couple of extra steps at the low power end, giving a little more fine control for simmering.
I’ll add that you should expect your induction cooktop to sound different than a gas stove when operating: instead of the hiss and burning flame sound, there will be an electric buzzing sound. This sound will vary in intensity depending on the cooktop model – some are quieter than others.
Lastly, I asked Van Haus to wire in a switch to cut power to the cooktop when we have the inverter running but we’re not using the cooktop. This model will pull a small load for its control display even when it’s not in use – and I didn’t want to waste any power when we’re running the inverter for other purposes.
Portable Electric Grill
My original intention had been to get another small propane grill, like we had in the Unity RV. However, while the RV had a propane tank underneath that we could hook up to, with the Transit van that would be having to carry little camp propane tanks inside, which is not really ideal. So I decided to look into electric grills, which I had never tried before.


After researching various models and reading lots of reviews, I settled on this Hamilton Beach Searing Grill (affiliate link) which has turned out to be really great. It’s a nice size with plenty of grilling space and yet still easy to store in the van, it has a cooking lid with a window, a temperature-based control knob and indicator light, it grills really well whether that be a pork loin, sausages or vegetables and of course there’s no propane tanks to deal with. We’ve even used it inside the van on the galley countertop when we were stuck in a big wind storm. And I’ve been pleasantly surprised to see that it doesn’t take that much wattage to maintain normal cooking temps, leaving room with our 2000W inverter to still be using our induction cooktop at the same time. The only downside with this model is that it has a very short cord so you’ll likely need a short extension cord (affiliate link) to use it where you want.
Rixen Espar Heating System
Van Haus installed a Rixen Espar hydronic heat exchanger that provides for both house heat and on-demand hot water. It’s a hydronic system that heats a glycol fluid that in turn is used to heat the air or the water. It has a tap into the Transit’s fuel tank so that it can burn the vehicle’s fuel but it can also run off of electric shore power. It seems to use only a very tiny amount of fuel to keep the van warm overnight. I’ve been really impressed with how quiet the furnace and the blower is – I can easily sleep through it cycling on and off, which wasn’t the case with the propane furnace in the LTV Unity.
The Rixen thermostat will of course let you set a temperature to keep the van above and you can control the fan speed separately. The lowest and quietest fan speed always seems to be sufficient. There’s also a mode for keeping the hydronic fluid hot to provide hot water without heating the van.
Update (April 2021):
The fan speed control stopped working. The LED lights would change on the control panel, but the fan speed would no longer change. (Thankfully, it was stuck in an “on” and medium speed position or we would have had many cold nights.)
I contacted Rixen and they were very quick to respond and offer to ship a replacement control panel. This turned out to not fix the problem but after doing some troubleshooting over the phone, they decided to send me a replacement circuit board which did fix the problem. Everything’s working well again and I really appreciate how quickly they helped us out since we were on the road.
Toilet: Waterless/Composting Toilet
I decided to go with a waterless/”composting” toilet mounted out-of-sight under a bench seat. I was originally looking at the Nature’s Head just because it’s so commonly reviewed and referenced by others. (There are also models from Air Head, Separett and Sun-Mar.) We ended up with the C-Head toilet because even its standard basic model was short enough (18″) to fit under a bench seat. The C-Head is probably the simplest design of them all and it’s crafted almost entirely from readily available hardware store parts. I got the “Basic C-Head” in matte white with the “slow close white” lid/seat and the add-on “P-tank” container which is recommended for off-road travel.
Like all of these urine-diverting toilets, the separation of urine and solid waste prevents the creation of nasty sewage and odors. And unlike the common cassette-style toilets, you don’t have a nasty tank of sewage to pour out somewhere. The solid waste is mixed with a medium like aspen wood shavings (as you would find at a pet store for small animal bedding) to absorb moisture, control odor and start the composting process. Urine is collected in a separate container. Here’s C-Head’s frequently-asked-questions page for more detailed explanations.


The C-Head being only 18″ tall allowed for it to be easily hidden within a small bench seat which ends up 21″ tall including its cushion:

We can report that the system works well and the convenience is well worth having a toilet onboard.
Now it’s true that our arrangement without a dedicated bathroom doesn’t provide any privacy if you’re sharing the van, but we don’t feel it’s worth giving up a lot of space for a full bathroom closet in such a small van. (It certainly can be done though.) For peeing, it really doesn’t feel like an issue anyway. As for doing #2, we prefer to make use of public restrooms like in a campground whenever possible. However, when public restrooms aren’t available, it’s nice to know you always have access to a place to go though.
As for privacy, one option is just to vacate the van for awhile to give one person some time alone, or when that’s not comfortable (like caught in stormy weather), hang a partition temporarily to give a little privacy – as we’ve done a couple of times already. It’s doable.
Ventilation: Maxxair 10-speed reversible fan
There’s two best known brands of roof fans for RV’s and campervans: Maxxair and Fan-Tastic fans. We previously had a pair of Fan-Tastic fans in the LTV Unity RV and while they did work and could definitely move a lot of air and keep the RV cool, we were missing a few features. The models we had provided three fan settings, the thermostat control (to automatically open above a set temperature), and a rain sensor to automatically close in the rain. What we were missing was the ability to operate the fan even in the rain and to run the fan at a quieter, slower speed. Even at its lowest speed, you were very much aware of the noise of it spinning.
 The Maxxair 10-Speed Reversible Fan addresses both of these issues. The Maxxair fan is a bit larger and includes a permanent hood over the top so that it can remain open and still operate while it’s raining outside. And its lowest speed settings are truly silent while still providing good air flow. Very welcome.
However… we’ve already encountered a reliability issue with the Maxxair. Ours keeps shutting down: a green light comes on and it starts beeping for 30 seconds, closes down, shuts off and refuses to start up again until you cut and restore power to it at the fuse box. Looking online, it appears that this is an often reported issue where it seems their circuit board can’t handle voltages higher than about 13.6. That’s really limiting as 13.6V or even higher are common charging voltage levels for campervans and RV’s – their specific usage! The solution is apparently to install a voltage regulator to pull the voltage down lower – but it seems to me this is something they should build into their products!
After I reported our troubles, Van Haus sent me a voltage regulator to install (we’re not local to them), but it turned out we still had the Maxxair Fan shutting down on us and sounding its alarm. I measured the voltage coming out of the voltage regulator and it was only 12.2V. Too low now or what?
I tried to contact Airxcel through their online form but didn’t get a reply after a few days. I then worked through their phone system to get a hold of a tech support person for the Maxxair products. After he heard that the fan was failing even with 12.2V from the voltage regulator, he told me that the circuit board I would need to replace is on backorder and they don’t know when they’ll be getting them but that it should be “soon”. He took my name and address and said they’ll send a replacement to me when they come in again.
I asked whether a voltage regulator was really necessary given how my battery system will tend to charge at 13.6V or so and he insisted that it was and that you didn’t want the voltage to ever get above that. When I said that my “van builder” suggested the voltage regulator for their fans don’t seem to help or be necessary, he replied with a “your builder knows vans, we know our fans”. When I suggested that perhaps they should build in voltage regulation into their product since 13.6V or higher is very common, he said something along the lines of “I just work here in tech support”. He says he answers the phone everyday to deal with issues like this and he’s passed along suggestions many times before but apparently the engineers think they know better.
(sigh) Pretty sad – and yet this is one of the two best, most popular brands for RV/campervan fans?
Anyway, it’s really important that we get the fan working reliably as we’ll be relying on it to keep the van cool in hot environments when we have to leave the cats inside while we go on a hike or whatever.
Update (May 2021):
Well, still nothing from Airxcel (there’s ongoing global shortages of electronic components right now), but Van Haus was willing to pass along a circuit board pulled from a unit they took out last year. I installed it and the fan is up and running now. Hopefully, it will stay that way with the voltage regulator wired in place. Still, Airxcel/Maxxair really need to fix their design to accommodate typical voltages in vans and RV’s.
A month later we finally received the replacement circuit board from Airxcel but the replacement one I got from Van Haus has been working well. I sent the extra one back to Van Haus.
Update (October 2023):
We’re having more problems with the Maxxair fan. It has been occasionally refusing commands, going into an error state and shutting down. We haven’t been able to figure out when or what situation causes it, but you’ll tell it to turn on or off, speed up or slow down the fan, or whatever and it will start flashing the green light and beeping like ten times or something and shut down. Then you try again and it might fail again or it might work again immediately after. We haven’t figured out a pattern. Doesn’t matter if commands are via the remote or directly. It can work for a dozen or more commands over a short period of time or all day and then it can fail again. Sometimes just once, sometimes multiple times before it starts working again.
Update (December 2023):
I contacted Airxcel customer service and they had me check to see if the error happened when the fan motor was disconnected. It did not and then did again when it was connected so they suggested that the fan motor (part #10-20968) needed to be replaced. Not under warranty and they just told me to search for it online. I found it on Amazon (referral link) and replaced it. I really expected it to be the control board, but no, this does seem to have fixed the problem. It has not refused commands or thrown an error since, at least so far anyway.
Trickle charger for starter battery
As with any vehicle that relies on a lead acid starter battery, if it sits unused for too many months the battery may be discharged to a point that it won’t hold as much charge and may even not be able to start the engine. However, this issue is apparently much worse with the Ford Transit as many people are reporting the starter battery gets drained much quicker, even in just a week or two.
One option is to fully disconnect the battery if the vehicle isn’t going to be used for a long while but another is to hook up a battery maintainer / trickle charger. Many battery maintainers are the type that you plug into a 120V wall outlet, but if you have a solar system installed on your van for your house batteries, you can also make use of that to maintain your starter battery.
- Amp-L-Start vehicle battery maintainer (detailed instructions here)
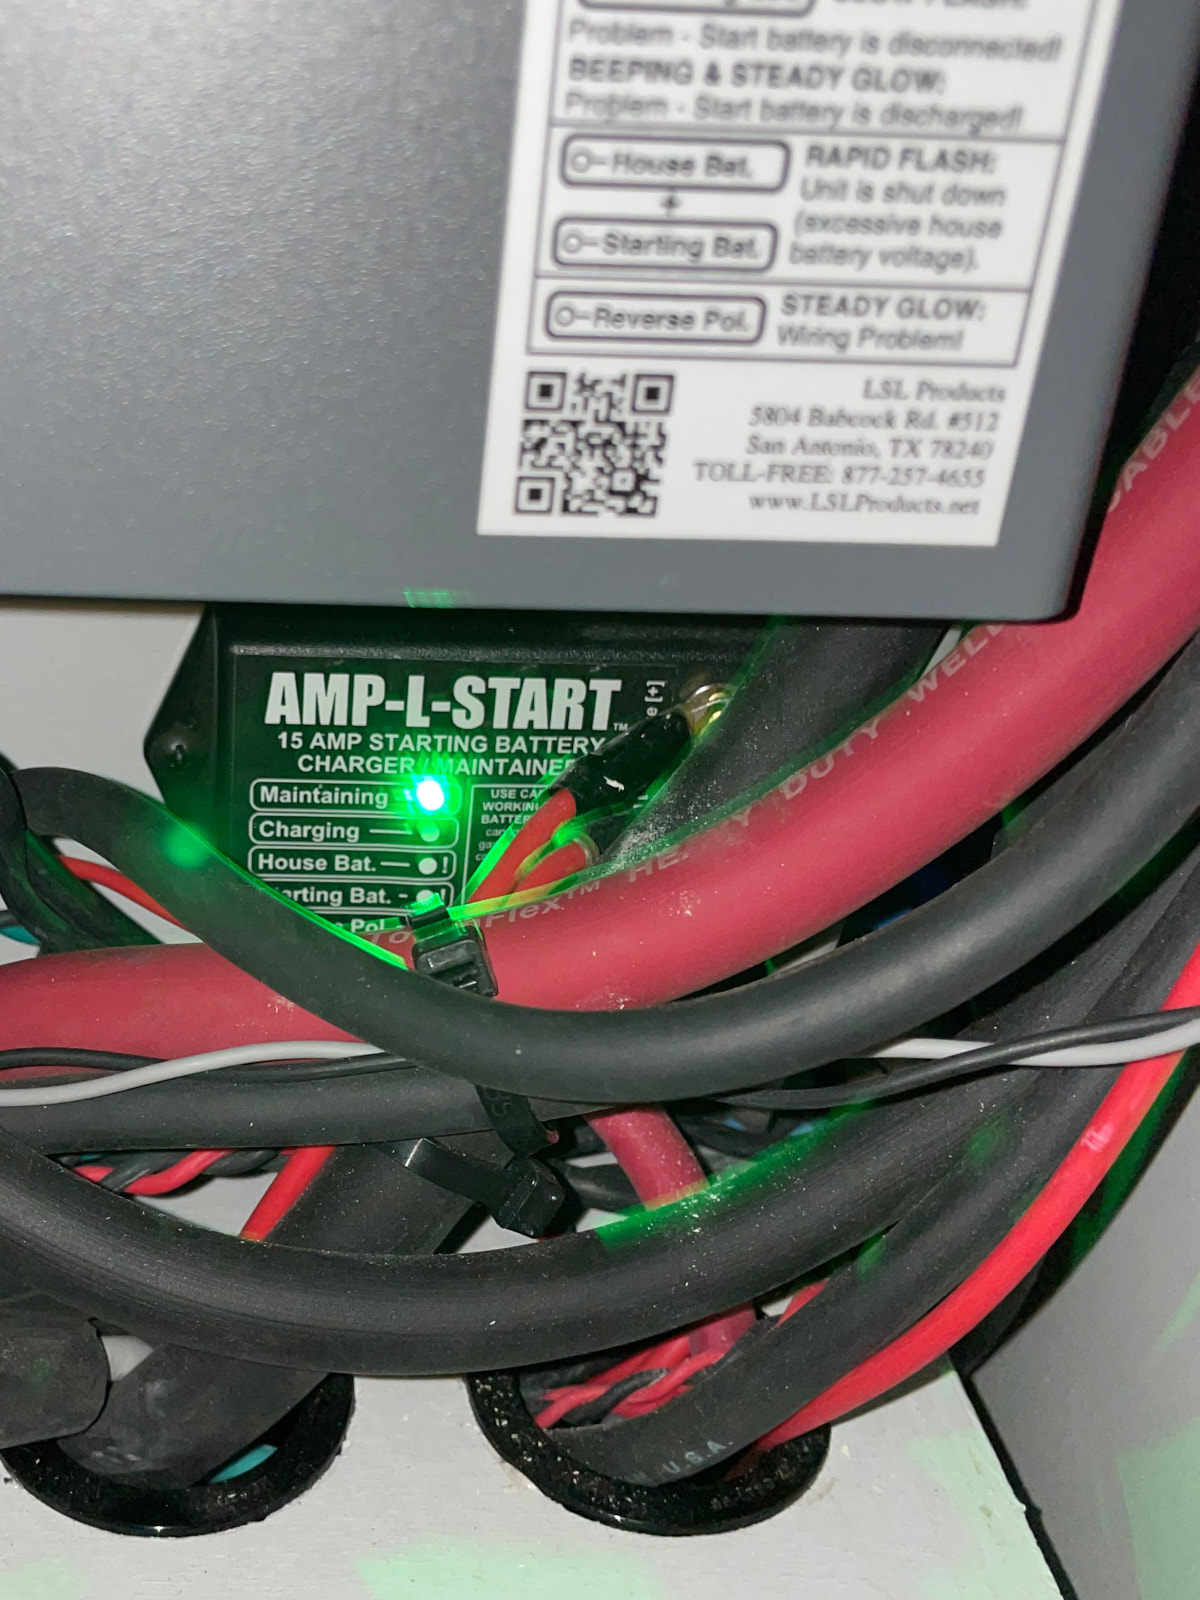 The Amp-L-Start maintains a healthy charge level on your starter battery using your house batteries and their solar charging system. It will also report if the starter battery is becoming over-discharged for some reason. This unit also supports connection to lithium ion house batteries.
As it happens, our van’s starter battery was over-discharged during the build out process. It sat for several months at QuadVan while getting converted to four-wheel drive and then for many more months at Van Haus waiting first to move through their build queue and then on hold due to the Covid-19 shutdowns. When I finally took deliver of the converted van some nine months later, the Amp-L-Start was reporting a problem with the starter battery. It’s not really surprising since it sat for such a long time without a battery maintainer hooked up. I’m also told that Van Haus even had to jump start the vehicle when they first received it. Anyway, I ended up going through the hassle and expense of replacing the factory starter battery – it’s a pain to get to since you have to remove the driver’s seat platform. With the Amp-L-Start now hooked up, this shouldn’t happen again.
Update (March 2021):
After a couple of weeks of the van sitting idle, I discovered that the Amp-L-Start was beeping all the time (even when not charging) and warning that the new starter battery was now over-discharged. It wouldn’t even go into maintenance or charging modes. I suspect that because the house lithium batteries weren’t being discharged, the daily solar charging periods were too short or minimal for the Amp-L-Start to provide much amperage to the starter battery – and not enough to make up for whatever is draining it.
I’ve seen some discussions online of people having problems with the Transit draining the starter battery, but I haven’t found any reports of the source of the problem yet. I’ll continue to try find what is causing the excessive draw from the starter battery but, in the meantime, I’ve decided to disable the “Lithium mode” on the Amp-L-Start, thus lowering the turn on/off voltages to a point where the Amp-L-Start will decide to charge the starter battery off of the house lithium batteries even when they’re not being charged by the solar system.
This seems to be working okay now. The Amp-L-Start is no longer warning of a discharged starter battery and I see it maintaining the starter battery even without incoming solar power. I contacted the makers of the Amp-L-Start to ask if this workaround would cause any trouble and they agreed that it was a reasonable thing to do. This does mean that some of the house battery capacity will be used to maintain the starter battery, but with 400Ah available it shouldn’t be an issue – and it also means I can use the cab stereo or other items powered by the starter battery without concern for draining it.
Update (May 2021):
I spoke too soon… the starter battery is still draining and the Amp-L-Start is still beeping to warn that the battery voltage is very low. It was fine while we were actively using and driving the van over the month of April but now that it’s been sitting a while, here we go again. I don’t know what’s wrong. Yeah, there seems to be a widely reported issue with Transit vans draining the starter battery quickly but why isn’t the Amp-L-Start keeping it topped off? Need to investigate some more.
Update (June 2021):
HEPA Air Filter
Given the increasing severity and frequency of wildfires across the western United States and the chances of encountering days of poor air quality even long distances away from the source of the smoke, I bought a compact HEPA air filter for the van for use when we just can’t escape the smoke.
This one is pretty expensive but it’s relatively compact, mounts to the rear of the passenger seat and runs off of a 12V plug: IQAir Atem HEPA air filter. The big advantage to this one is how it doesn’t take up floor or countertop space when in use, or storage space when not in use.
There are also plenty of less expensive and still fairly small units that can be run off of your AC inverter, like this one: Geniani Home Air Purifier with True HEPA.
Seat belt for bench seat
I added an aftermarket seat belt to the rear bench seat in case we ever want to be able to have a third passenger ride along – it easily tucks out-of-sight under the back cushion:


Ideally we would want some sort of head rest/restraint to help prevent whiplash (the seat back isn’t very tall), but at least the seat belt is better than nothing if we have an extra passenger for a little while.
Temperature/Humidity Sensors
This is a direct carry over from our experience with the LTV Unity RV:
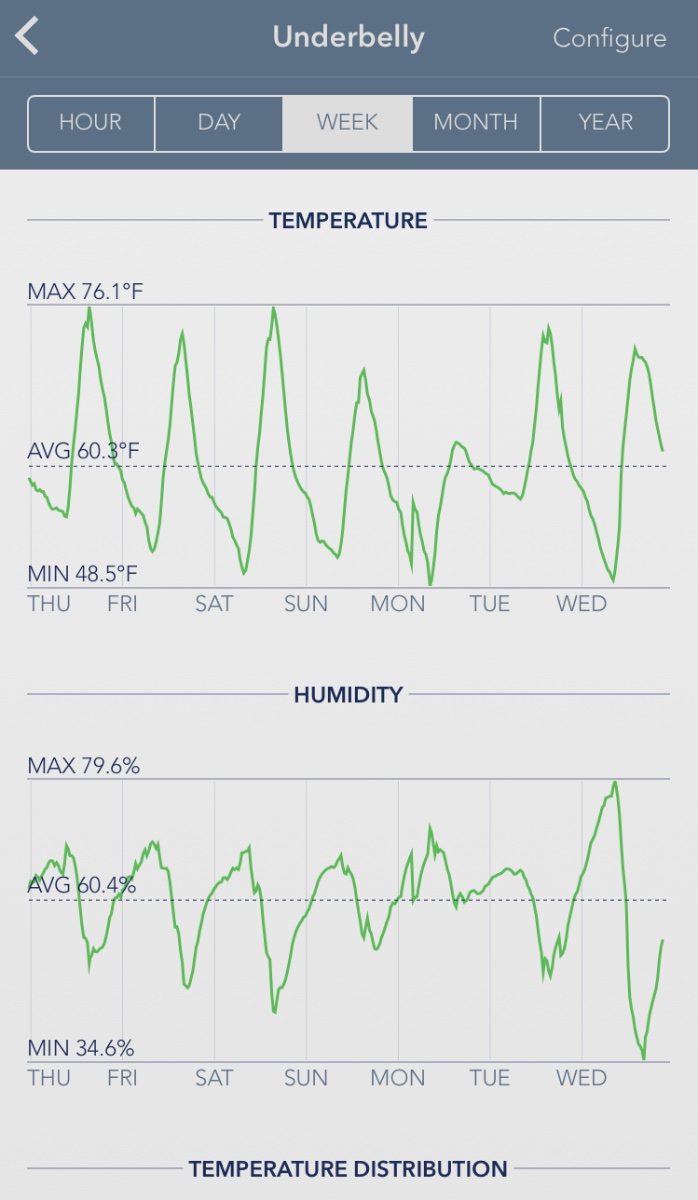
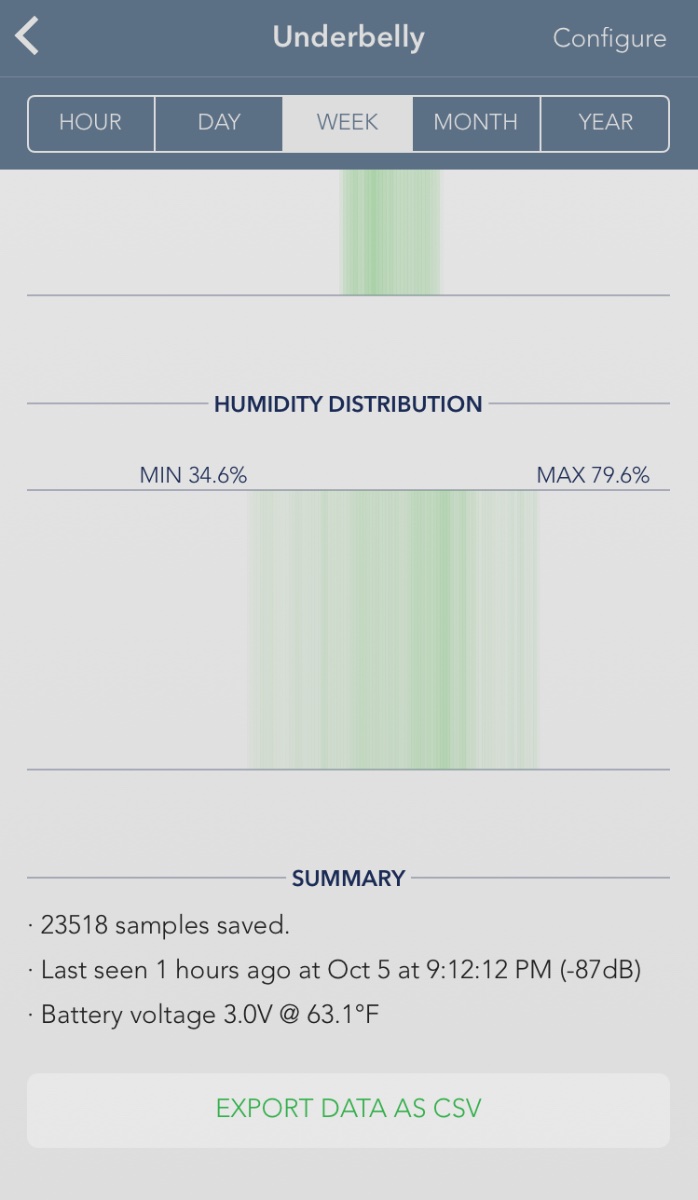 I was looking at a number of mountable weather/temp sensors when I stumbled on the SensorPush Wireless Thermometer/Hygrometer (affiliate link). You drop these little guys wherever you’d like to monitor temp or humidity and they collect data over time and automatically sync to your smartphone via bluetooth. Unlike typical wireless weather sensors, you can view the accumulated data over time and set alerts to be notified if the temperature or humidity moves outside of a set range. They can run on their little CR2477 batteries for over a year.
I’ve got one in the van to be sure that the temperature never gets out of hand when we have the cats on board, another mounted outside under the body and another in the fridge to be sure its keeping things cold enough. With the RV, I could monitor them even from across a parking lot and inside a restaurant but unfortunately with the metal-walled van, the signal doesn’t travel quite so far. However, you can also get an optional SensorPush G1 Wifi gateway (affiliate link) to monitor the sensors from anywhere over the internet. For the van, that would mean setting up a cellular internet connection and Wifi router, which I haven’t felt the need to do.
Cellular Signal Booster
 I installed a weBoost Drive X (affiliate link) cellular booster in the Transit van. A cellular booster acts as a relay between cellular devices in your vehicle and any accessible cell towers, boosting your available signal in places where you may have little or no signal.
The weBoost comes with a small external antenna that you mount outside, either on a metal roof or on a small sheet of metal (that acts as a ground plane), and an internal antenna that you mount near wherever you’ll be using your cellular device. I asked Van Haus to provide a couple of 12V power ports (as well as a couple of dedicated USB ports) in the smallest overhead cabinet over the galley and also mount the external antenna on the roof and run it to this cabinet, where I then installed the weBoost. (I actually had Van Haus to install two external antennas in case I ever want to use a cellular modem like the NetGear LB1120 to provide dedicated WiFi in the van.)
The weBoost Drive X (affiliate link) instructions say you should mount the internal antenna to between 18″ and 36″ away from your device. For now, I’ve got it mounted in the overhead cabinet over the cab area. With the older model (weBoost Drive 4G-X) in the LTV Unity, I had trouble getting it to perform well until I followed some online advice and started placing my phone directly in contact with the internal antenna. Once I started doing that, it worked really well and I could then use the phone’s shared hotspot for other devices in the van, like my iPad or MacBook. Note that these boosters aren’t useful (and can even give poor performance) when you already have a good signal.
So far it seems that with this newer model (Drive X) placing the antenna right up against the phone actually degrades the signal and it is actually best to have the antenna mounted a little bit away as they recommend. We’ve taken to leaving the internal antenna loose in the cab’s overhead bin so we can place it wherever we want it in the van at the moment. Also, let me point out the importance of having the antenna near where you’re going to use it AND away from your external antenna. My brother’s van builder ignored these instructions and they’ve found that their booster doesn’t seem to help at all. Their internal antenna was mounted at the back of the van, immediately below where their external antenna was mounted on the roof.
I should add here that I’ve found Verizon to have the most coverage in very remote and rural areas across the western United States.
Emergency satellite communicator
We’re often in some very remote areas, many hours from any assistance or any cellular service, whether that be in the camper van, or out hiking, biking or backpacking. Sometimes I’m on these trips on my own too. So I looked into the possibility of finding a very small satellite communication device just for emergency use. Happily, there are a number of very compact devices available now.
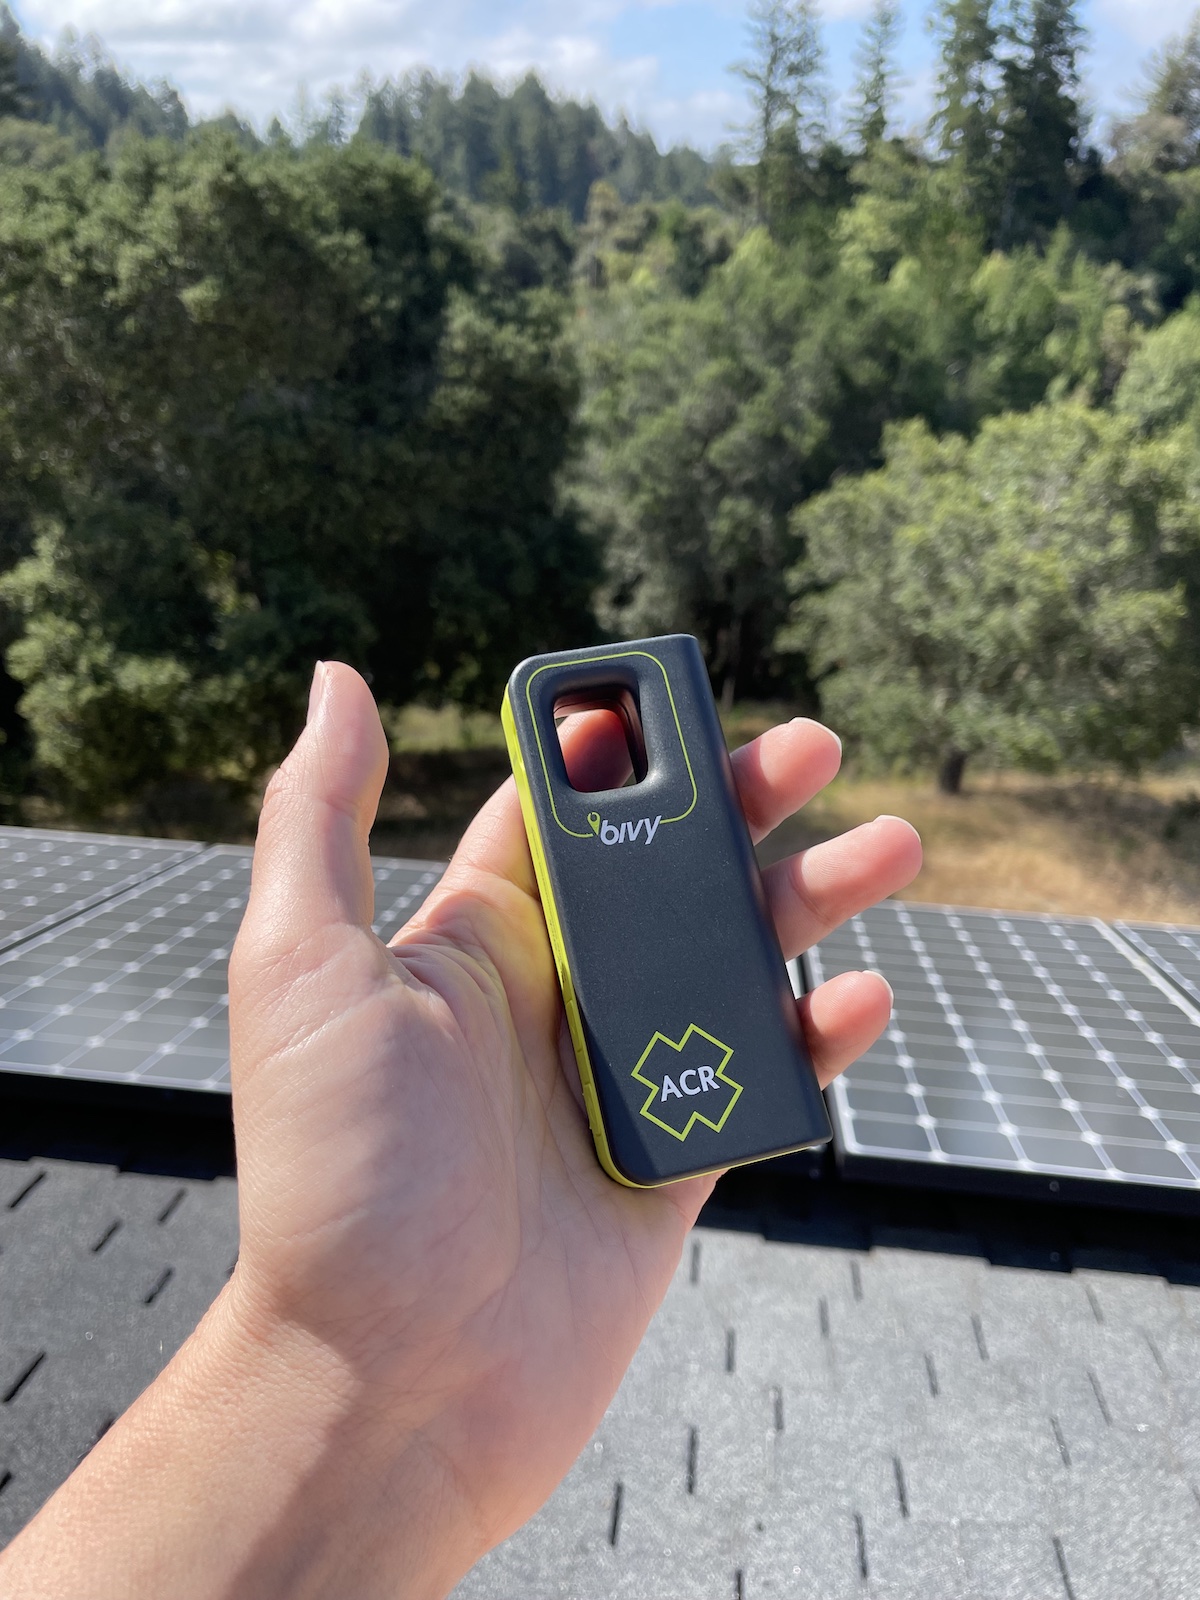
Update (2024): Now that Apple’s iPhones have built-in satellite connectivity both for emergencies and for messaging with friends and family, the dedicated communicator I talk about below isn’t so useful.
I’ll leave the old info as is:
I decided to go with the Bivy Stick. It’s super small: smaller and lighter than a smartphone and yet it allows you to communicate via satellite as long as you can get a clear view of the sky. There’s no built-in screen. It has just a couple of buttons to send an SOS to global emergency services or send your location and/or a predefined check-in message to someone if desired. When paired with your smartphone via Bluetooth, it supports two-way communications via text or email with any contacts or with emergency services. It also provides support for downloading local weather reports or topo maps. It operates via the Iridium satellite system but you don’t have to keep an active subscription. There’s no activation fee each time you decide to re-activate the monthly service so there’s no penalty for not keeping the subscription going when you’re not going to be carrying it. (They have changed their pricing model though. They reduced the purchase price significantly but now require you to subscribe at a mid-tier level for fourth months initially before you can then unsubscribe or downgrade to a lower tier.)
Hopefully I’ll never need to use it for an emergency. I’ve managed to go this long (55+ years) without the need while hiking, backpacking and traveling around the world, but it seems like a nice emergency backup for just a little bit of weight. Take note though: in some countries these devices are quite illegal. So be sure to check before packing it in with your gear when traveling.
Projector, Screen and Bluetooth Speakers
Going quite a little bit over the top, I put together a little camper van home theater – because… why not?!
This is assembled from a pair of Oontz Angle 3 Ultra Bluetooth speakers, a 40″ portable projection screen (and a bit of extra hardware) and this small LG PF50KA 1080p video projector.
I’m happy to report that I was able to do this without making any holes in the van. For the Bluetooth speakers, I installed a zip tie mounting point using an existing wall panel screw on either side and the speakers just slip into the zip tie loop. (And they can be removed if we want to use the speakers outside.) For the projector, I made a little mounting board that is attached to the ceiling using the ceiling panel’s existing screw holes – just slightly longer screws to accommodate the board thickness. A little tripod riser mount is attached to the mounting board and the projector is screwed via its tripod mount. The cables are routed with plastic cable guides inserted into the seam along the roof at the back of the van. The retractable screen is normally tucked away out-of-sight alongside the mattress and it hangs over the foot of the bed by being slid into place above the cabinet doors on either side.
Starlink satellite internet service
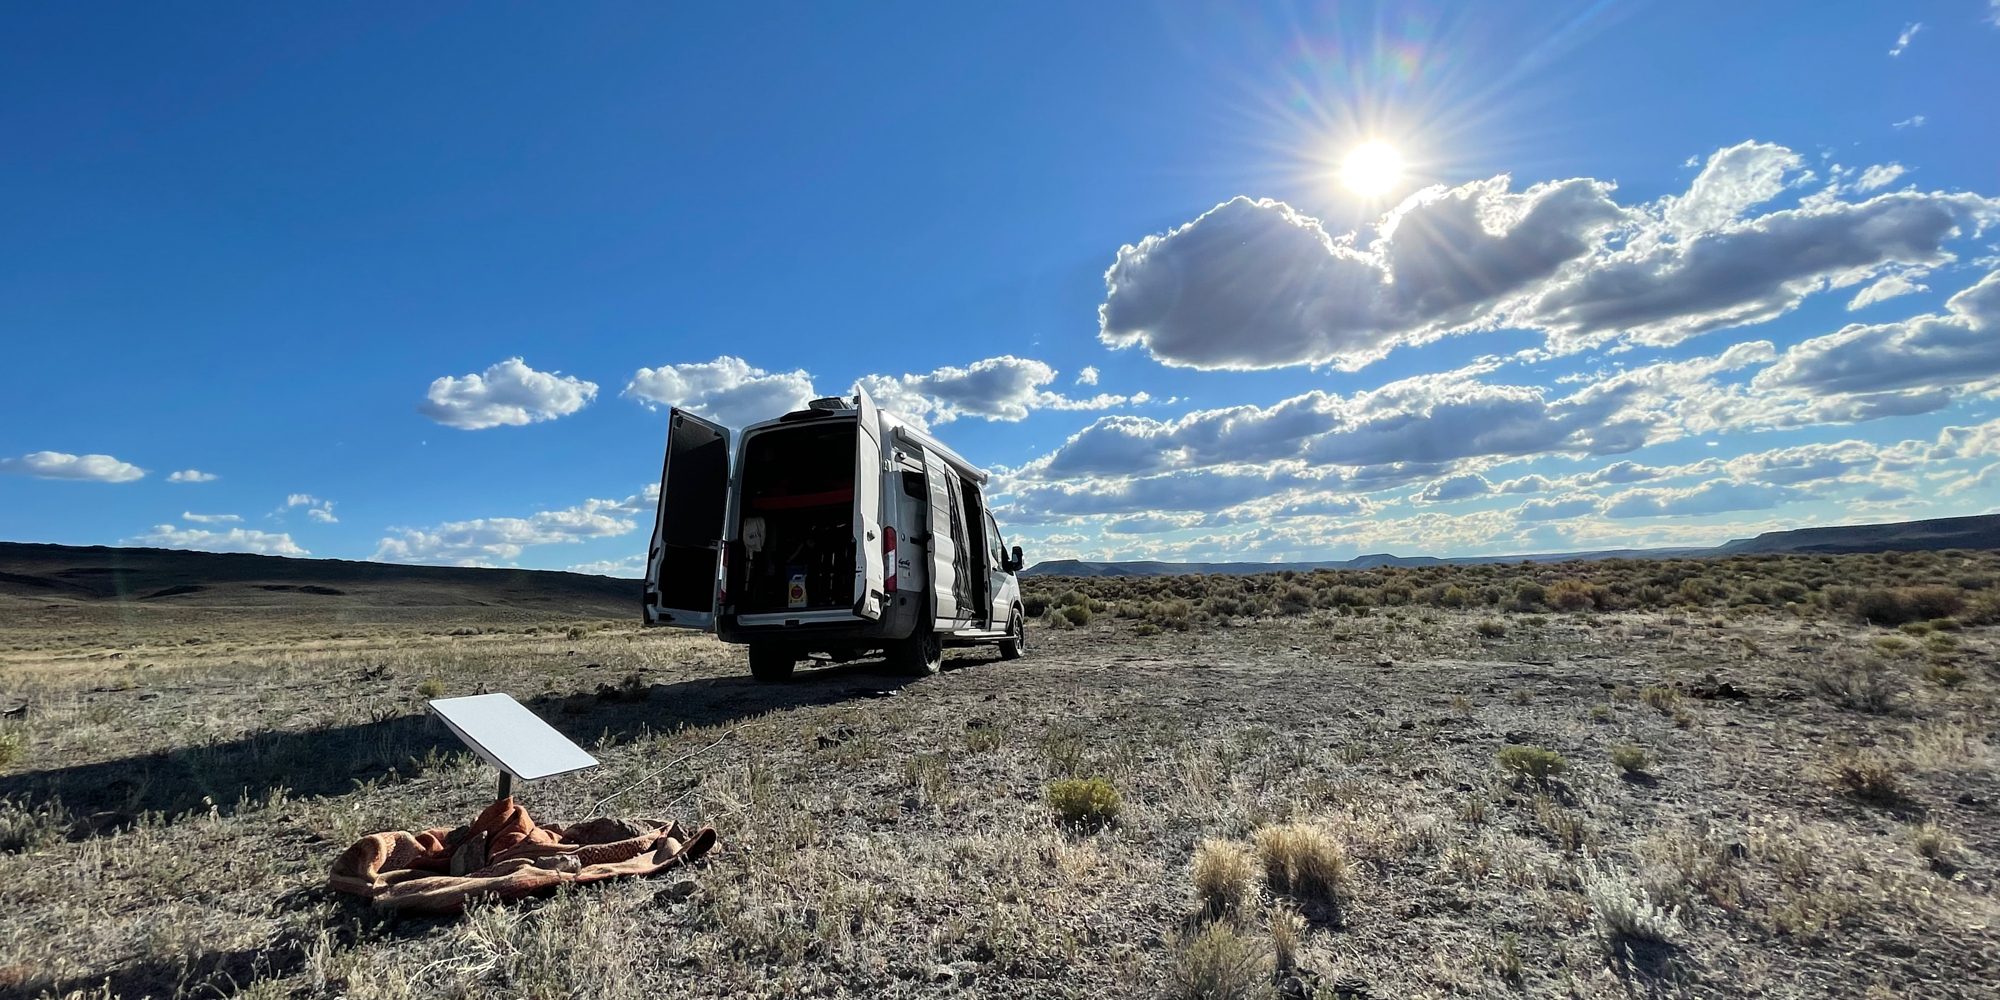
Another mostly unnecessary but fun high tech convenience is our Starlink system. Starlink is a low-Earth orbit satellite system designed to provide high speed internet access in remote locations of the planet. Nothing wrong with being completely disconnected from the world for a while, but it’s also really cool tech to play with. Just place the dish out in open view of the sky, power it up and let it sync up and the accompanying WiFi router delivers impressive speeds (100-200 Mbps or more) and low latency despite being camped far out in some remote mountains or desert. It seems to draw about 35-55 watts. (It varies over time. Maybe whether its transmitting or not?)

The roaming version of the service costs more than the residential service but it allows for use almost anywhere and you can start and stop the monthly subscription as needed. There’s also now a “standby” mode for “emergency messaging and easy reactivation in dead zones” at $5/month currently – and surprisingly this still gives you better than dial-up speeds.
Update (January 2026): I’ve since replaced our Starlink Articulated antenna (gen 2) with the newer (gen 3) Starlink Standard antenna so that we can often leave it mounted on the roof – which also allows for use in-motion. I’m using a very strong magnetic roof mount that still allows us to remove it for setting up on the ground if the sky is obstructed where we’re parked.
As with the earlier Starlink antenna, I’m using a 12V step up converter and POE injector (this one is from XTAR-Link) and a small, low power travel router from GLInet to minimize the power draw. The system seems to pull about 40-45 watts.
On a recent 10-day trip to the Eastern Sierra, we found that having the antenna mounted on the roof worked great both in motion and at wild camping spots where it eliminated the old task of pulling out the old articulated antenna, setting up and securing it on the ground, running the cable back through the van and waiting for it to go through its whole position finding and reorienting process, plus of course the whole take down process on departure. As it happened we were always able to orient roughly north, which I prefer to do anyway to point the more insulated end of the van to the south, and there were sometimes some tall trees in front of us but it worked great and provided strong bandwidth. At some point we’ll find out how much being pointed away from north while camped affects it and we’ll eventually encounter some situations with heavy tree cover but we’ll still be able to unlatch the dish and set it up on the ground in a nearby clearing using the 150-foot Starlink cord we carry.


Here’s my description of our old Starlink setup based on the gen 2 articulated Starlink antenna:
The current Starlink rectangular antenna dish isn’t designed to be left mounted on the roof of a vehicle in motion but it isn’t too unmanageable to stow away in a van or RV. With a bit of hunting, I managed to find a padded Gator Cases bag that accommodates the antenna and should keep it safe while tucked into a cabinet in the van. We made a bunch of modifications to it, adding some more padding to the sides and bottom, removing the outer pocket, cutting a slot to slide it in with the mounting post sticking out:
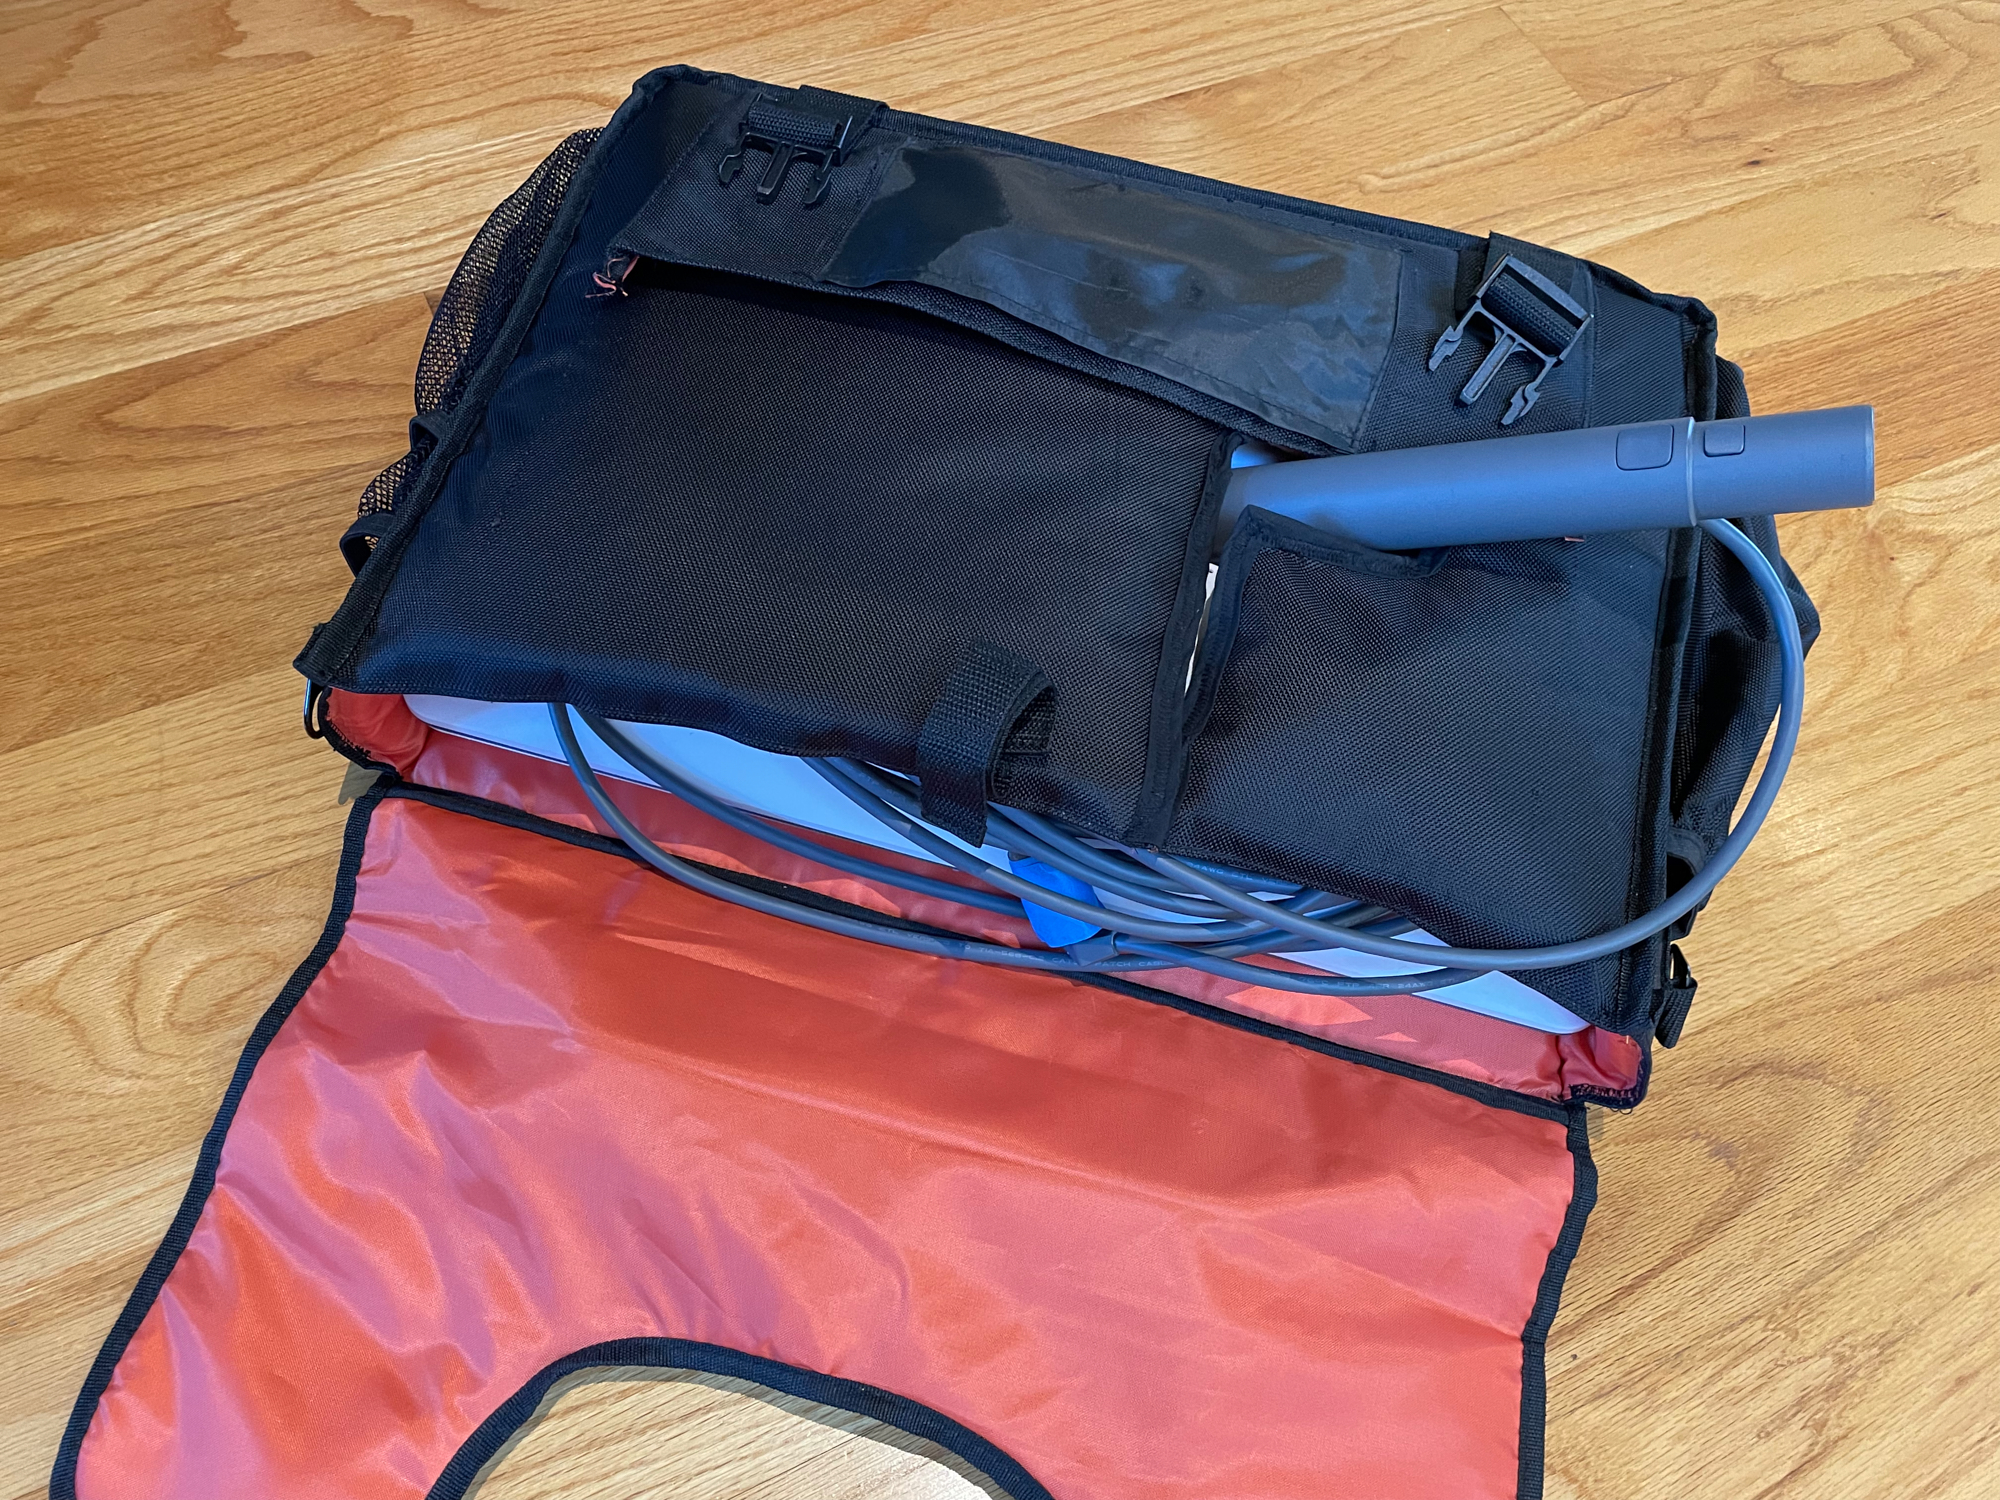
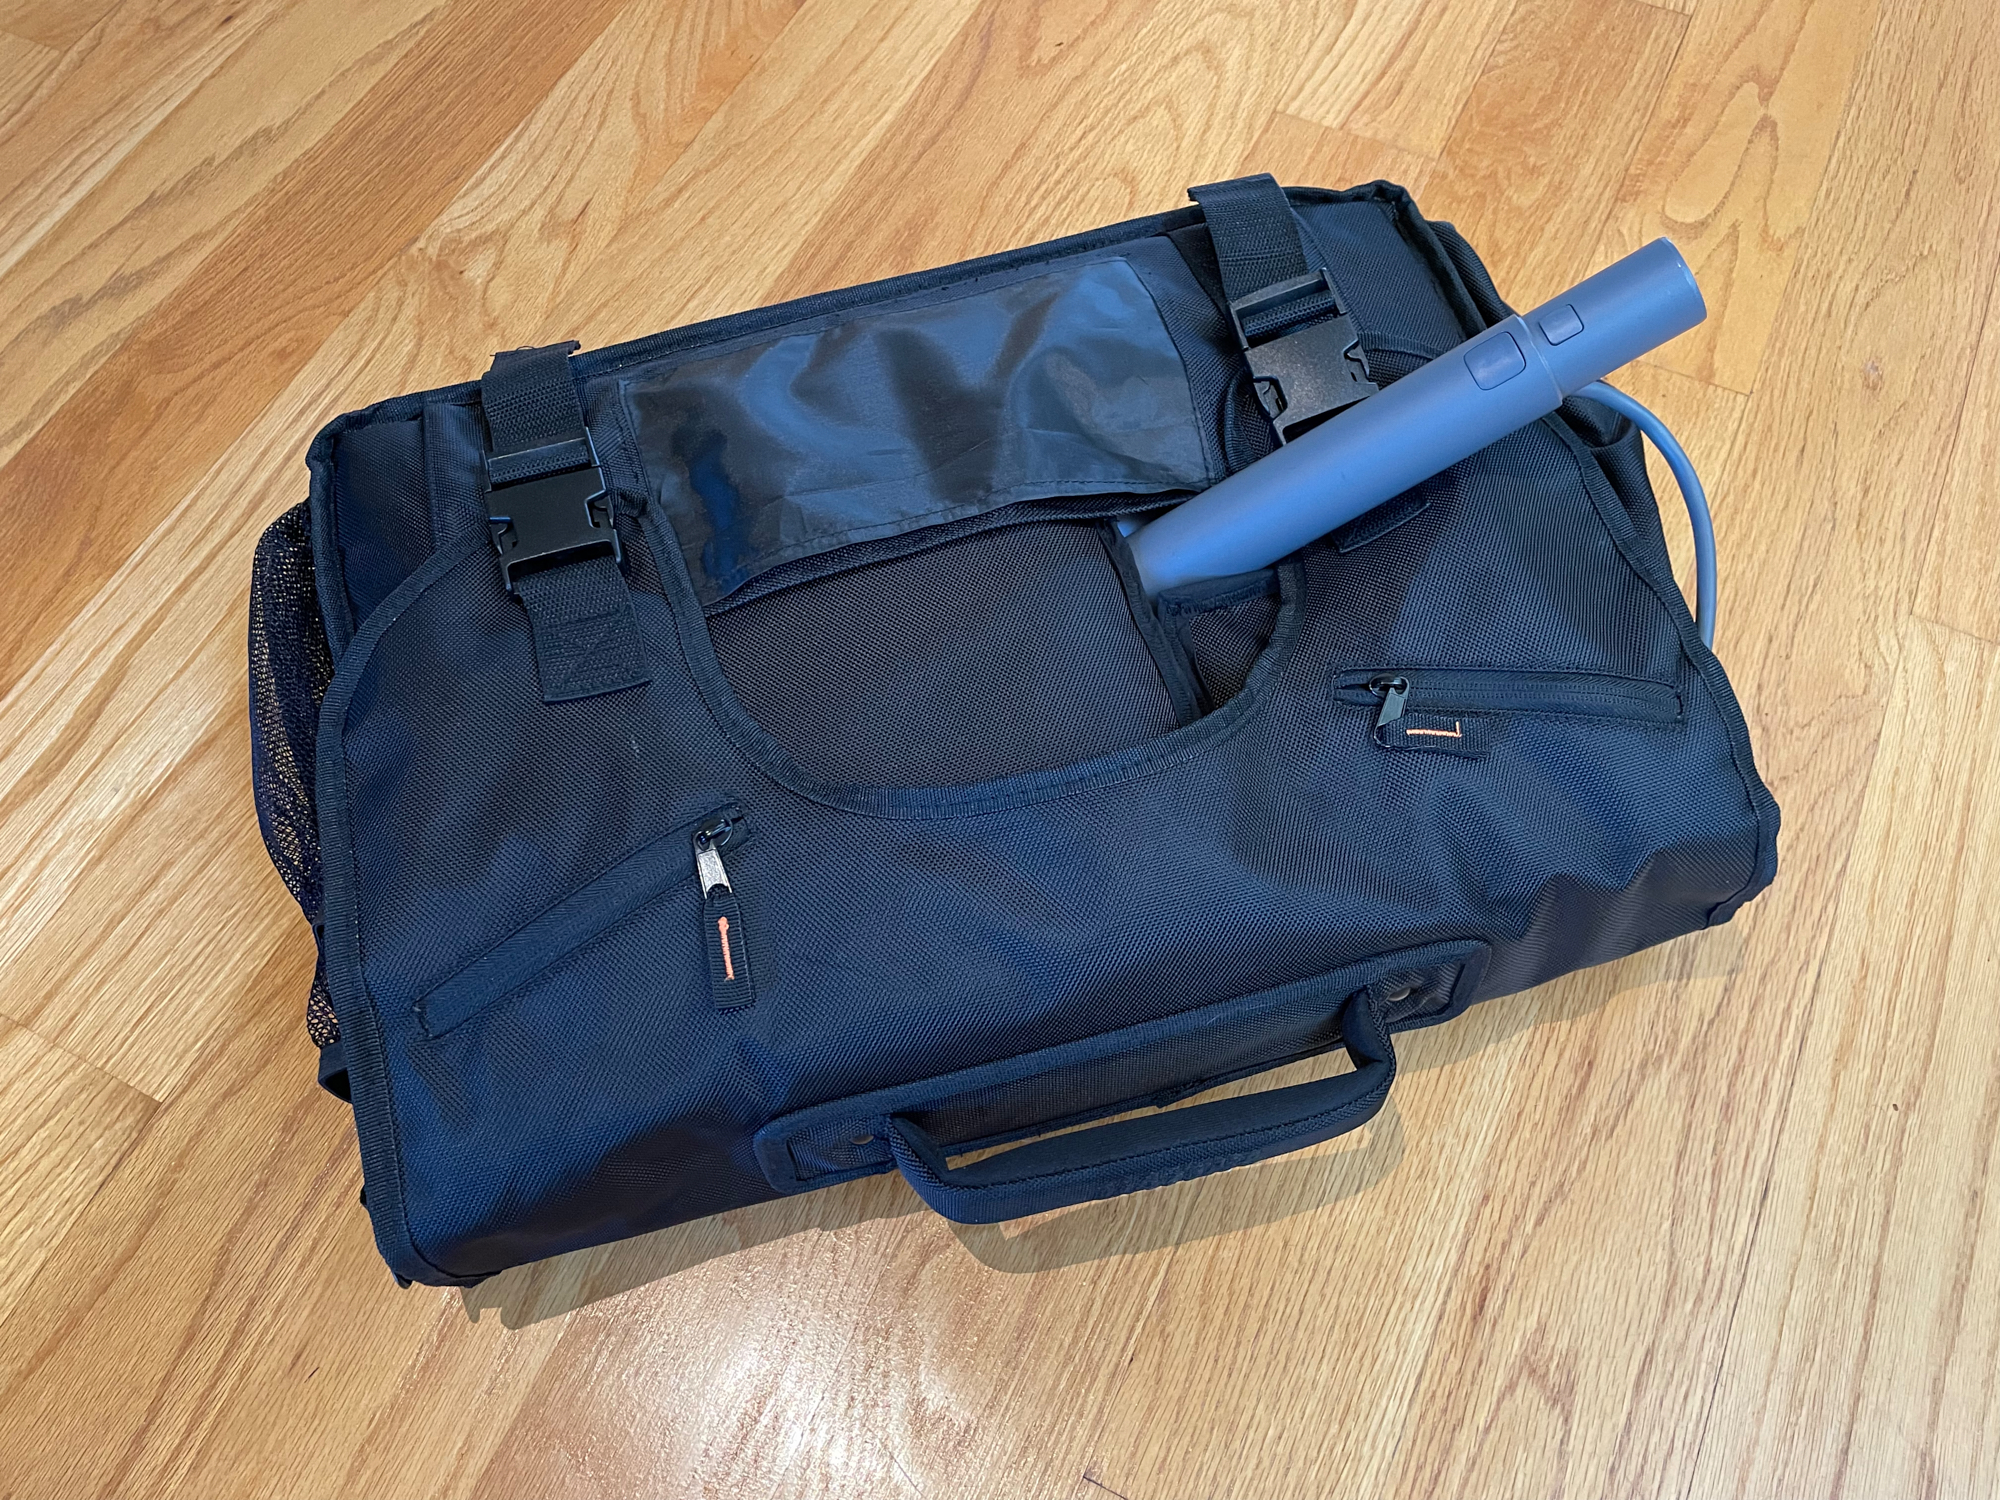
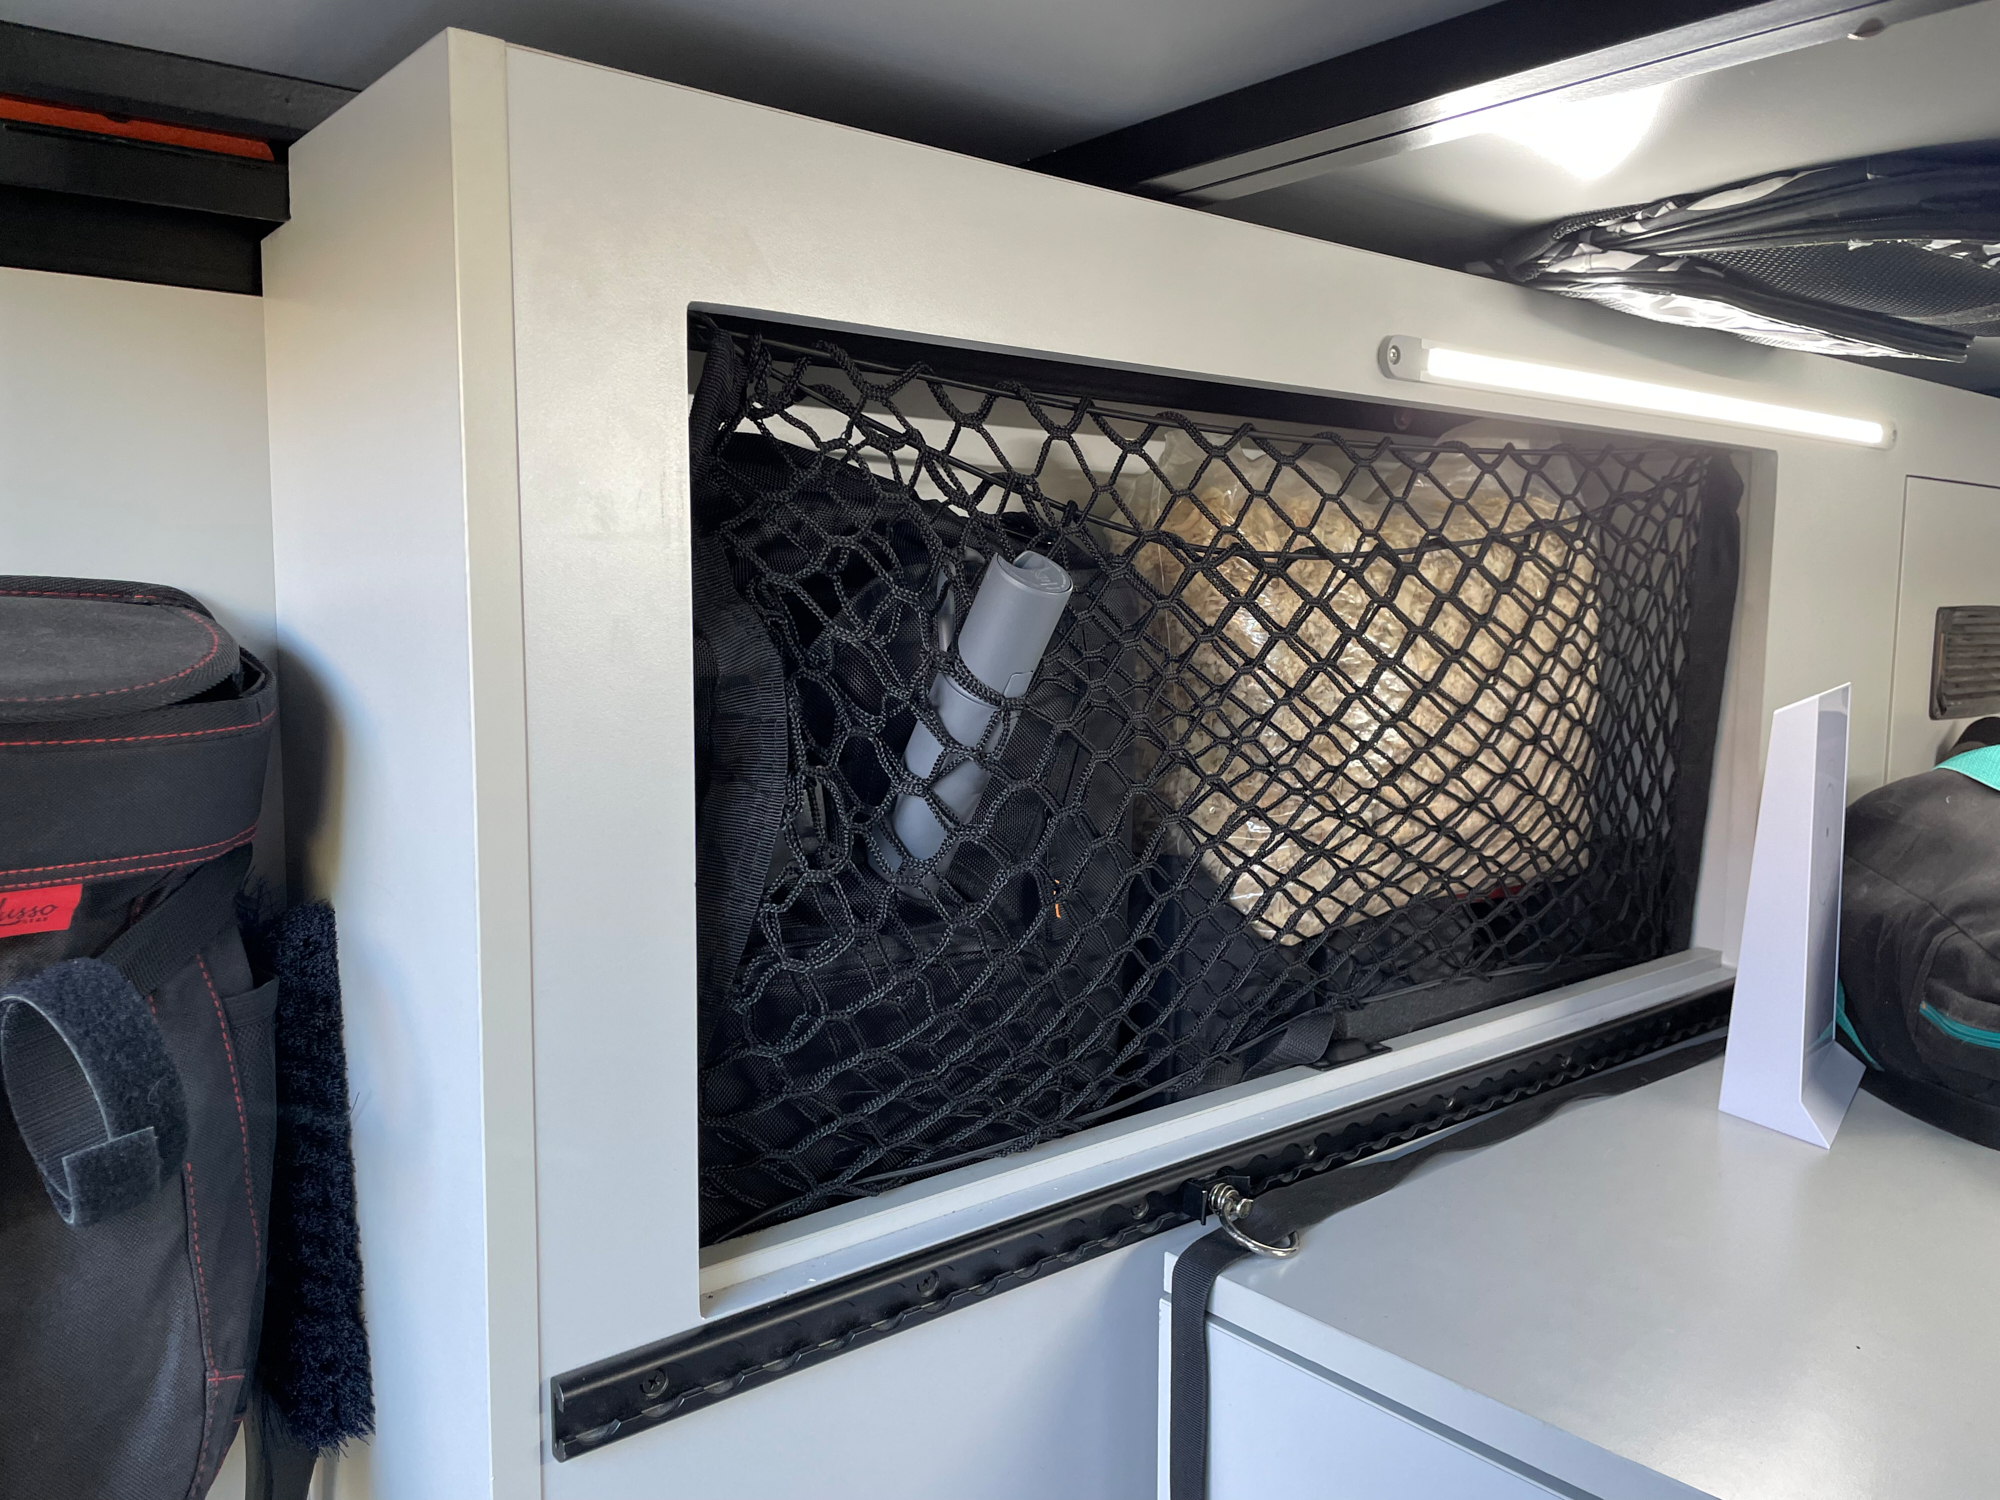
Powering Starlink directly from your 12V battery system:
We’ve been using the provided Starlink router with the van’s inverter but I learned that folks have been converting the Starlink antenna to run directly off of their 12V battery system to avoid the overhead of having to convert power twice (12V DC to 110V AC and back to DC again). Some folks have cut the original Starlink cable and put together their own power-over-ethernet injector but there’s now a Starlink-specific POE injector and a cable adapter (Amazon referral links) from a company called Yaosheng that takes care of the unique Starlink wiring and even allows you to leave the original Starlink cable intact. You do still need to install a 12V to 48V step up converter unless you opt for their even-more-recently-introduced integrated power converter and injector.
I bought a 12V to 48V step up converter that other folks recommended but I kept having problems with the setup. It would work but I would see frequent, very brief, split-second “Disconnected” status displays in the Starlink app. I would still get good bandwidth (even > 200 Mbps at times) but clearly something wasn’t quite right. I posted the details of my troubleshooting here on reddit and eventually found that the issue seemed to be with my USB-powered GL-iNet GL-SFT1200 (Opal) router (Amazon referral link) – despite the fact that others are using this same router.
After a couple weeks of Gl.iNet support doing remote testing, including with remote access to a laptop I provided connected directly to the router, they eventually noticed that the router was seeing a changing MAC address (we don’t know why) and they found a workaround: Turn off the “Network Acceleration” option under Network settings on the Gl.iNet router. They don’t know why this alleviates the problem but the engineer said they were going to report this to the chipset manufacturer. They also don’t know why the router reports a changing MAC address from the Starlink dish. I don’t have more information as we were only communicating during these remote testing sessions via text messages, but it is working now.
Rodent barrier
This is a carry over from my old Sprinter-based RV and the issues I had with rodents causing trouble and damage in the engine compartment and utility bay. I live in an area surrounded by fields and forest and an endless supply of mice and other rodents. I tried all the usual remedies from scented sprays and herb bags, dryer sheets, noise makers, etc and still kept having trouble.
The ultimate solution I eventually arrived at was installing a walled rodent barrier around the whole vehicle, called the “BoxKat” (plus a Wi-Fi enabled electric zapper trap as a backup). It’s a flexible/collapsible barrier for keeping rodents out of a given area (like your car or RV). It’s a little expensive but it actually seems to work – as in, I never find evidence of mice or other rodents in the engine compartment.
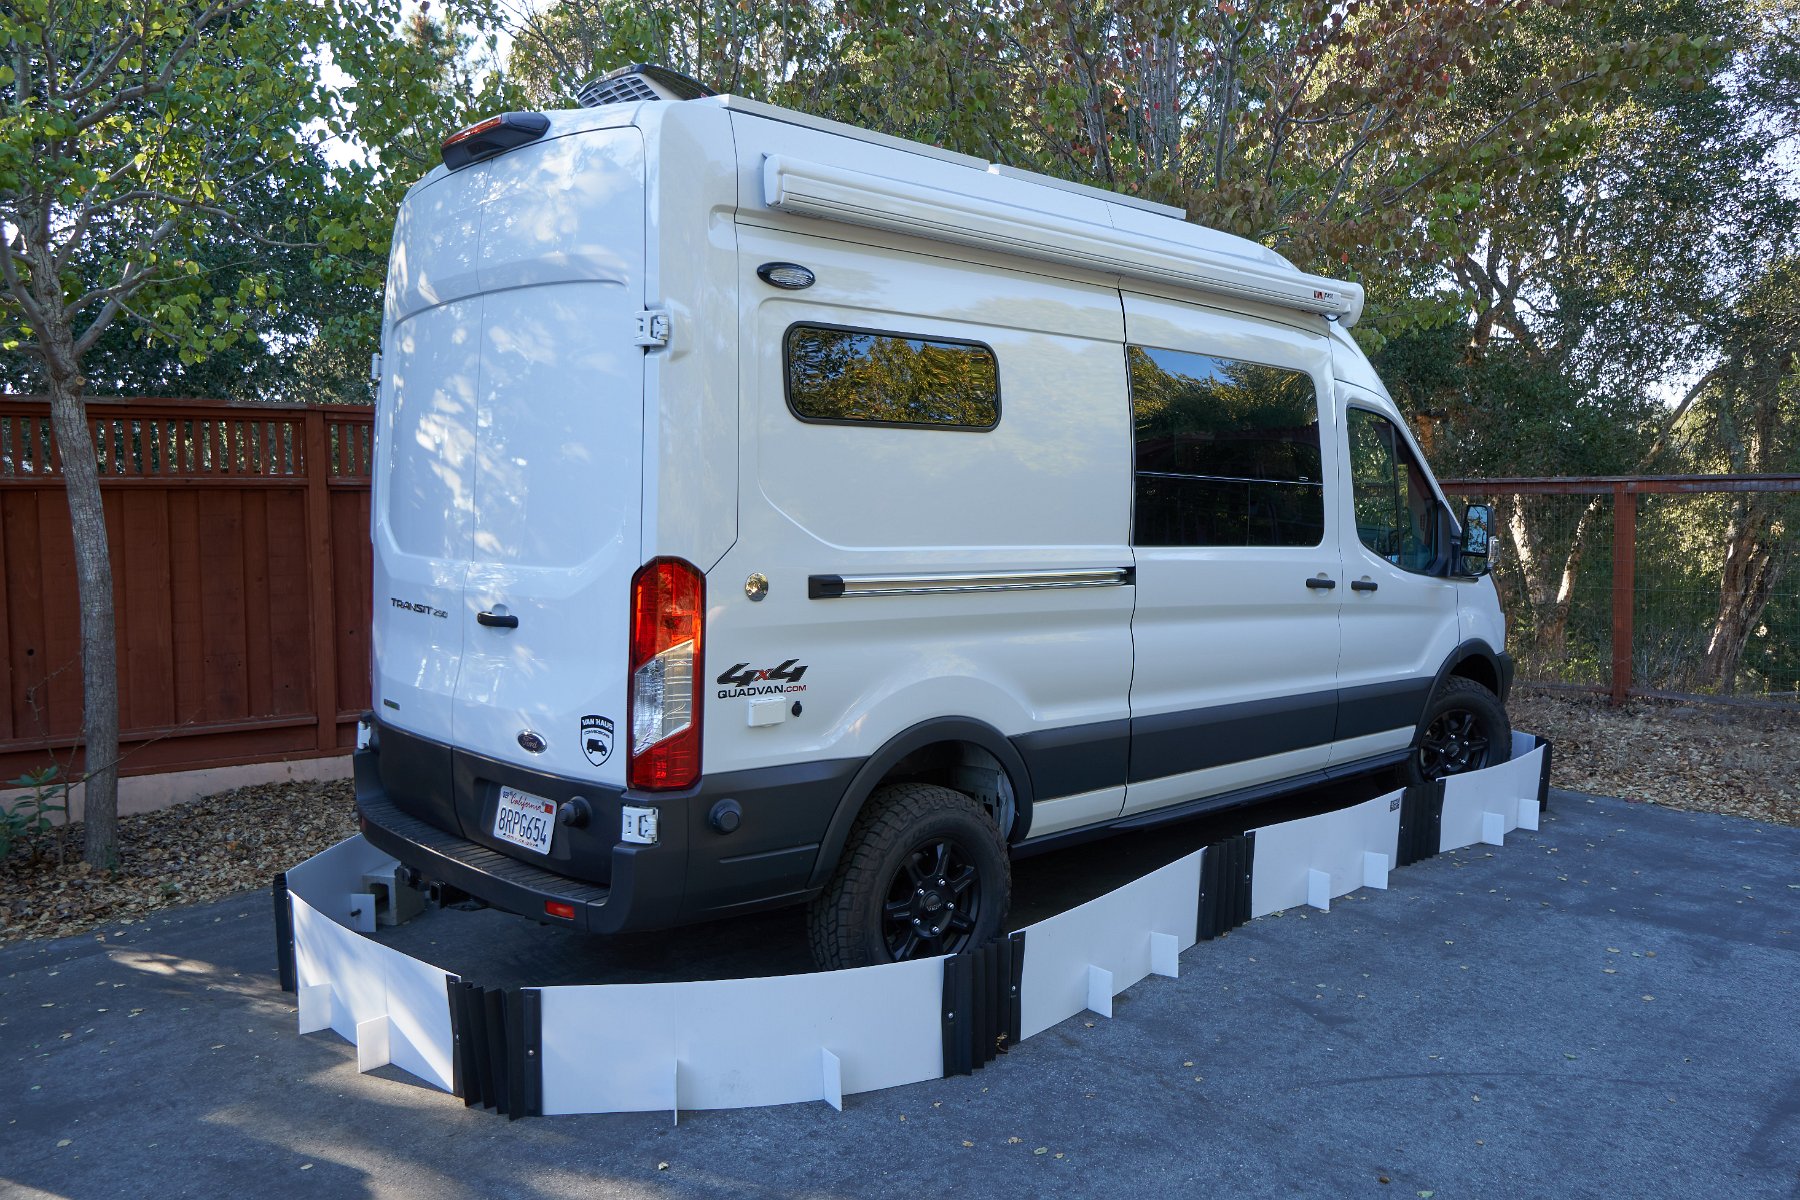
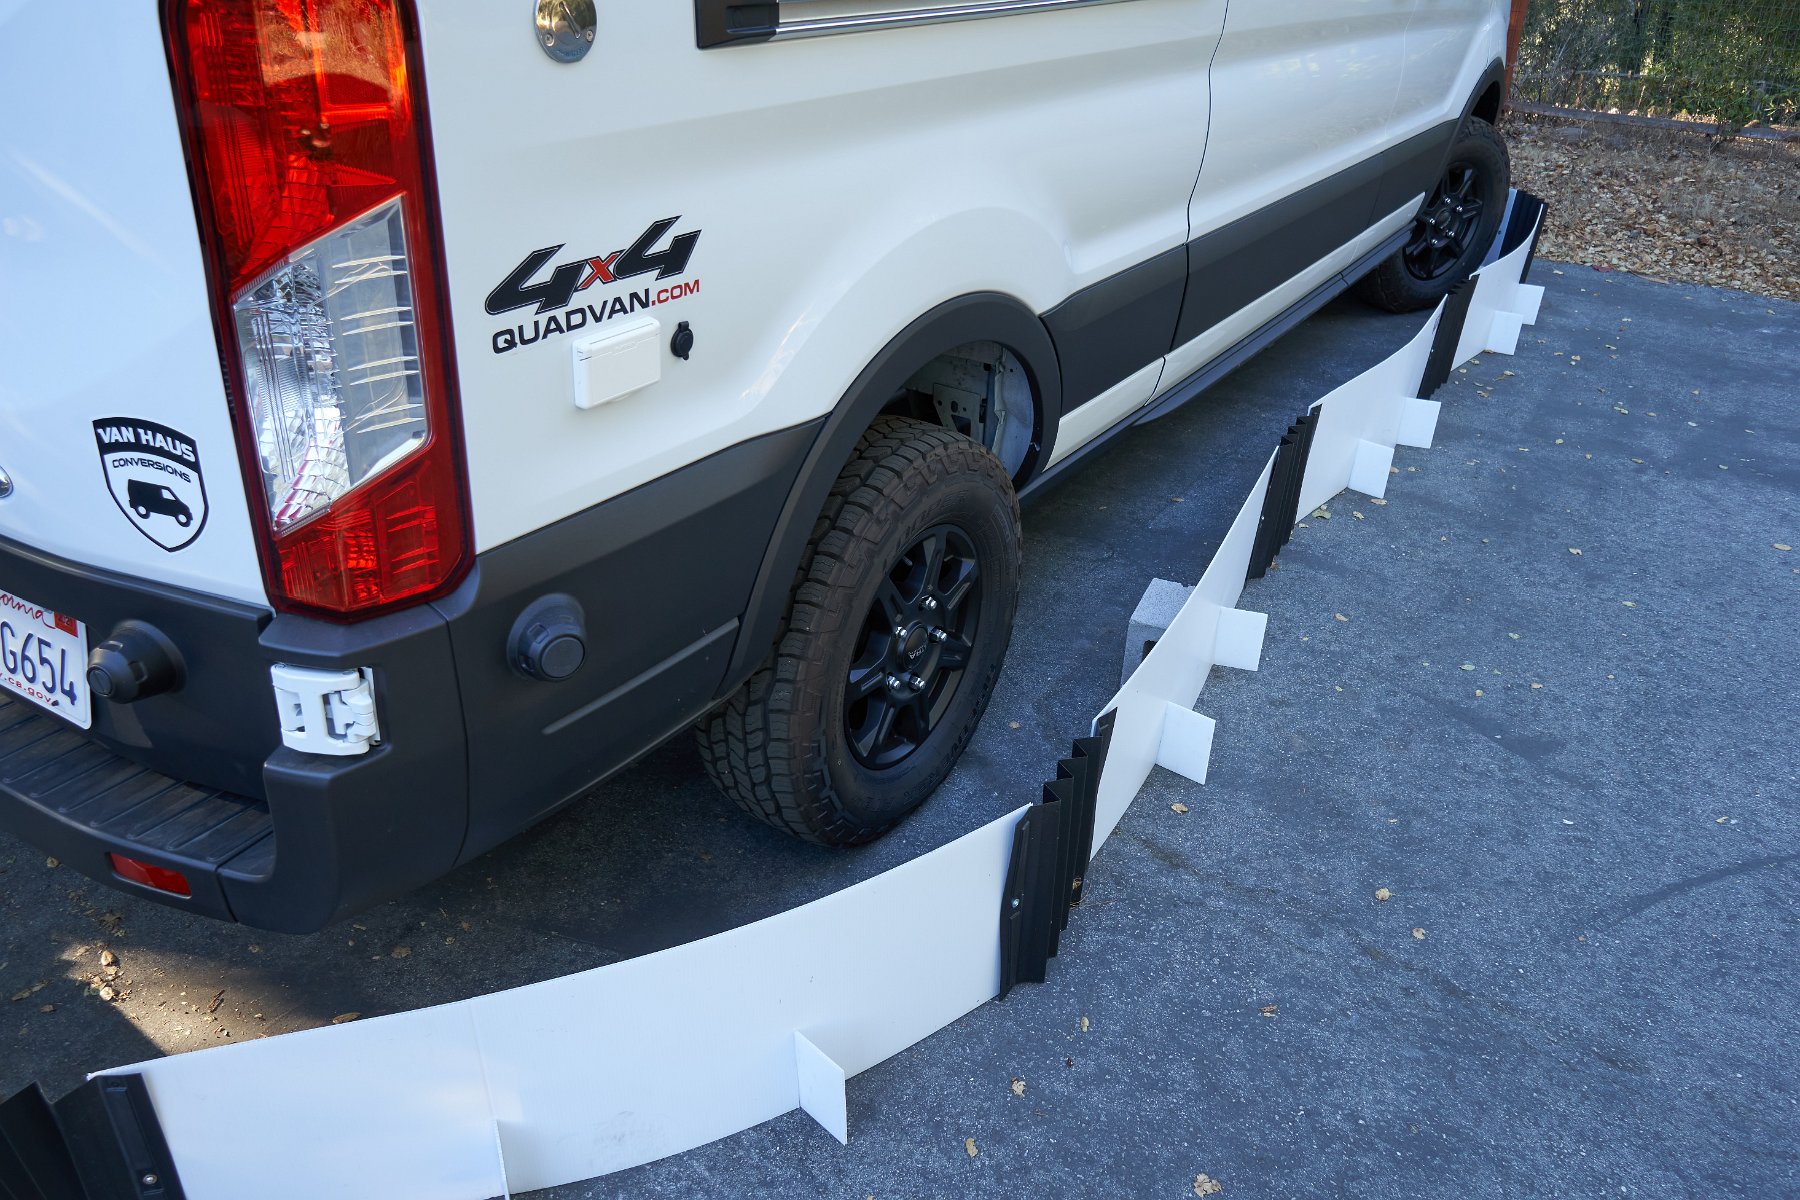
I did have a little trouble getting it to sit flush against the ground and not have any gaps in an area that isn’t perfectly flat due to underlying tree roots lifting up the asphalt. I also had to take BoxKat inventor Tom Sharp’s recommendation to buy some steel rods and then I still had to add some hollow concrete blocks to get the pieces of the barrier to stay in place with the extreme gusts of wind I get around my hilltop home.
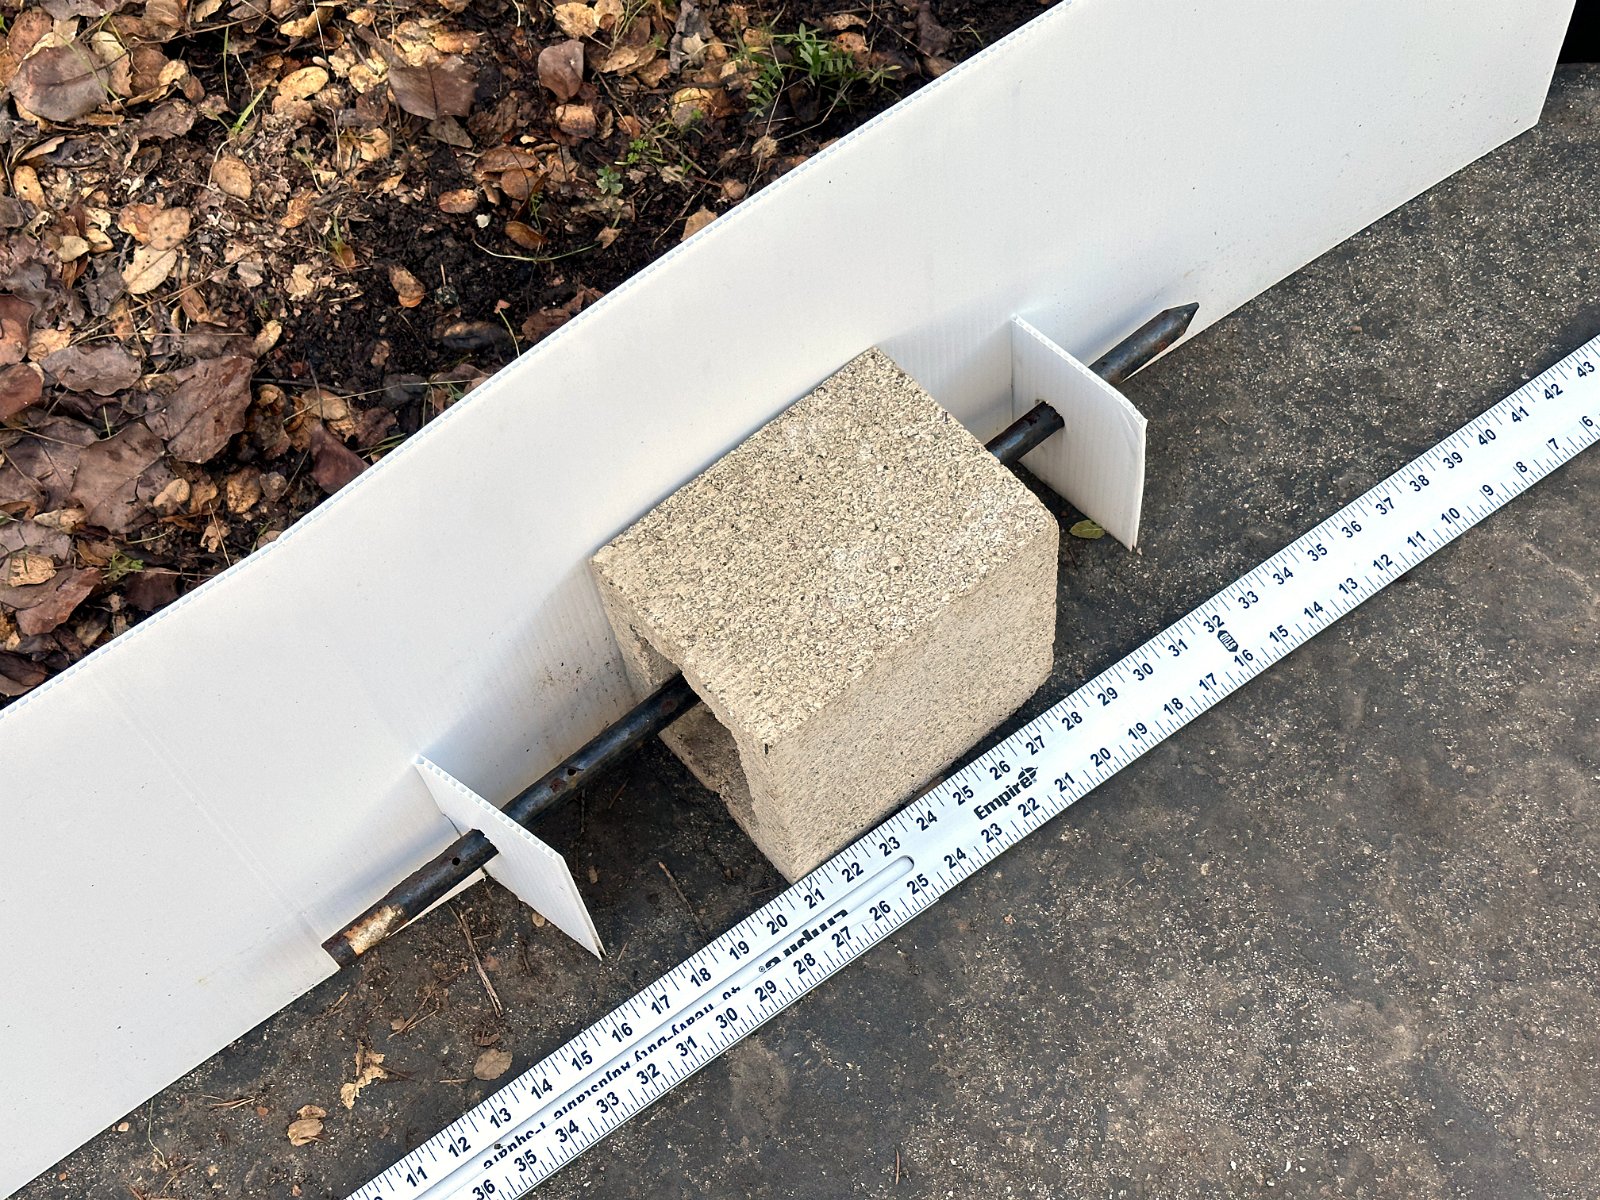
I also have an electronic WiFi-enabled rat trap (from Victor) in the engine compartment to make sure that if anything ever does get past the barrier, it won’t be likely to do any damage. These are great traps in that they connect to your WiFi network and notify you if the trap is ever triggered so that you don’t have to make a point of regularly checking on them.
Anyway, the upshot is that this system of a physical rodent barrier around the whole vehicle with a trap as a backup has been working great. The few times I caught anything in the trap was during actual trips outside the barrier and during times when the barrier was disturbed before I secured things down with the rods and blocks.
My brother ended up getting a BoxKat for their van too and when it arrived he sent me a photo of the label on the box – it features an image from my web site showing our old Leisure Travel Vans RV set up with the BoxKat!
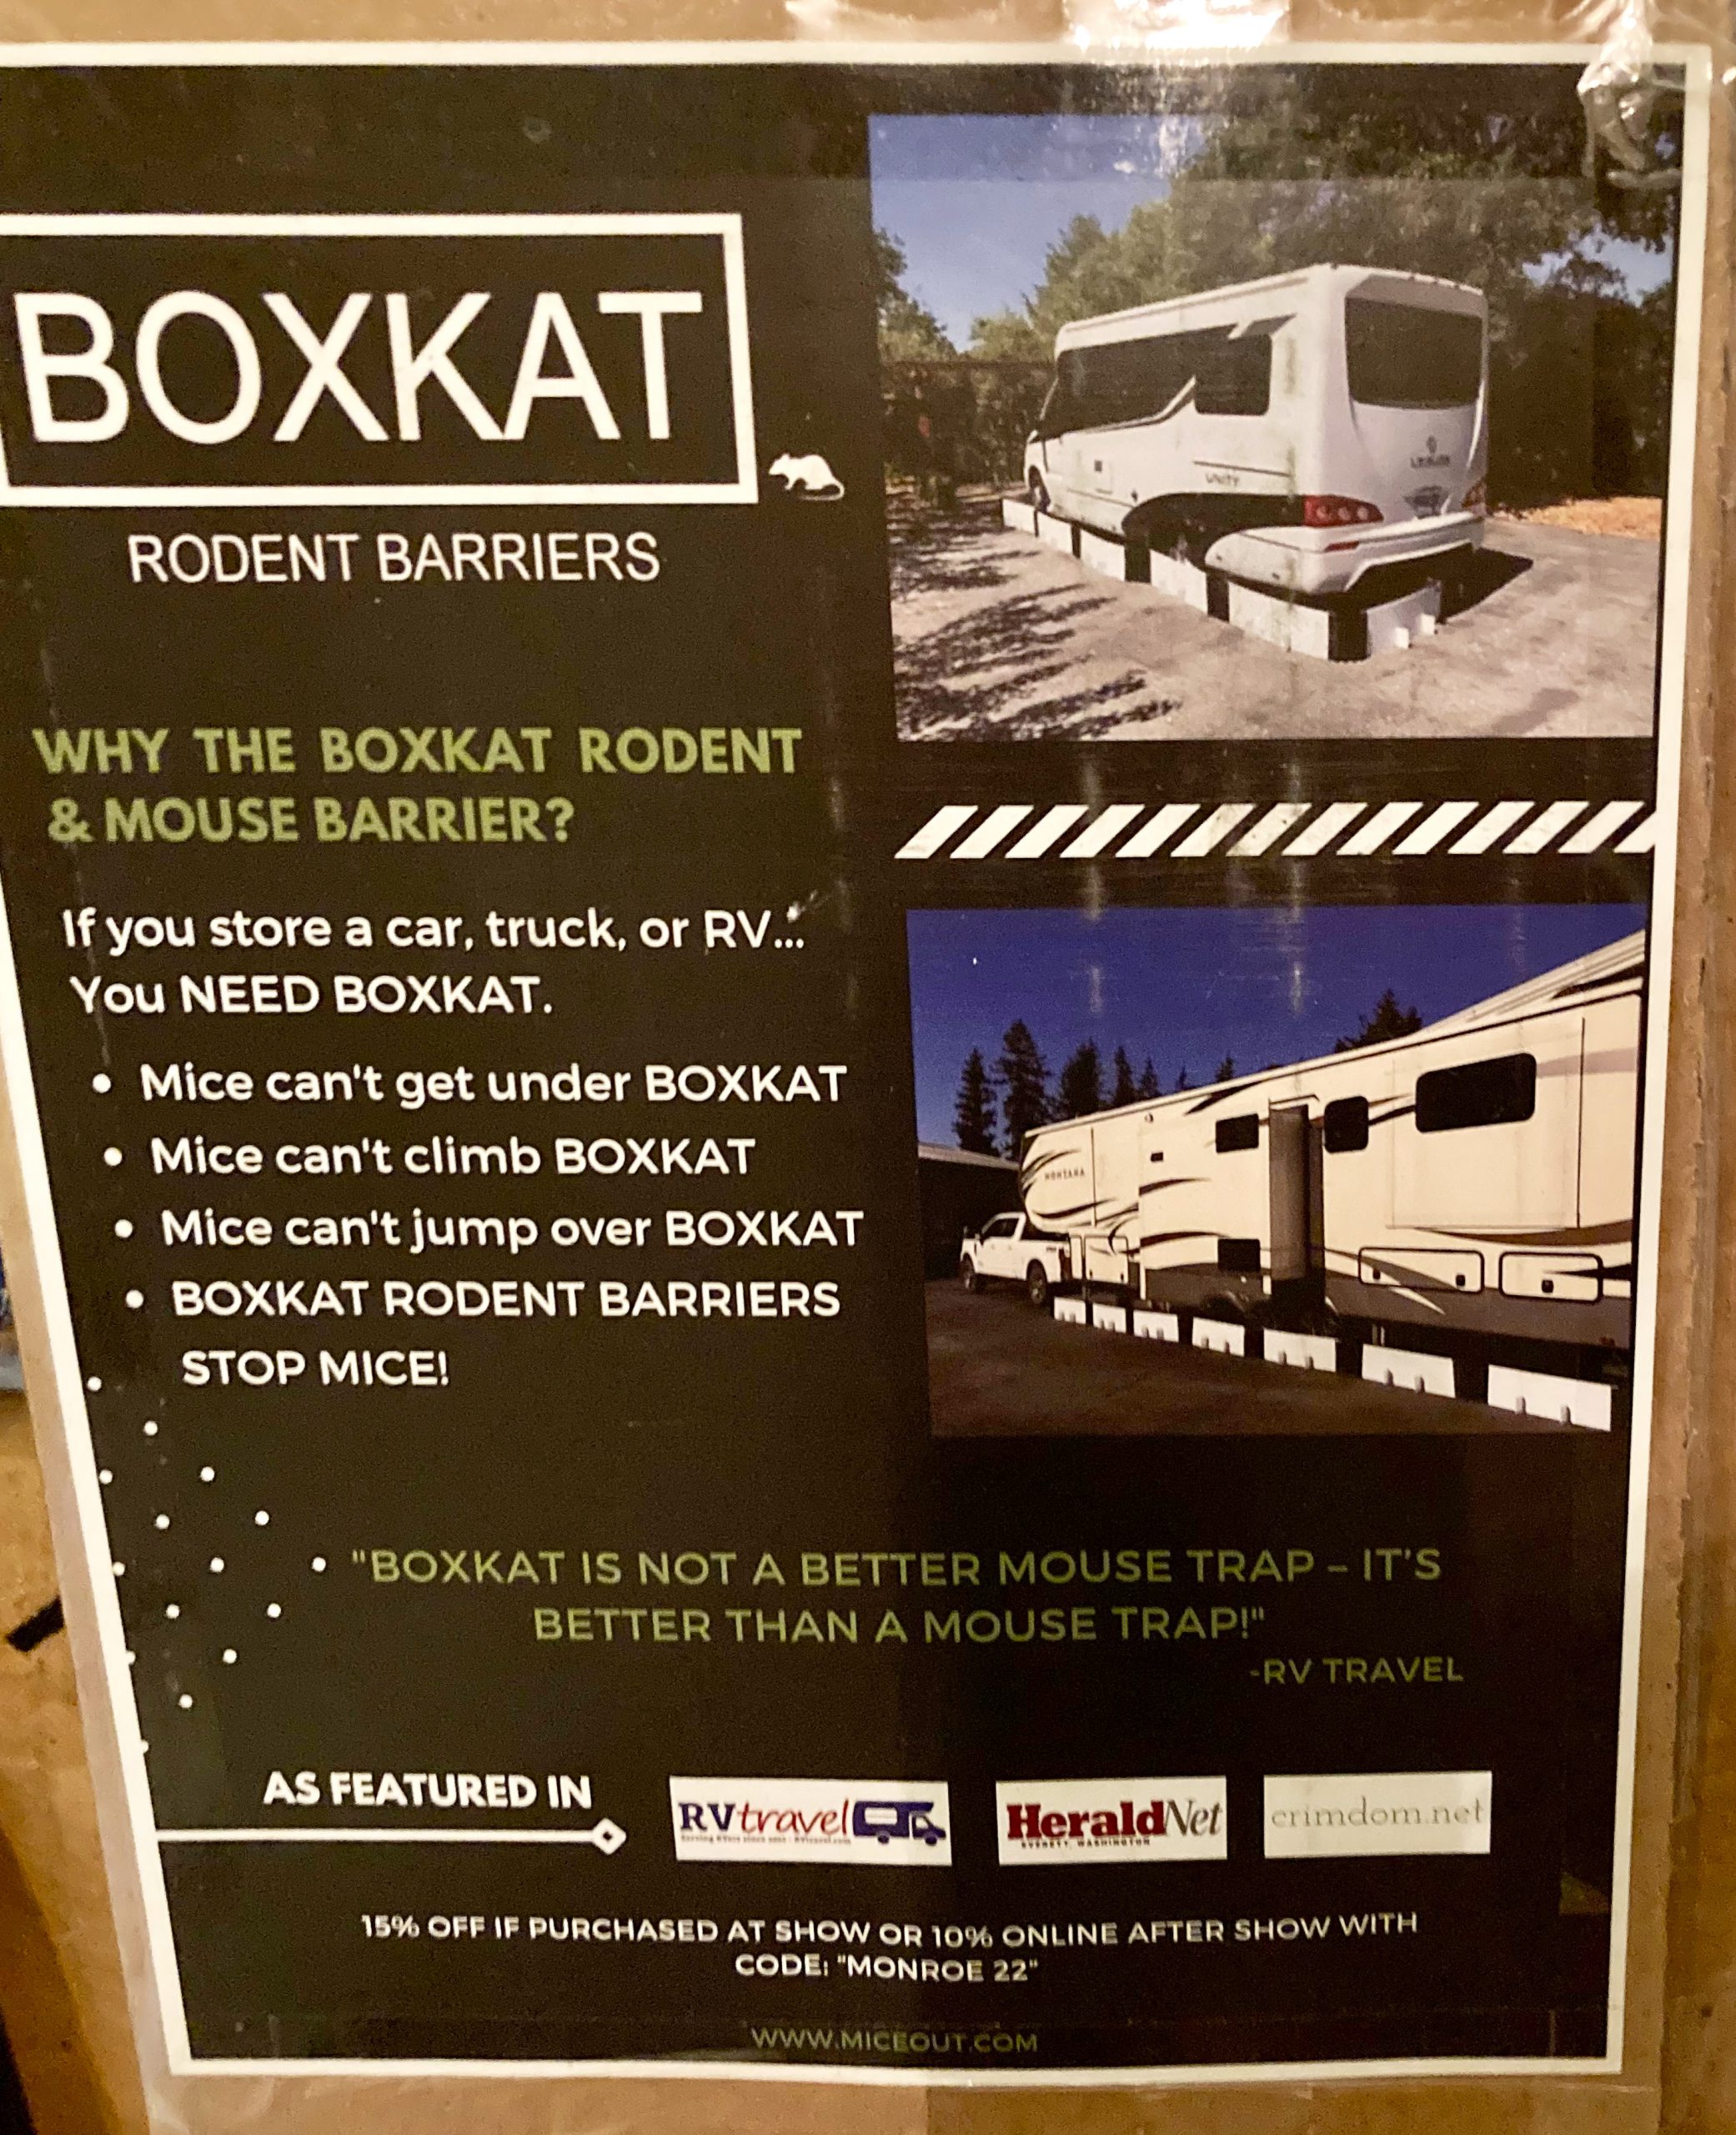
Update (October 2025):
The creator of the BoxKat rodent barrier, Tom Sharp, reached out to me and offered to send his new and improved “BoxKat 2.0” for me to try. I took him up on the offer and set it up. There’s some significant changes as you can see in these pictures.


The new version now comes with solid acrylic right angle supports or braces and the segments are secured with multiple plastic fasteners at each joint rather than just one bolt and the old velcro strips. This helps make the barrier more sturdy. It’s also easier to set everything up (except for having to peel the plastic film off of all the acrylic supports) since there’s no need to drill holes and add those steel rods from the hardware store to help keep it upright. (The old velcro strips also tended to collect dirt and debris and the adhesive eventually starts to release over many years in the weather.)
I’m not sure whether having just one pair of these acrylic supports at each segment will be enough to withstand windy storms but I’m still using the concrete blocks to weigh down the support pieces. We get some *really* high winds whipping through here and I’m sure the barrier would be blown over otherwise. (Even my old setup with those steel rods and concrete blocks were turned over in one particularly bad storm.)
One note about this new design is that while the plastic fasteners are convenient for assembly, they’re not removable – you can’t back them out once they’ve been pushed into place. That means you have to cut them if you need to reconfigure your setup in some way. Of course, you can just use some machine screws and wing nuts instead of the plastic fasteners as needed.
Anyway, I still highly recommend the BoxKat rodent barrier – it really does work and keeps the rodents out!